☁️ How to Integrate Nextcloud with Virtuozzo S3
🗄️ Creating the Bucket on S3
To start creating the Bucket on S3:
-
Access your VHI panel after logging in.
-
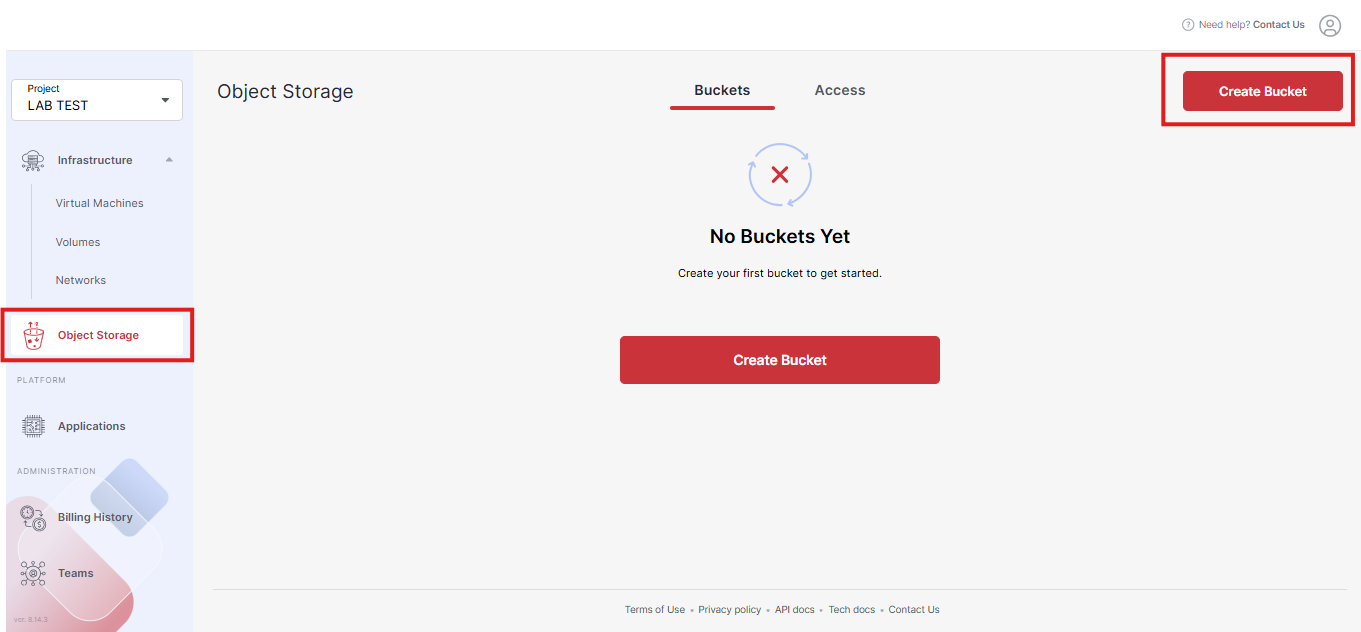
Click on the Object Storage option in the main menu on the left, then click the Create Bucket button on the right.
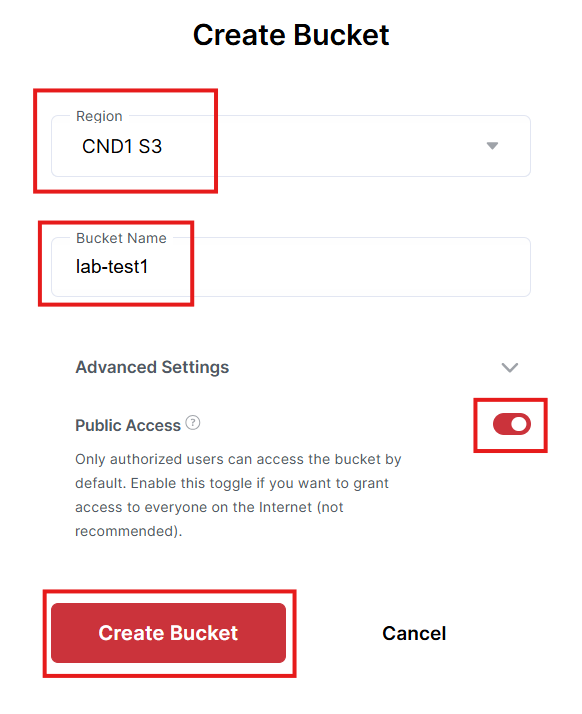
- On the next screen, choose the region, name your Bucket, enable public Access, and click Create Bucket.
Note: Our Bucket was created in the Region CND1 S3.
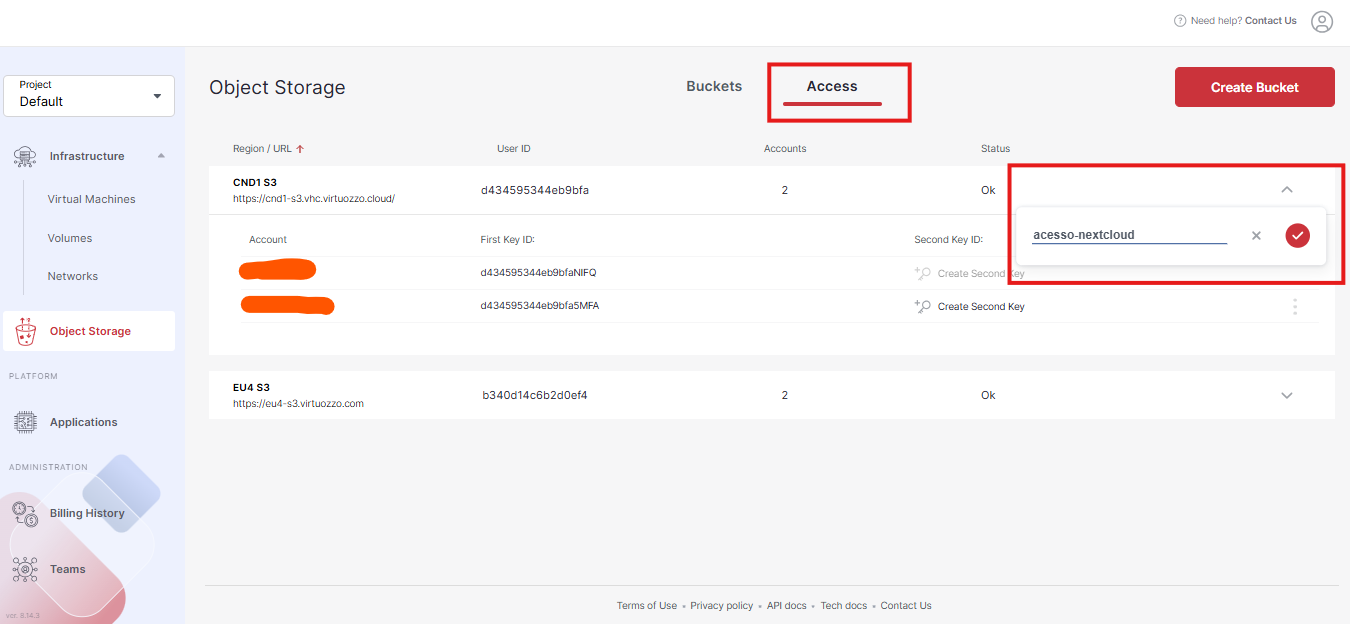
- After creating the Bucket, click on the Access tab, then click +ADD Account, enter a name for the key, and click the button to create it.
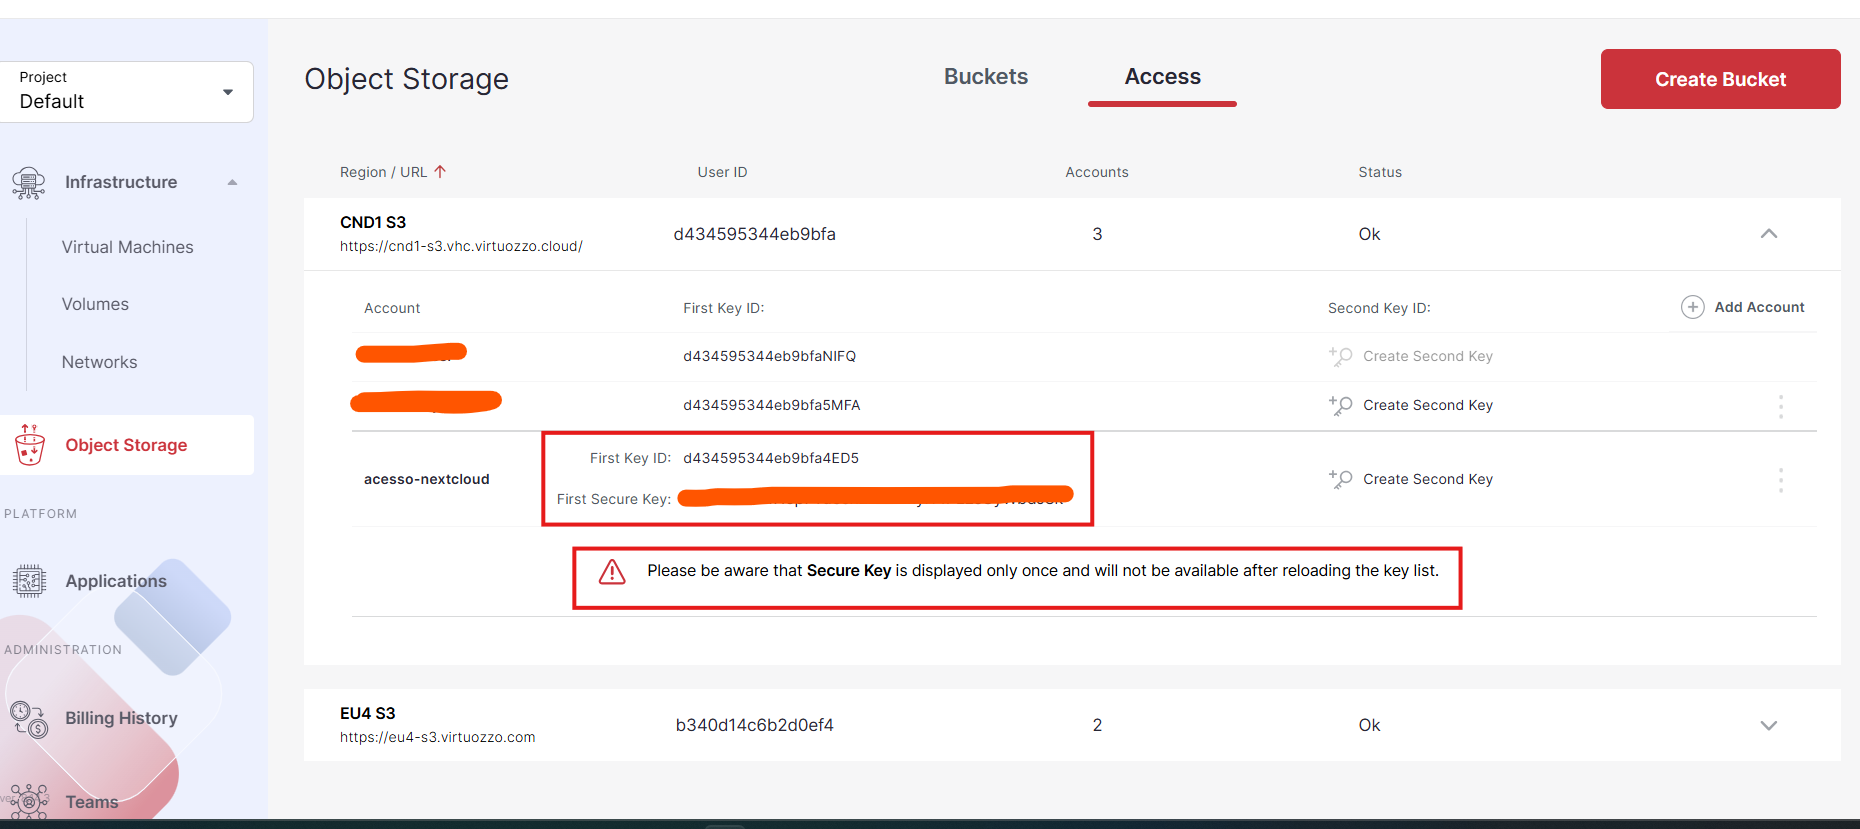
- After creating the Access account acesso-nextcloud, copy the First Key ID and also the First Secure Key to the Access Key and Secret Key fields in the Nextcloud external storage configuration.
Note that below there is an Alert message informing that the Secure Key will be shown only once, so it is recommended to save this information elsewhere.
- In the next step, we will configure External Storage in NextCloud.
Access your NextCloud account, then go to the Admin menu, and click Apps. On the next Your apps screen, search for External storage support and click the Enable button. After this first step, we can proceed with the other configurations to access our Bucket.
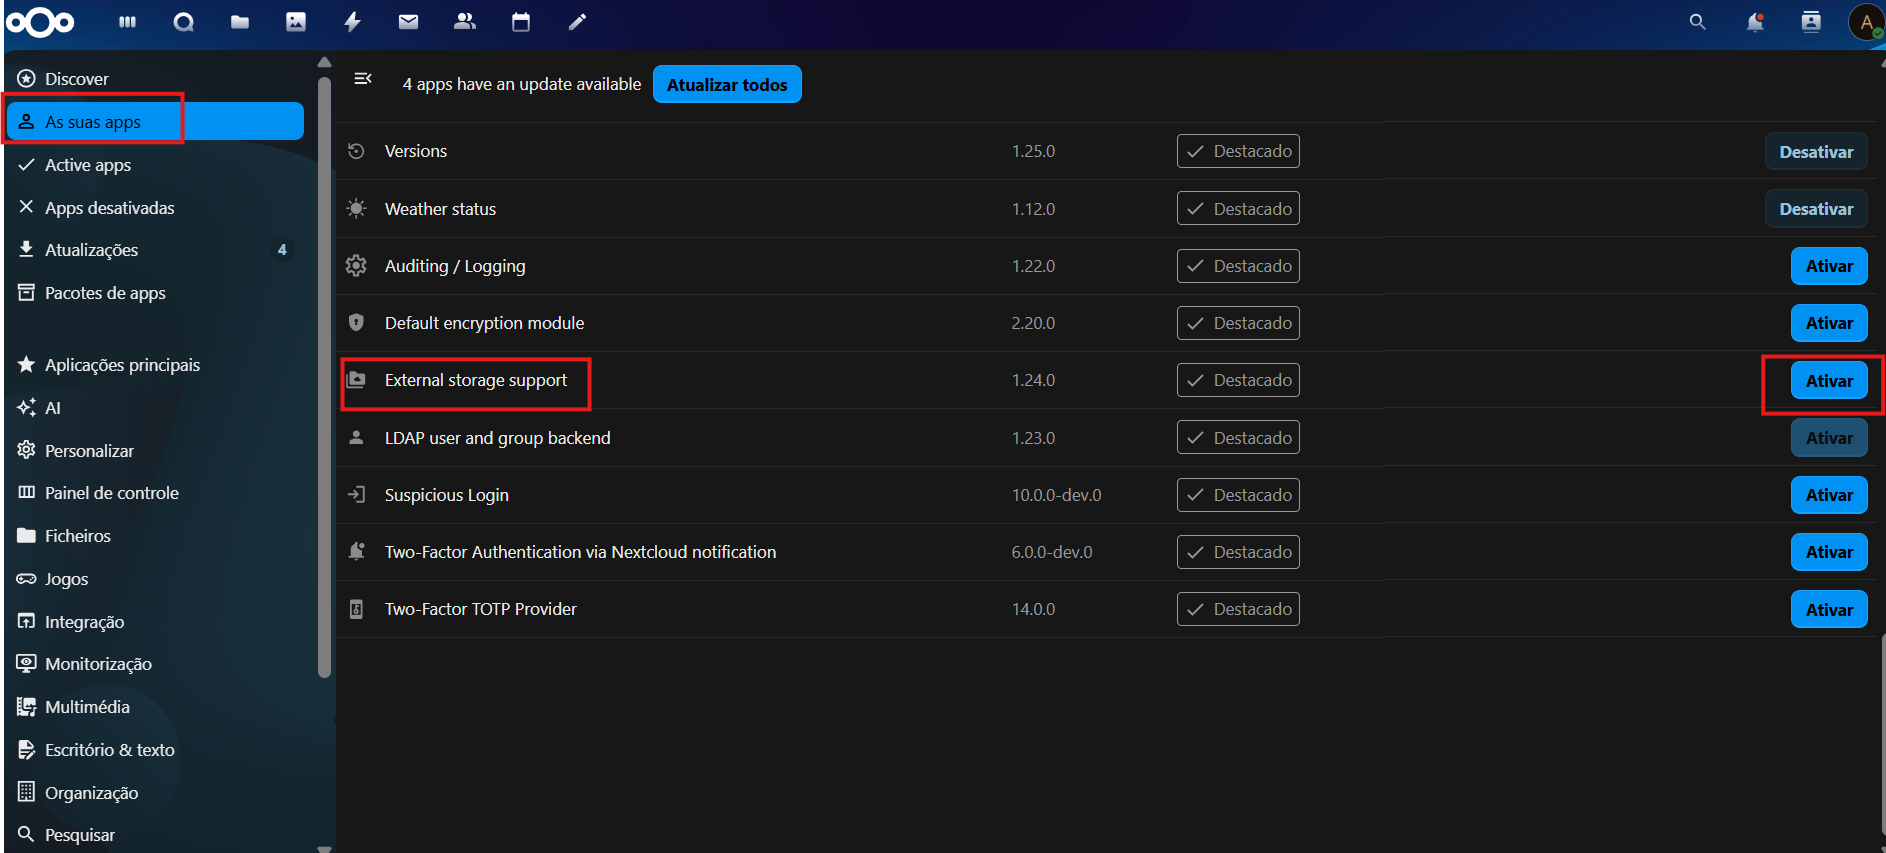
- In the next step, we will configure Access to the Bucket created on VHI S3 with NextCloud using First Key ID and First Secure Key.
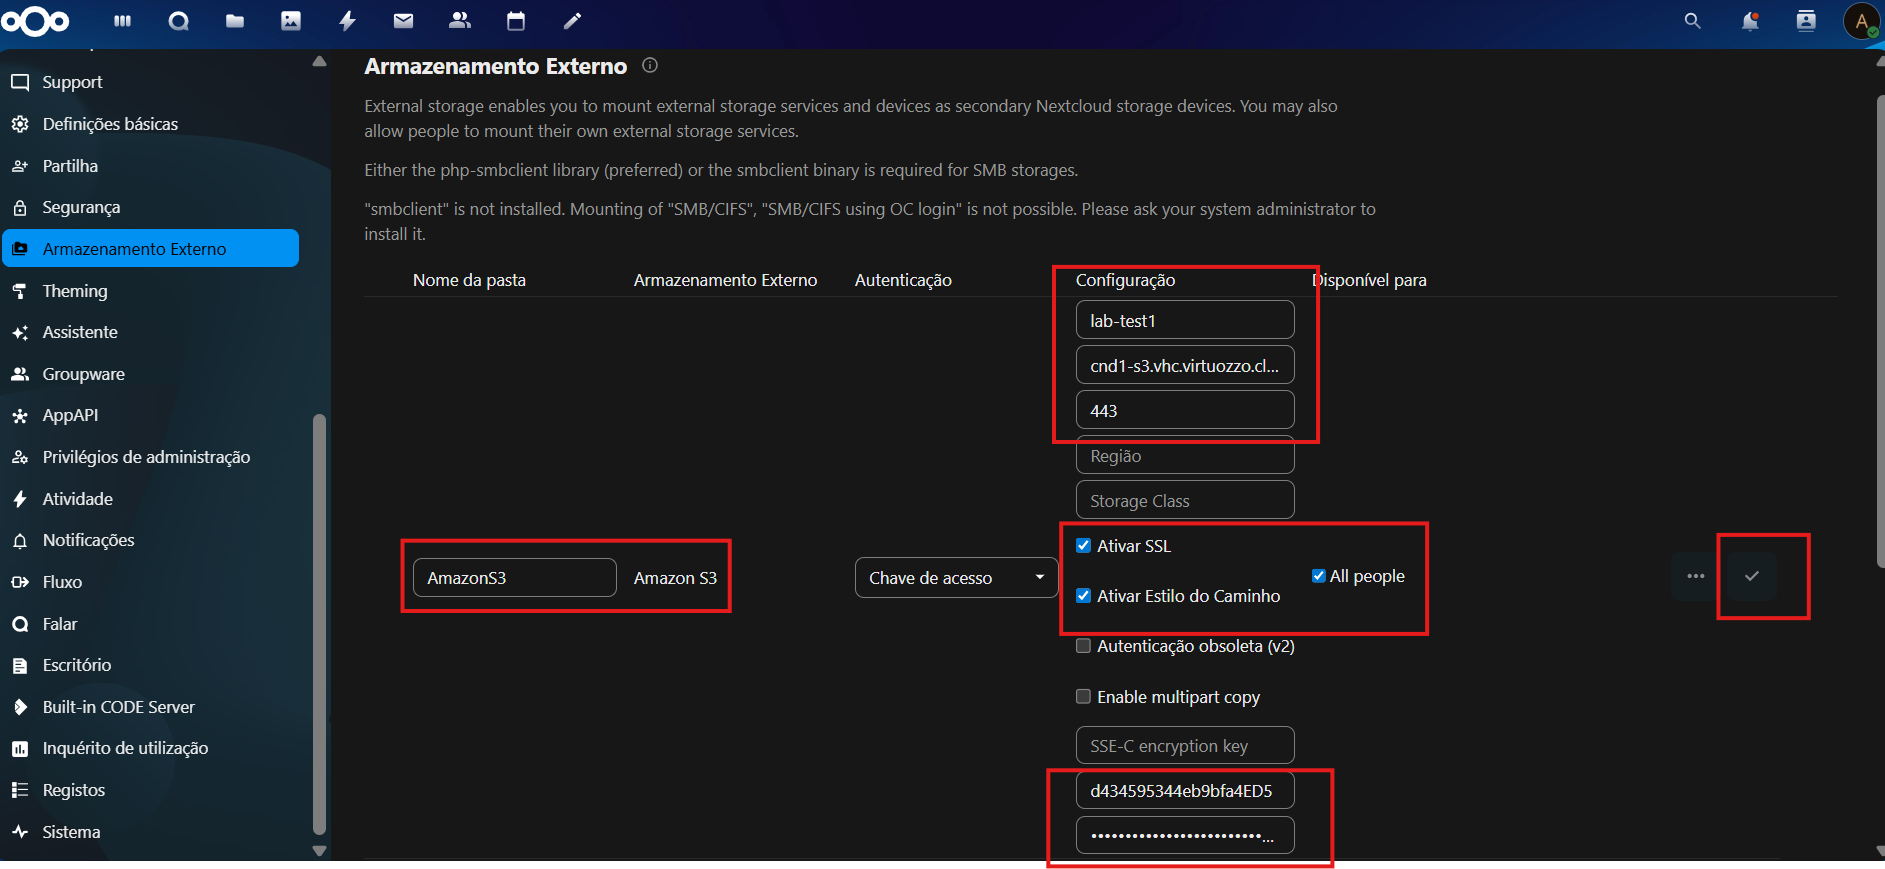
Go to the Admin menu, click Administration Settings, on the next page scroll down to Administration and click External Storage. This screen is where we will configure access for our Nextcloud account to the Bucket created on VHI S3.
- Select the name of the Folder and External Storage as AmazonS3 and the Authentication mode as Access Key.
- In Configuration, add the name of the Bucket, we created it as: lab-test1.
- Below, add the Region / URL address: cnd1-s3.vhc.virtuozzo.cloud and port 443.
- Enable the features as shown in the image below: Enable SSL, Enable Path Style, and All People.
- In the last configuration step, add the First Key ID and below the First Secure Key.
- To finish, click the button with the OK symbol, then you will be prompted for your Nextcloud account password to save and apply the configuration.
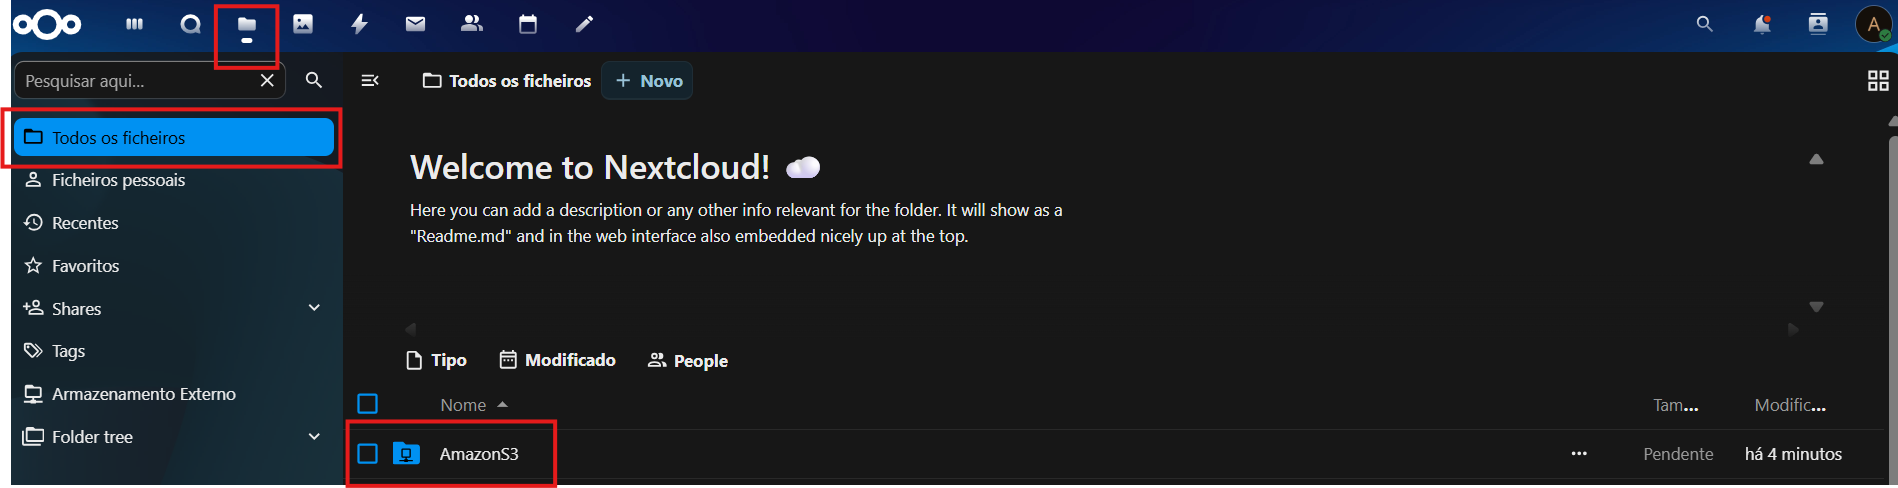
- After completing the access configuration of our Nextcloud account with the VHI S3 Bucket, we can proceed to the Files screen, where we can see that a folder named AmazonS3 was created, which is actually our mounted Bucket, meaning the configuration was done correctly and the integration is working perfectly!
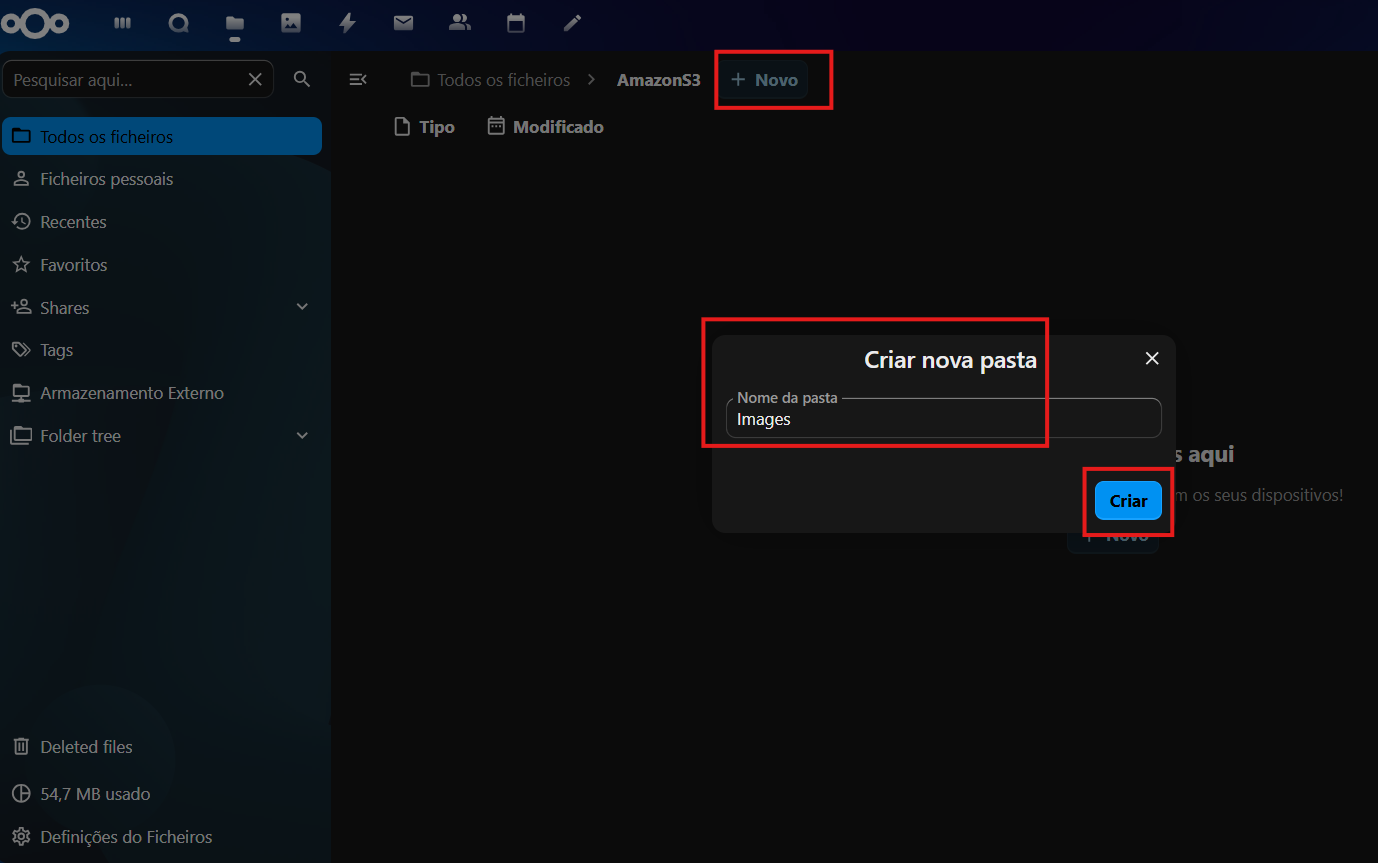
- To finalize our test and validation, we will create a folder named Images and upload an image file to our Bucket. To create it, click New, then New Folder, enter the name, and click the Create button.
- Let's open the newly created Images folder and upload an image file by clicking New, then Upload Files. In the next window that opens to locate the file on your computer, select the image to upload.
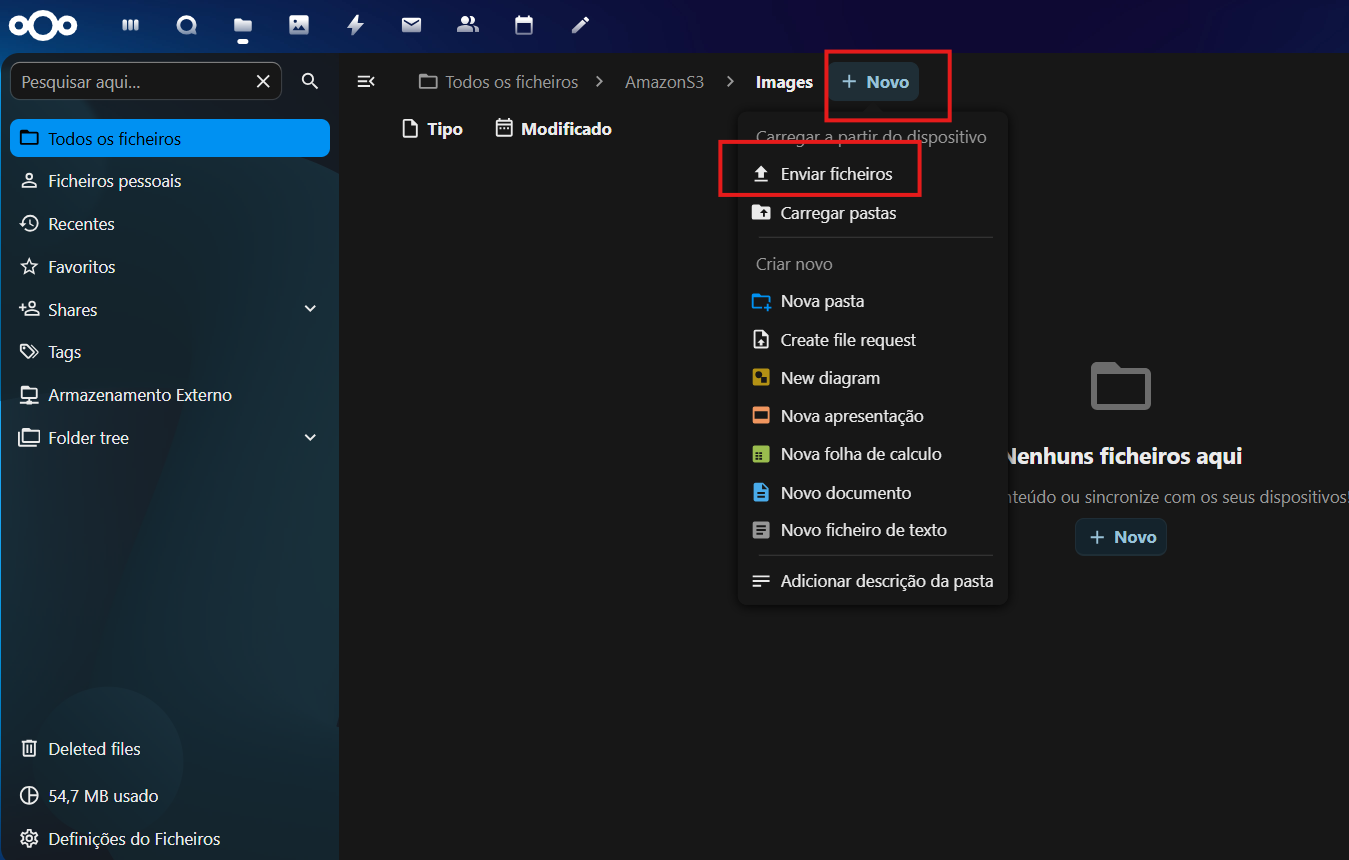
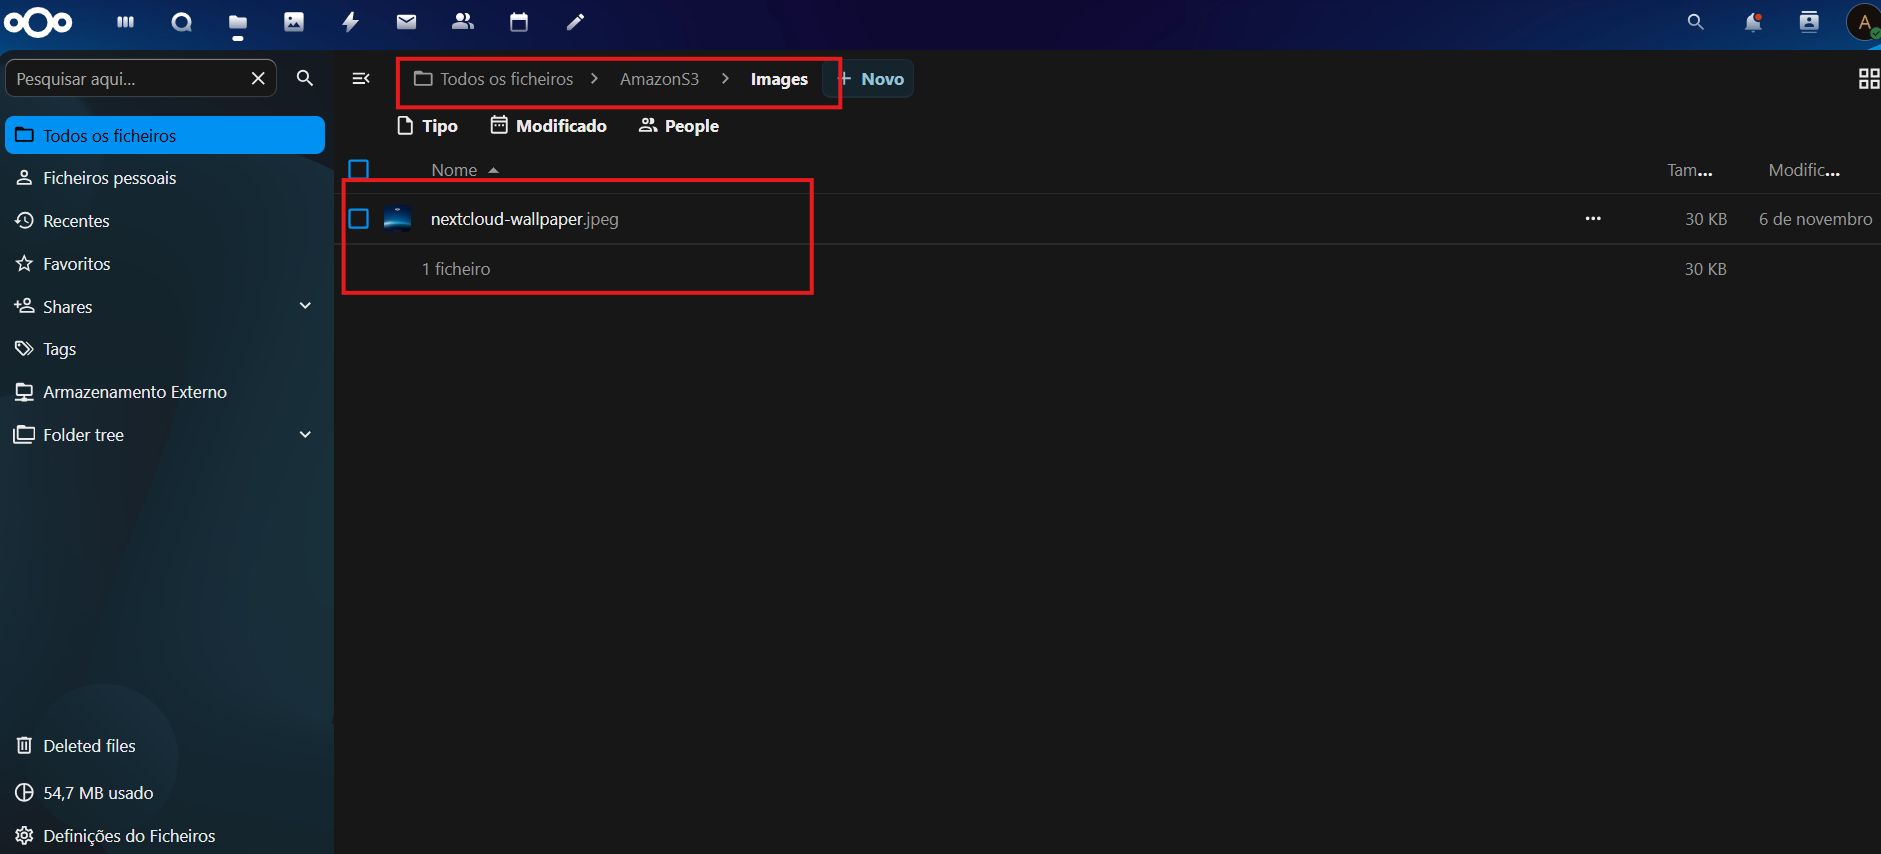
- We can confirm that the image upload to our folder was successful. The image below shows inside the Images folder the image that was uploaded, which is a Nextcloud wallpaper.
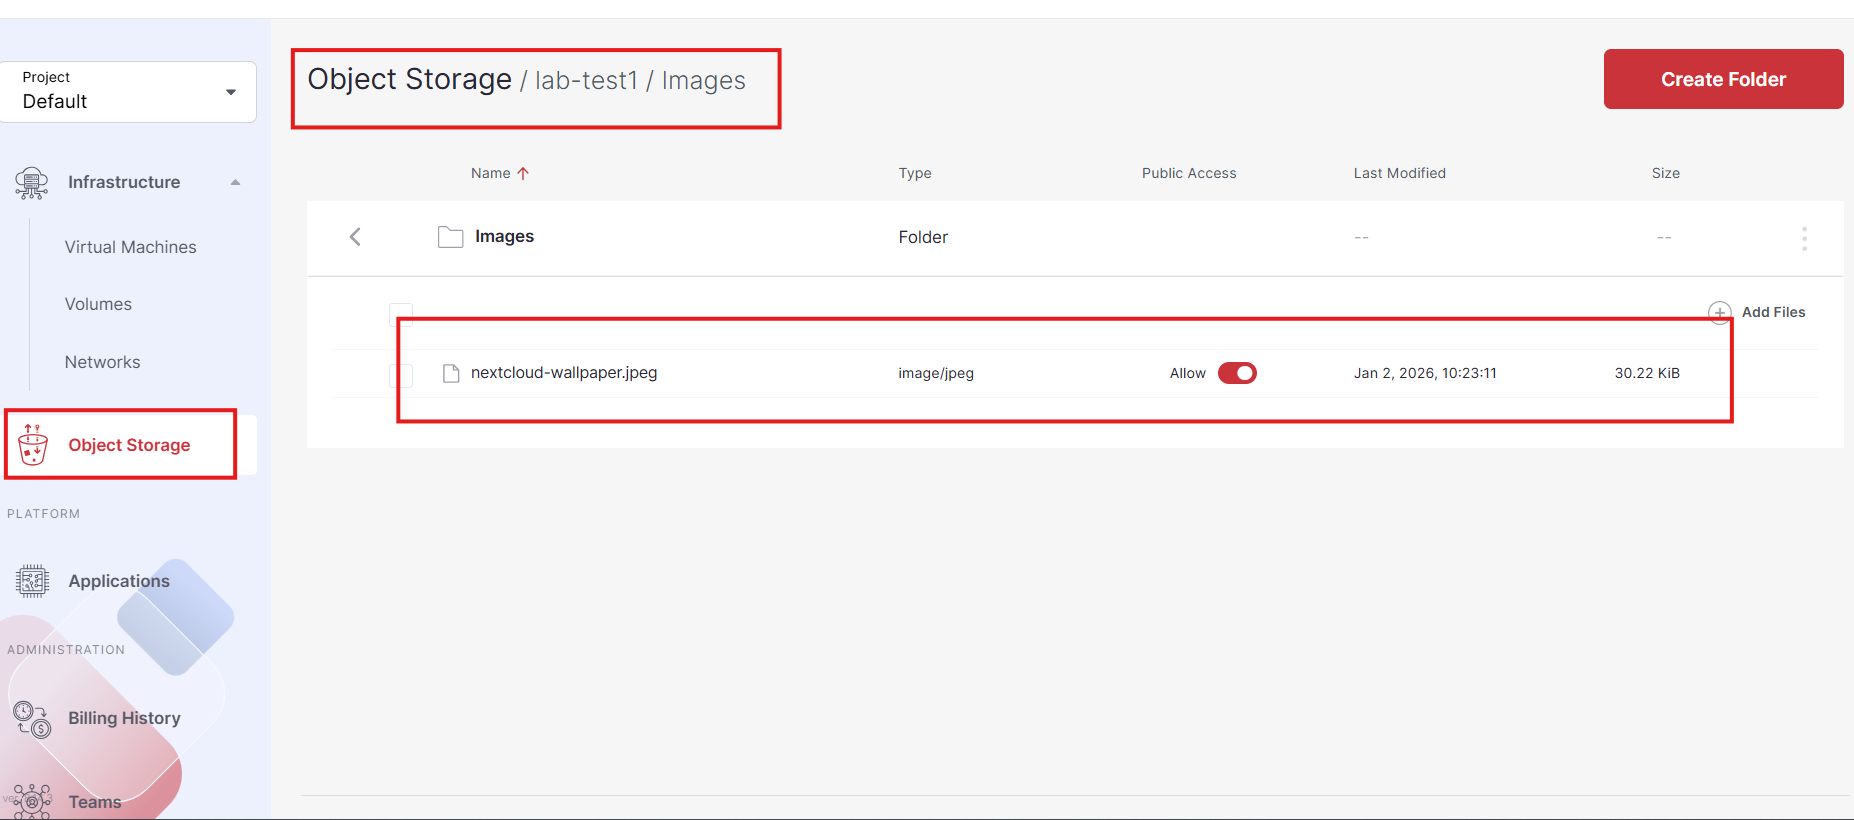
- Next, we can test and validate if it worked correctly by accessing our Bucket directly through the VHI S3 Object Storage Panel. When accessing the panel, click Object Storage, access the lab-test1 Bucket, then open the Images folder, and upon opening, we can confirm that our uploaded image file is stored and has Public Access enabled.
🧠 Questions?
Contact the technical support team if you have any difficulties with installation or configuration.