How to Enable Two-Factor Authentication (2FA) in Cloudlets
Description
Two-Factor Authentication (2FA) is an extra layer of security for your SaveinCloud account. When enabled, in addition to your password, you must enter a code generated by an authenticator app on your phone each time you sign in.
We recommend enabling 2FA to protect your account against unauthorized access.
Prerequisites
- Have an authenticator app installed on your phone, such as Google Authenticator.
- Have access to your SaveinCloud (Cloudlets) panel account with a valid username and password.
Step by Step
Step 1 — Access Settings
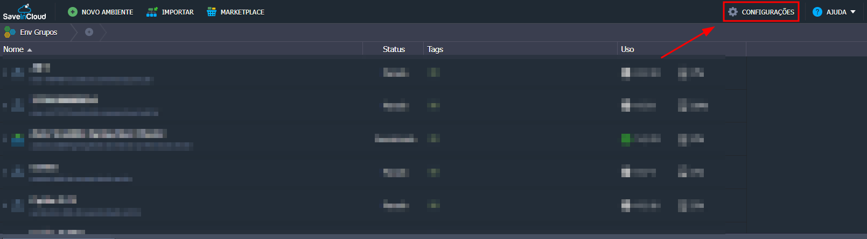
In the SaveinCloud panel, click Settings in the upper right corner of the screen.
Step 2 — Start the 2FA setup
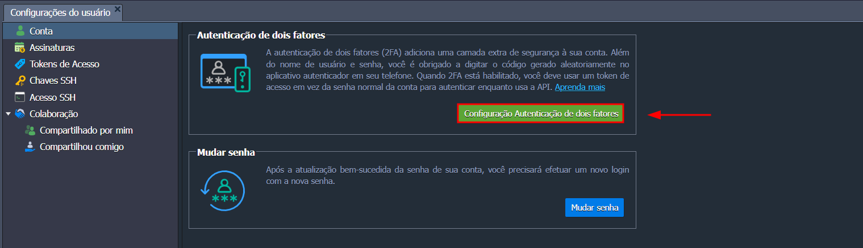
On the Account tab, locate the Two-factor authentication section and click Two-factor authentication Setup.
Step 3 — Confirm the account password
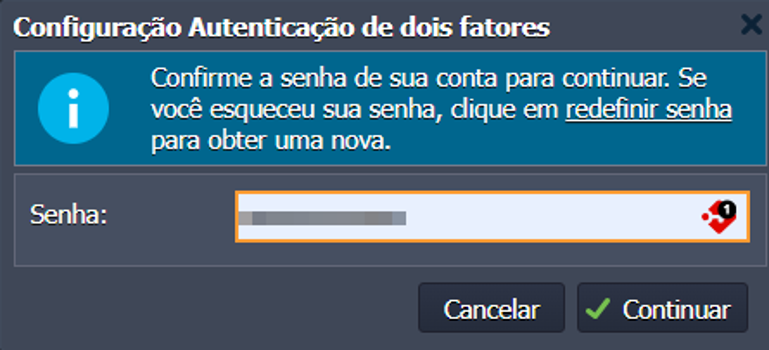
Enter your account password and click Continue.
Step 4 — Register the authentication app
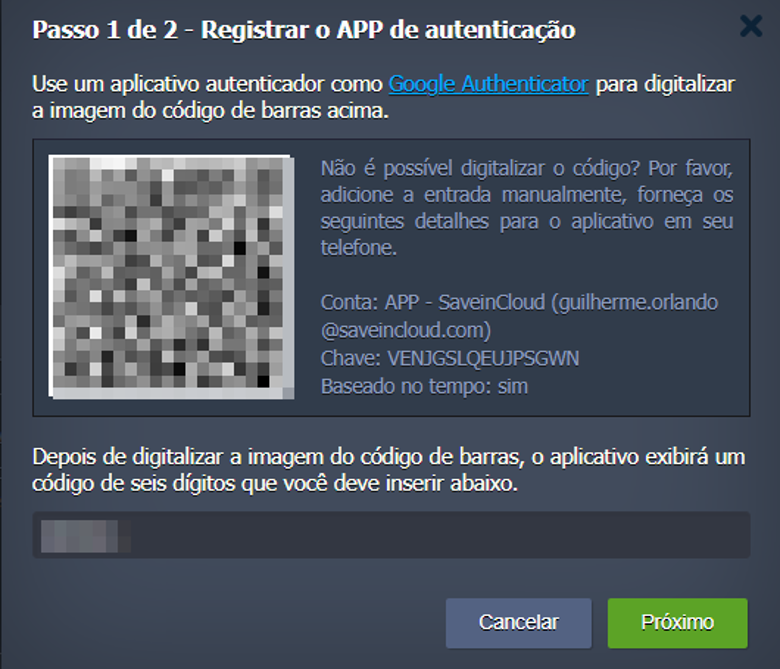
Use an authenticator app, such as Google Authenticator, to scan the QR Code displayed on the screen. If scanning the code is not possible, you can set it up manually using the account and key details shown on the same screen. Then enter the six-digit code generated by the app and click Next.
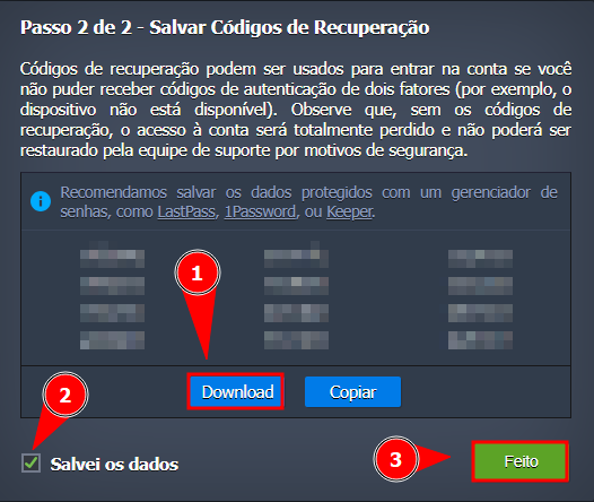
Step 5 — Save the recovery codes
Click Download to save the recovery codes, check the I saved the data box, and click Done to complete the setup.
⚠️ Important: The code generated by the authenticator app is refreshed periodically. Keep access to the app in a safe place — if you lose the registered device, you may need to contact support to recover access to your account.
Conclusion
Done! Two-Factor Authentication is now active on your SaveinCloud account. From now on, every time you sign in to Cloudlets, you will be asked for the code generated by the authenticator app in addition to your password.
Questions?
Contact technical support and send us your question — we will be glad to help!