💻 Introduction to Platform CLI
The Platform CLI (Command Line Interface) allows you to interact with your SaveinCloud account directly from your local machine's terminal. It enables you to perform most operations available on the platform, as well as automate frequent tasks with simple commands and scripts.
✅ Advantages of using the CLI
-
Automation of common tasks
-
Scripts for DevOps and continuous deployment
-
Control and management of environments via terminal
-
No need to open the web panel
🔧 Installing the Platform CLI
Run the command below in your local machine's terminal:
curl -s ftp://ftp.jelastic.com/pub/cli/jelastic-cli-installer.sh | bash
Prerequisites:
- Java 8 or higher installed on your machine.
- Windows: use a Unix-compatible environment (e.g., Cygwin or Git Bash).
🚀 Getting Started
After installation, the CLI will be installed in ~/jelastic.
1. Authentication
On the first execution of any command, authentication will be requested:
-
Platform URL:
app.paas.saveincloud.net.br -
Email: your registered email
-
Password: your platform password
Example to authenticate manually:
~/jelastic/users/authentication/signin \

--login  [email protected]  \

--password suaSenhaAqui \

--platformUrl  app.paas.saveincloud.net.br
If the response contains "result": 0, the login was successful ✅
🔐 Two-Factor Authentication (2FA)
If your SaveinCloud platform account has two-factor authentication enabled, the following message from the screenshot below will appear:

You will then need to generate an Access Token to use the CLI. Follow the steps below:
- In the platform panel, click the Settings button in the upper right corner.
- Go to the Access Tokens tab.
- Click Generate.
- Give it a descriptive name, such as
Token CLI. - (Optional) Set an expiration date for the token.
- Check the API Access option (or select specific permissions if desired).
- Click Generate.
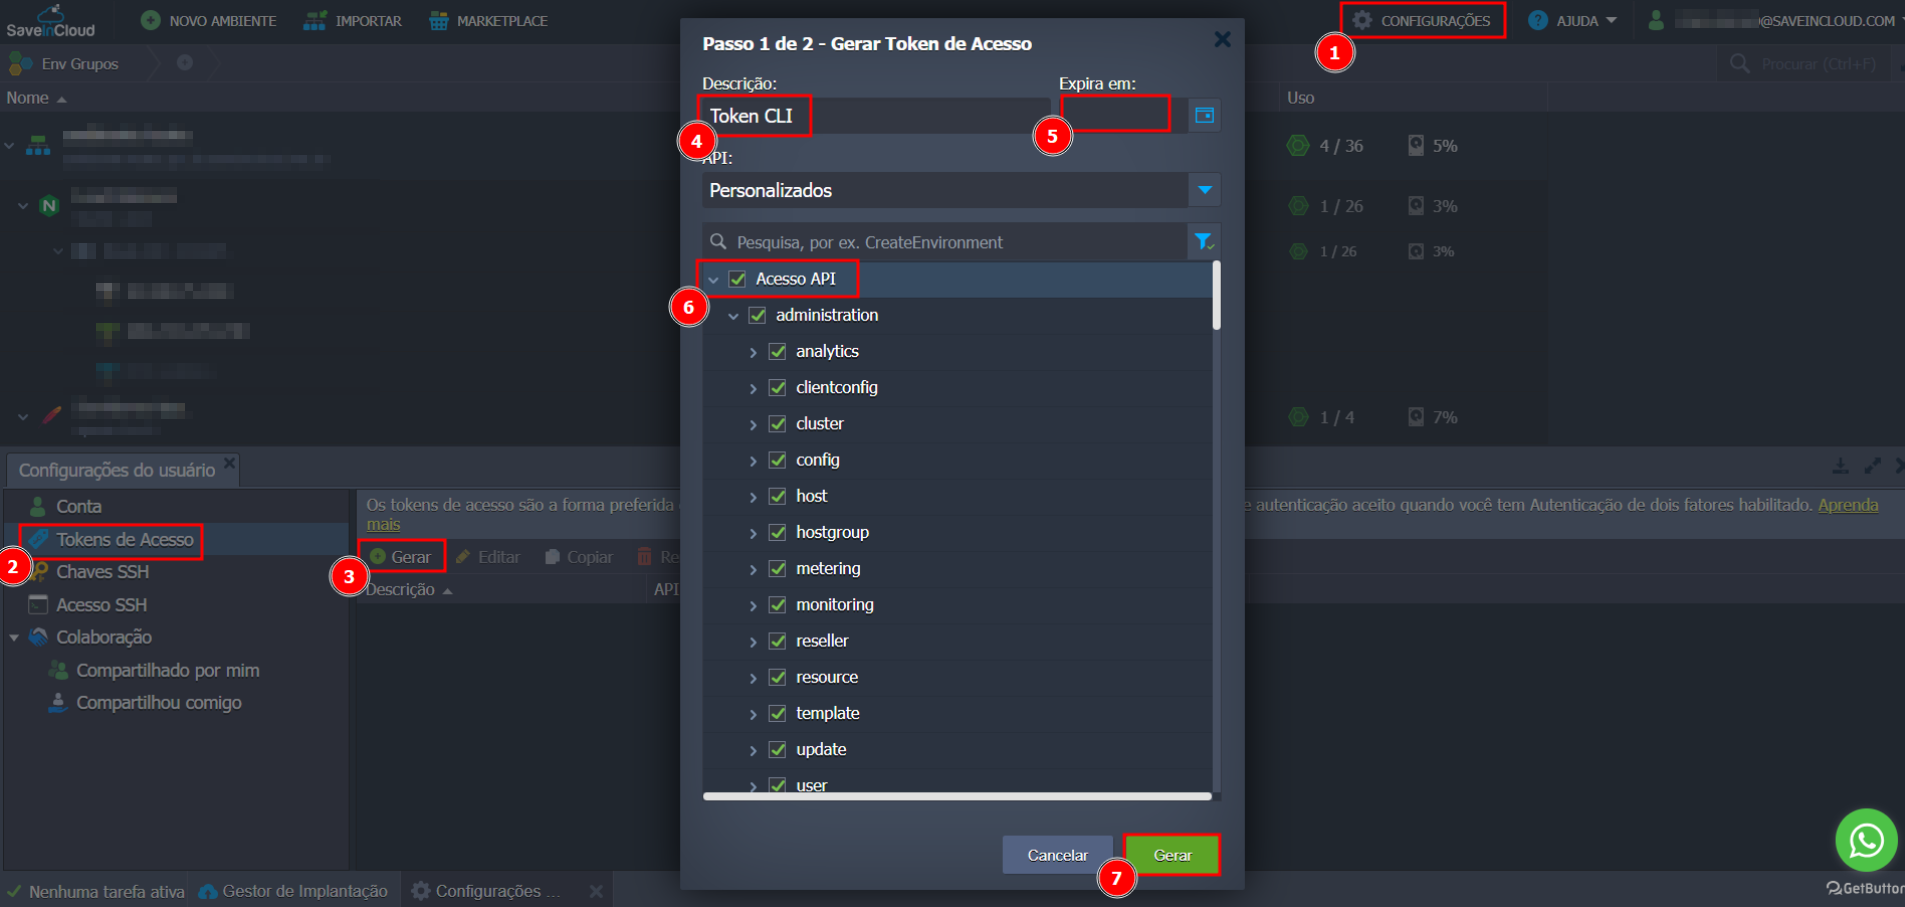
On the next screen:
- Click Copy to securely save the token.
- Check the box "I saved the data" and finish by clicking Done.
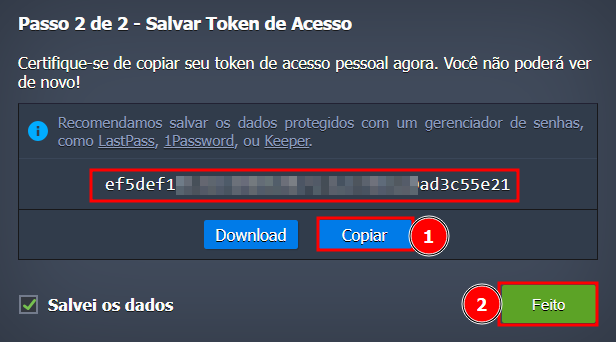
📌 Important: You will not be able to view the token again after leaving this screen. Keep it safe!
When authenticating via CLI, when prompted for the API Token, paste the code generated above.

2. Session and configuration
After login, session data is saved in:
~/.config/jelastic/jelastic.properties
If you want the CLI to return a real error when a command fails (instead of always returning code 0), add to the file:
jelastic.non_zero_exit_code=true
3. Built-in help
To see available commands:
~/jelastic/help
You will see the structure of the methods, such as:
users

environment

marketplace

...
To list the commands of a method:
ls ~/jelastic/environment/control
Example of available commands:
reboot,redeploycontainers,getenvinfo, etc.
4. View command parameters
To see the list of parameters of a command, run it without arguments:
~/jelastic/environment/control/reboot
The CLI will display the description and required and optional parameters.
5. Hide loading animation
For use in scripts, add the parameter --silent true to remove the animation and show only the response:
~/jelastic/environment/control/getenvinfo --envName ambiente-test --silent true
🔄 Updates
The CLI automatically checks for available updates and displays a warning when there is one.
For technical details, also see the API Documentation.
✅ Conclusion
The Platform CLI is a powerful tool for developers who want to gain agility, automate tasks, and control environments directly from the terminal.
Try it, automate, and save time! 🧠⚙️