🔐 Installing and Configuring VPN with Pritunl
This guide provides a complete step-by-step to configure a VPN using Pritunl on the SaveinCloud platform.
🛒 Installation via Marketplace
- Access the SaveinCloud panel and click MARKETPLACE.
- Search for Pritunl VPN and install it.
After the environment is created, an email will be sent with instructions for the initial setup.
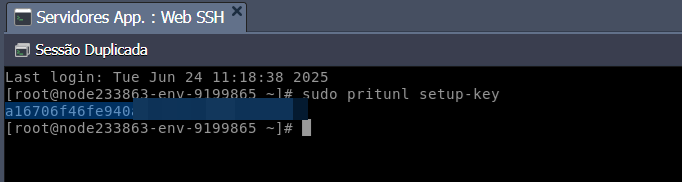
In the Web SSH terminal, run the following command:
sudo pritunl setup-key
If you want to use a separate database, edit the database URI after this command.

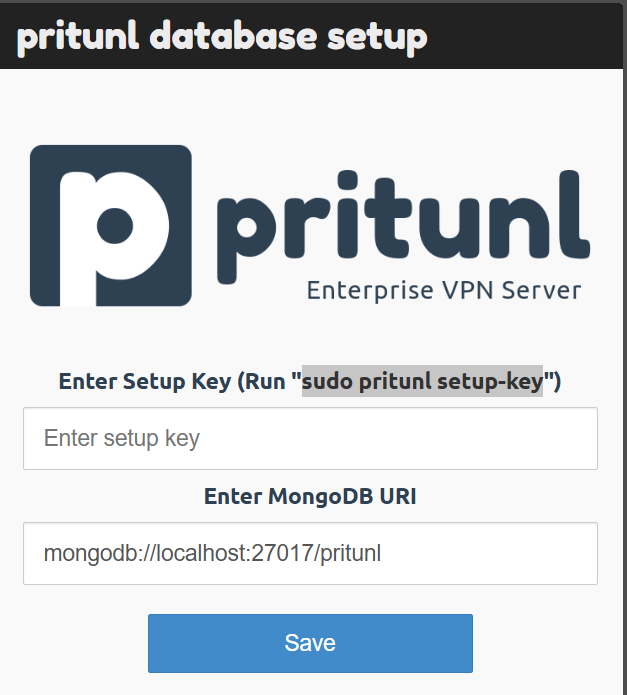
⚙️ Initial Setup of the Web Panel
Access the server's public IP to start the configuration.
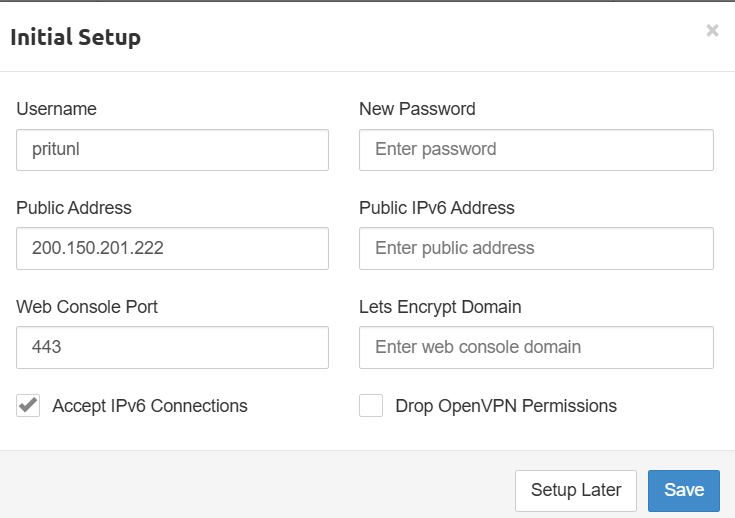
👤 Username
- Username for accessing the web interface.
- Default example:
pritunl - Recommended: change to something more secure.
🔑 New Password
- Password to access the admin panel.
- Use a strong password to protect access.
🌍 Public Address
- Server's public IP.
- Used in generating VPN profiles.
- Example:
200.150.201.222
🌐 Public IPv6 Address
- IPv6 address (optional).
- Use if you want to offer VPN via IPv6.
🛠️ Web Console Port
- HTTPS port of the web panel.
- Default:
443
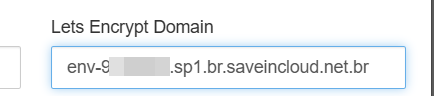
📄 Let’s Encrypt Domain
- Domain for automatic SSL certificate issuance.
- Example:
vpn.seudominio.com.br - Importance: prevents certificate warnings in the browser.
💡 If using your own domain, it must point to the IP of the Pritunl machine. Otherwise, the certificate will not be issued. You can use the host's own domain provisioned on the platform.
📥 Accept IPv6 Connections
- Allows connections via IPv6.
- Check if your network or users support IPv6.
🔒 Drop OpenVPN Permissions
- Removes inherited OpenVPN permissions.
- Recommended for increased security.
✅ Buttons
- Setup Later: Postpones the initial setup (not recommended).
- Save: Saves and starts the server with the entered data.
🏢 Creating Organization, Users, and Servers
🧩 Create Organization
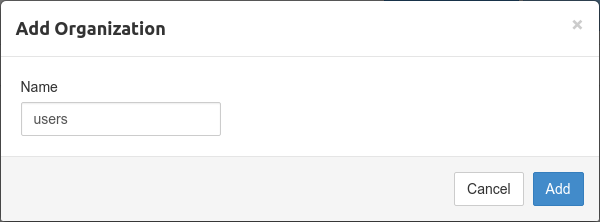
- In the panel, go to the Users tab.
- Click Add Organization.
👤 Create User
After creating the organization:
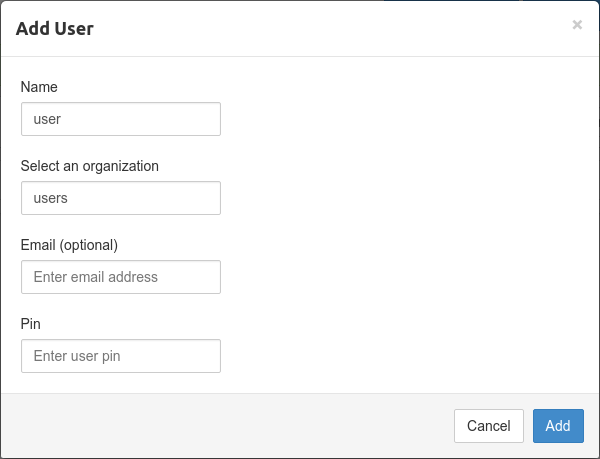
- Click Add User.
- Enter the name and optionally an email and PIN.
🖥️ Create Server
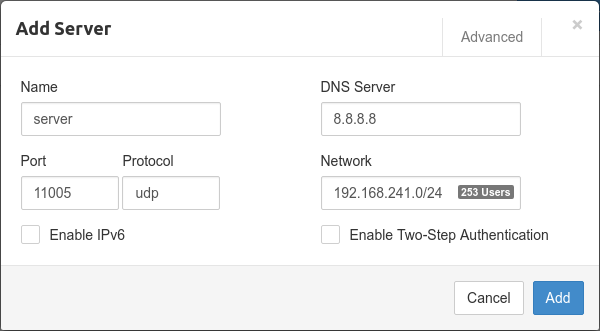
- Go to the Servers tab and click Add Server.
- A random port (UDP) and an automatic VPN network will be generated.
- Make sure this network does not conflict with your local network.
After creation:
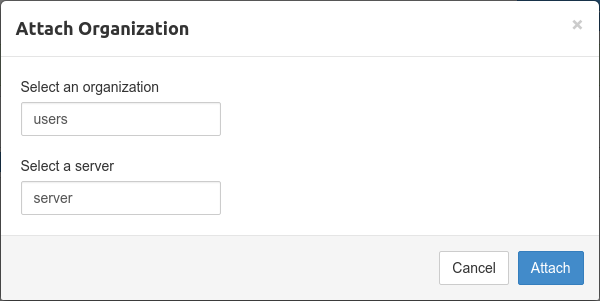
- Click Attach Organization and select the created organization.
- Click Start Server to start it.
🧭 Configuring Server Routes
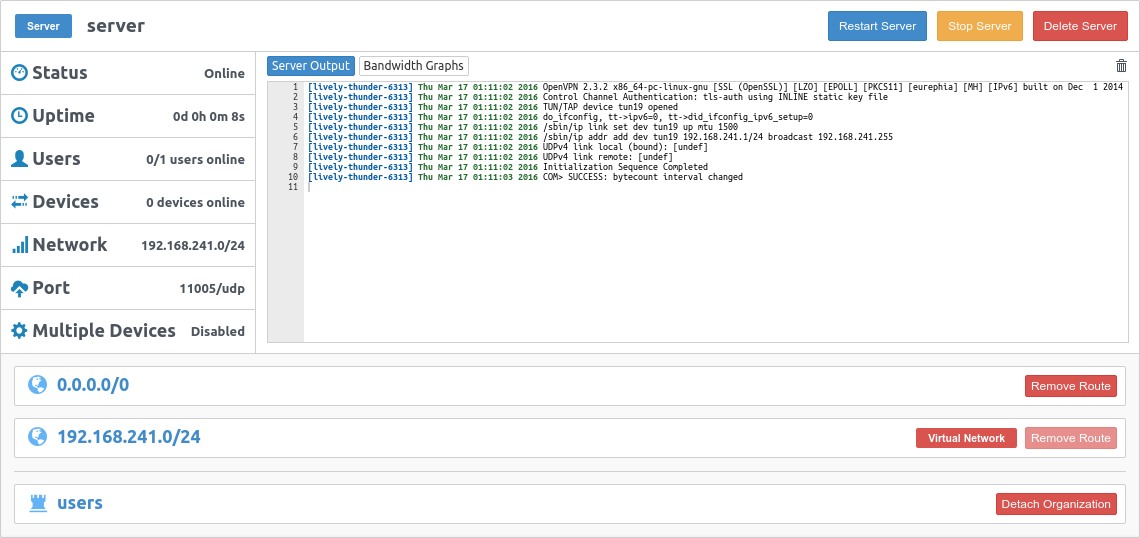
By default, the route 0.0.0.0/0 is configured, which makes all traffic pass through the VPN.
If you want to route only a local network, follow these steps:
- Remove the default route.
- Click Add Route and enter, for example,
10.0.0.0/8.
⚠️ The route 0.0.0.0/0 tunnels all internet traffic via VPN, which may generate unexpected traffic costs.
Use 10.0.0.0/8 to access only private networks, or specific ranges with /32, such as 10.0.10.12/32.
📥 Downloading Connection Profile
After creating the server, go to the Users tab.
- Click the download icon or the user's links button.

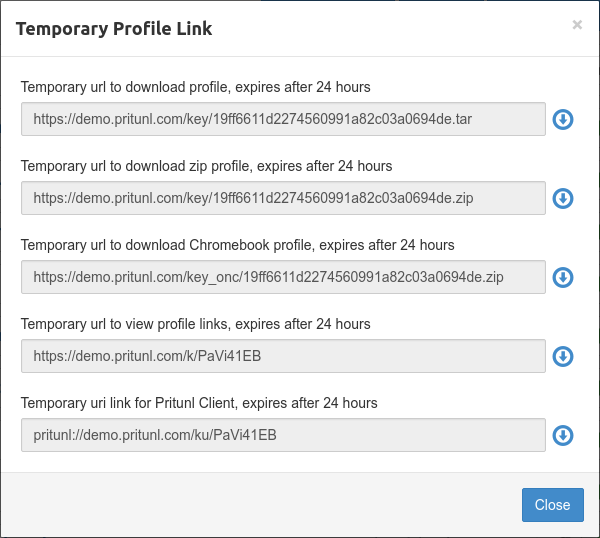
🔗 Temporary Links
You can use the URI link to import directly into the Pritunl client (or compatible OpenVPN).
🧠 Questions?
Contact the technical support team if you have difficulties with installation or configuration.