☸️ Kubernetes Cluster Deployment on SaveInCloud Marketplace
The Kubernetes Cluster from the SaveInCloud Marketplace allows provisioning a dedicated cluster, optional observability modules, and different topologies, serving both development and production environments.
🚀 Deployment Step-by-Step
- Access the SaveInCloud Marketplace.

- Search for Kubernetes Cluster.
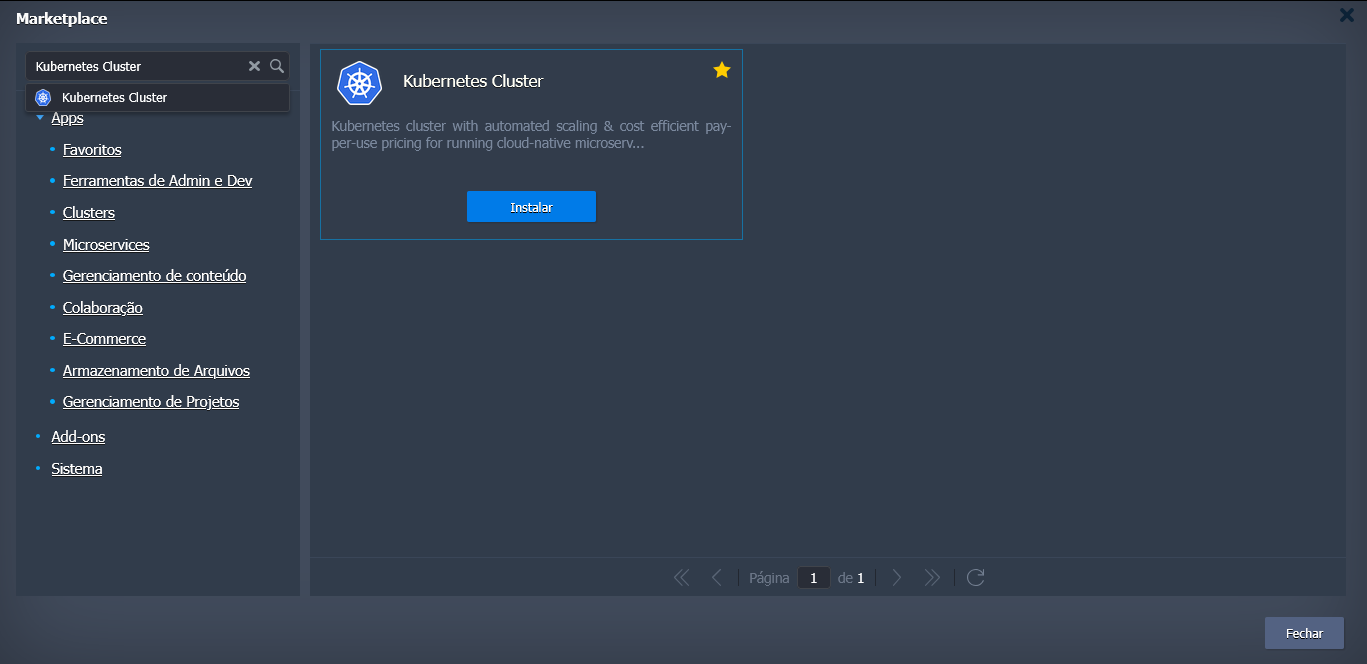
- Click Install.
- Configure the options as described below.
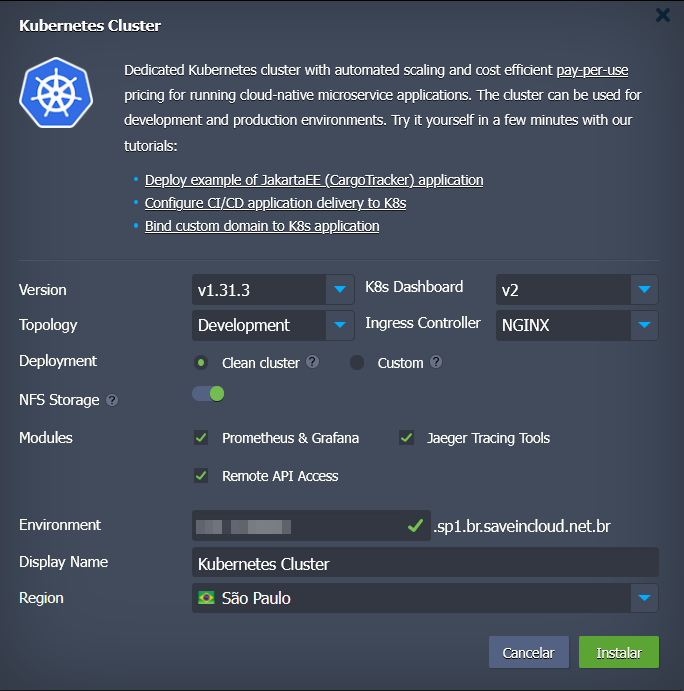
⚙️ Configuration Options
🔢 Version
Select the desired Kubernetes version (e.g., v1.31.3).
It is recommended to always use the latest stable version.
📊 K8s Dashboard
- v2 → Official native Kubernetes dashboard, with a simple interface and basic management features.
- Skooner → A lighter and more responsive alternative, focused on monitoring and workload management, RBAC, and advanced visualization.
🏗️ Topology
- Development → Simplified cluster (1 Control Plane, 1 Storage, 1 group of Workers).
- Production → Distributed and redundant cluster (multiple Control Planes, multiple Storages, multiple Workers, and API Balancers).
🔎 Practical example:
- Dev → ideal for testing, development, and staging.
- Prod → recommended for critical workloads, ensuring high availability.
🌐 Ingress Controller
Defines how external traffic will be routed to cluster services:
- NGINX → Default option, robust and widely supported.
- HAProxy → Focused on high L4/L7 performance.
- Traefik → Designed for microservices, with native Let's Encrypt integration.
📦 Deployment
- Clean Cluster → Basic cluster, ready to receive workloads.
- Custom → Allows adjusting specific configurations (when available).
💾 NFS Storage
Enables persistent storage for workloads.
⚠️ Required to enable monitoring and tracing modules.
📈 Optional Modules
Available only if NFS Storage is enabled:
- Prometheus & Grafana → Advanced monitoring and metrics dashboards.
- Jaeger Tracing Tools → Observability for distributed applications, request tracing between microservices.
- Remote API Access → Allows remote access to the cluster API for integration via
kubectlor CI/CD pipelines. (Does not require NFS Storage)
🌍 Environment & Region
- Environment → Technical name of the cluster (auto-generated, can be customized).
- Display Name → Friendly name shown on the dashboard.
- Region → Choose from available datacenters.
🗺️ Dev vs Prod Differences
📌 Dev Environment
- 1 Control Plane
- 1 Storage
- 1 group of Workers
📌 Prod Environment
- 2 or more API Balancers (HAProxy)
- 3 Control Planes
- 3 Storages (auto-clustering)
- 2 or more groups of Workers
➡️ This ensures greater resilience and high availability.
📥 Provisioning
- Define the desired version, dashboard, topology, and ingress.
- If needed, enable NFS Storage and select optional modules.
- Configure the environment name and region.
- Click Install.
⏳ The process takes a few minutes and, at the end, the cluster will be ready for use.
✅ Best Practices
- Use Dev only for testing; always choose Prod for critical applications.
- Enable NFS Storage + Prometheus/Grafana for monitoring from the start.
- Plan the use of Ingress Controller according to the application architecture.
- Use Remote API Access to integrate CI/CD pipelines.
🛠️ Troubleshooting
- Cluster does not start → Check if the selected Kubernetes version is supported.
- Ingress does not respond → Confirm if the domain is correctly configured for the Load Balancer.
- Modules do not enable → Enable NFS Storage before selecting Prometheus/Grafana or Jaeger.
- SSL → Can be configured later via ingress with Let's Encrypt support in the Add-on.