☁️ How to Deploy Nextcloud via Saveincloud Marketplace
Nextcloud is a complete personal cloud solution to securely store, share, and manage files. The Saveincloud platform allows you to deploy Nextcloud quickly and easily through its Marketplace.
🛒 Accessing the Marketplace
To start installing Nextcloud:
-
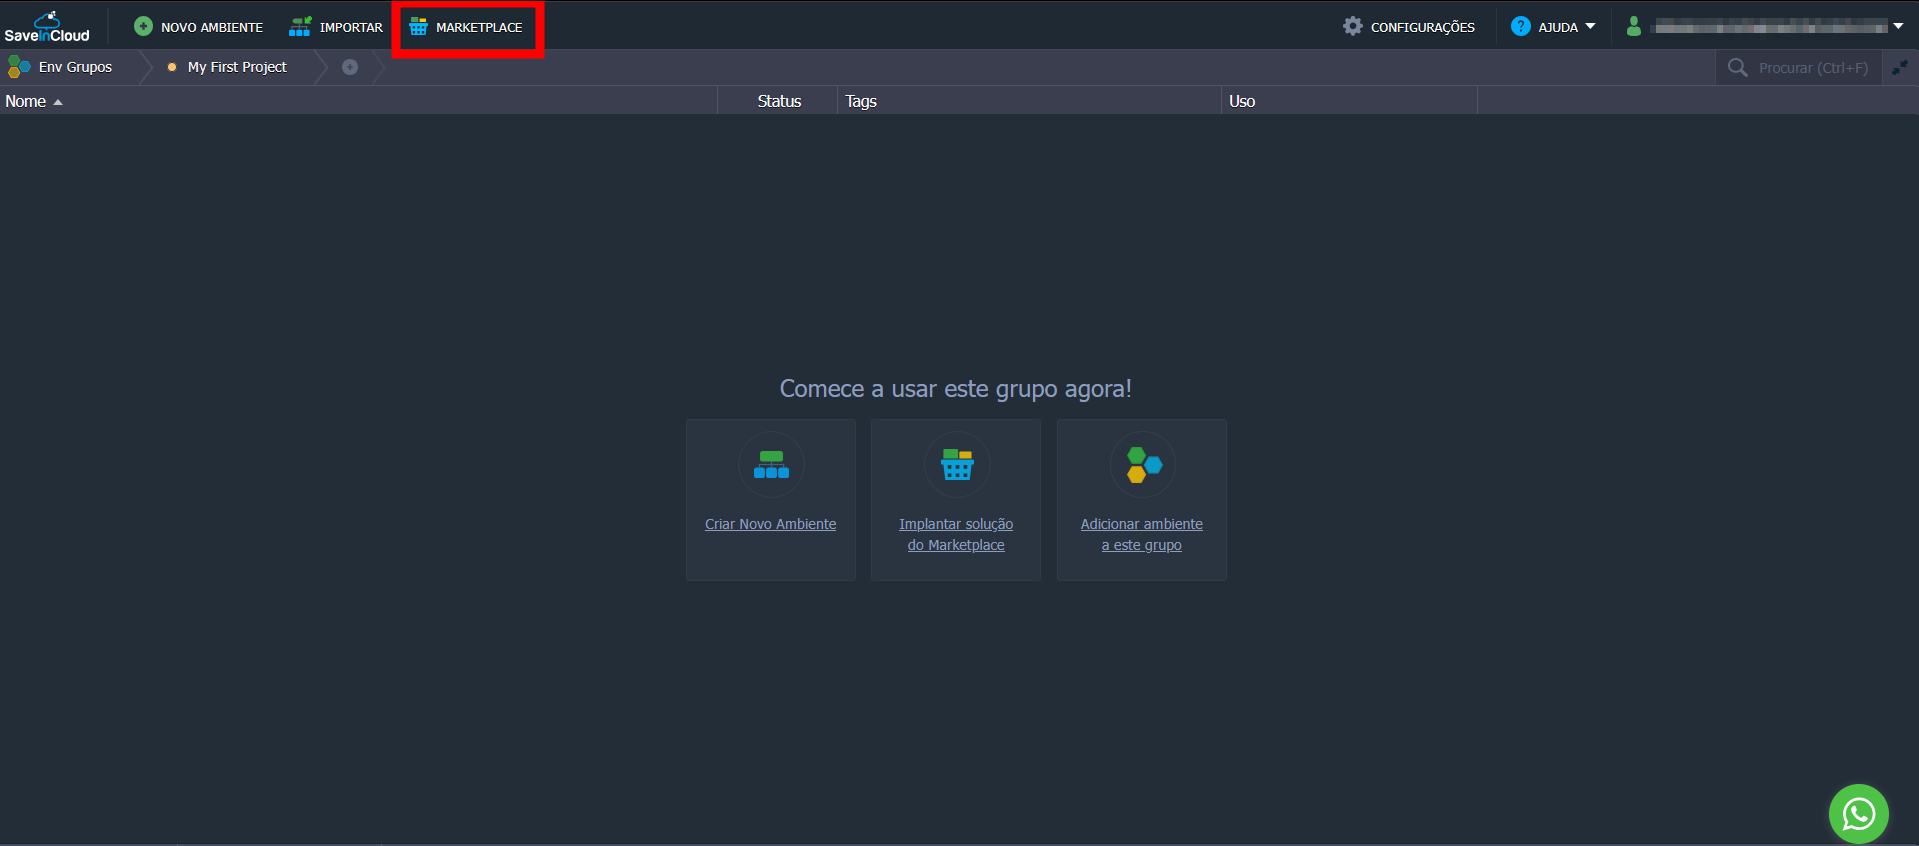
Access your Saveincloud panel after logging in.
-
Click on the Marketplace option in the main menu.
-
Use the search bar and type
Nextcloud.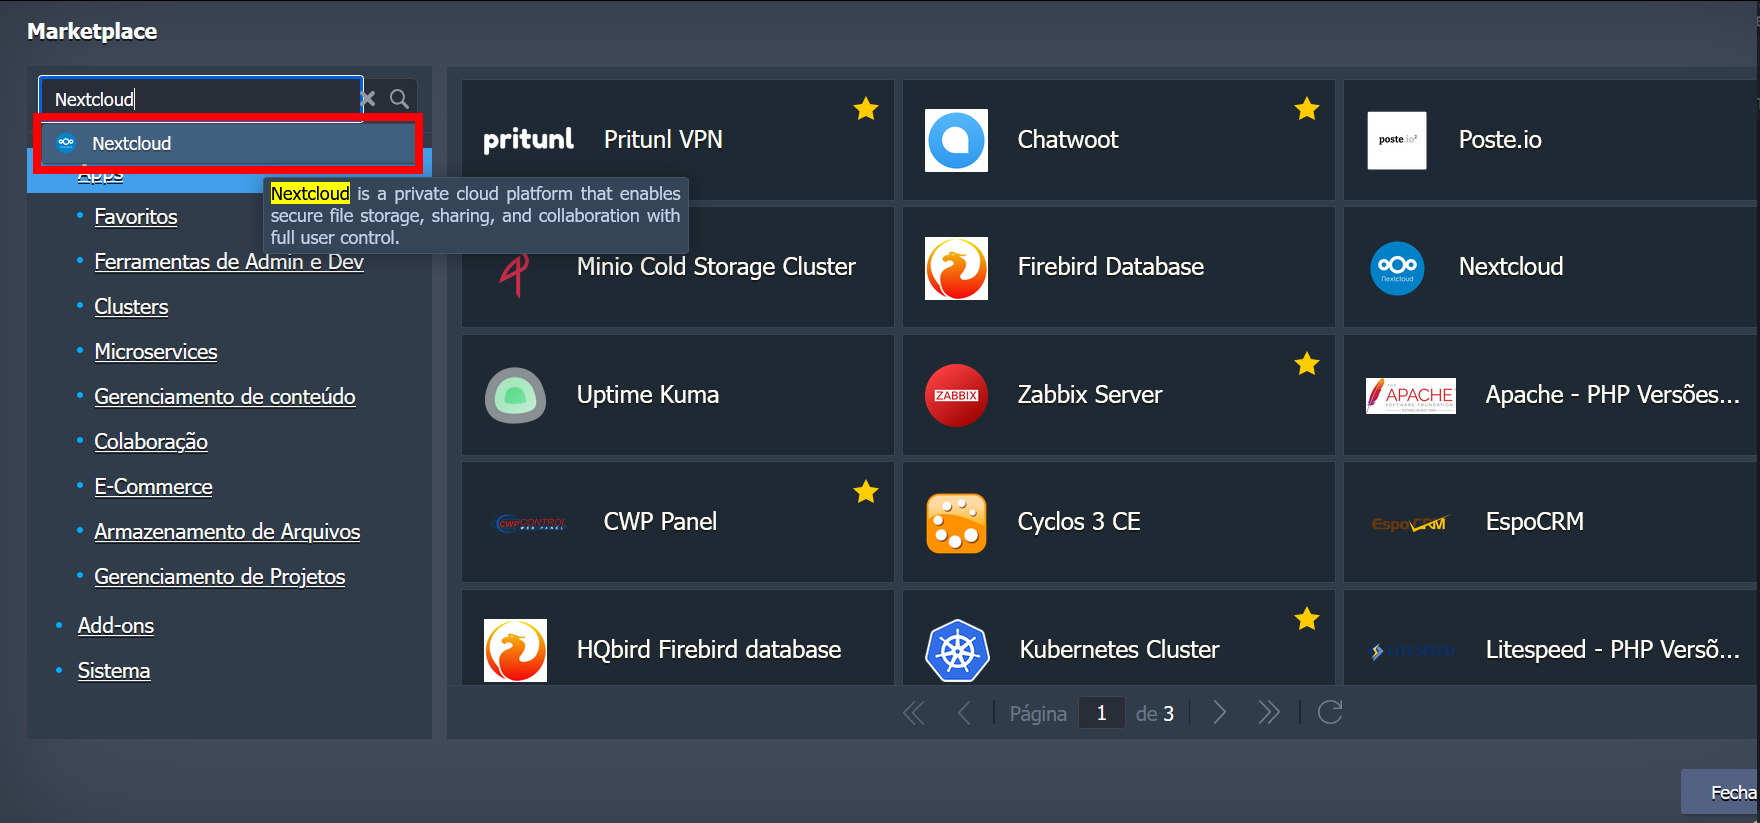
🚀 Deployment Flow
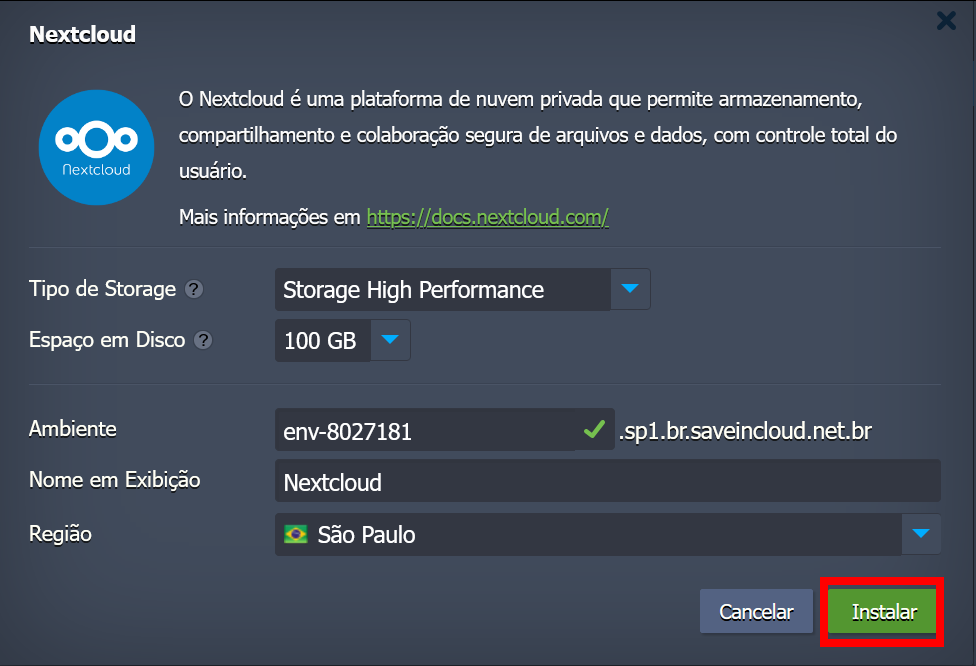
When selecting Nextcloud in the marketplace, a pre-installation popup will appear with the following configuration fields:
-
🗄️ Storage Type:
- High Performance or Standard Performance
- High Performance: High Performance is the highest performing disk model (Hot Disk) designed for handling large amounts of data movement (I/O In and Out), with pay-as-you-go billing, at a fixed price of 0.7GB per GB in use.
- Standard Performance:
Standard Performance uses Cold Storage type disk.
In Cold Storage, the allocated disk space is charged per GB/Allocated, with discounts on the GB price according to the allocated amount.
Usage Range Price per GB/month 1 GB to 250 GB R$ 0.50 251 GB to 1 TB R$ 0.42 1 TB to 2.99 TB R$ 0.30 3 TB to 10 TB R$ 0.23 10 TB to 30 TB R$ 0.18 Above 30 TB R$ 0.14
- High Performance or Standard Performance
-
💾 Disk Space:
- Define the desired capacity (After environment creation, disk space can be modified)
-
🌐 Environment Hostname:
- Subdomain name generated by the platform
-
🏷️ Display Name:
- Friendly name for identification (default:
Nextcloud)
- Friendly name for identification (default:
-
📍 Datacenter Region:
- São Paulo, Brasília, or Fortaleza
After filling out the fields, click the Install button and wait for the deployment process to complete.
✅ Prerequisites
Before starting the deployment, remember that:
- It is not necessary to have your own domain, DNS, or pre-configure SSL to deploy Nextcloud
📬 Post-Installation and First Access
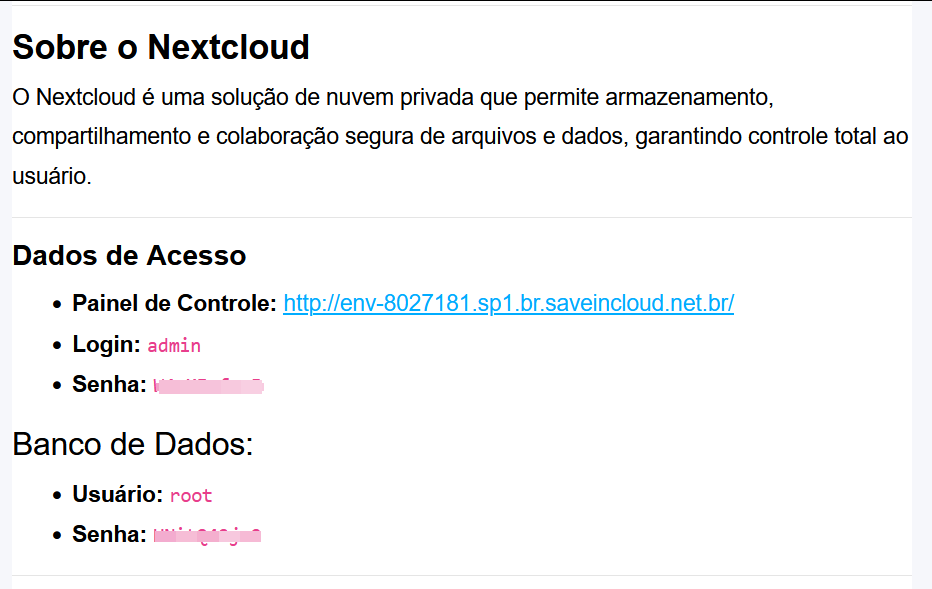
Once the installation is complete, you will receive by email the access credentials (username and password) and the URL of the provisioned Nextcloud environment.
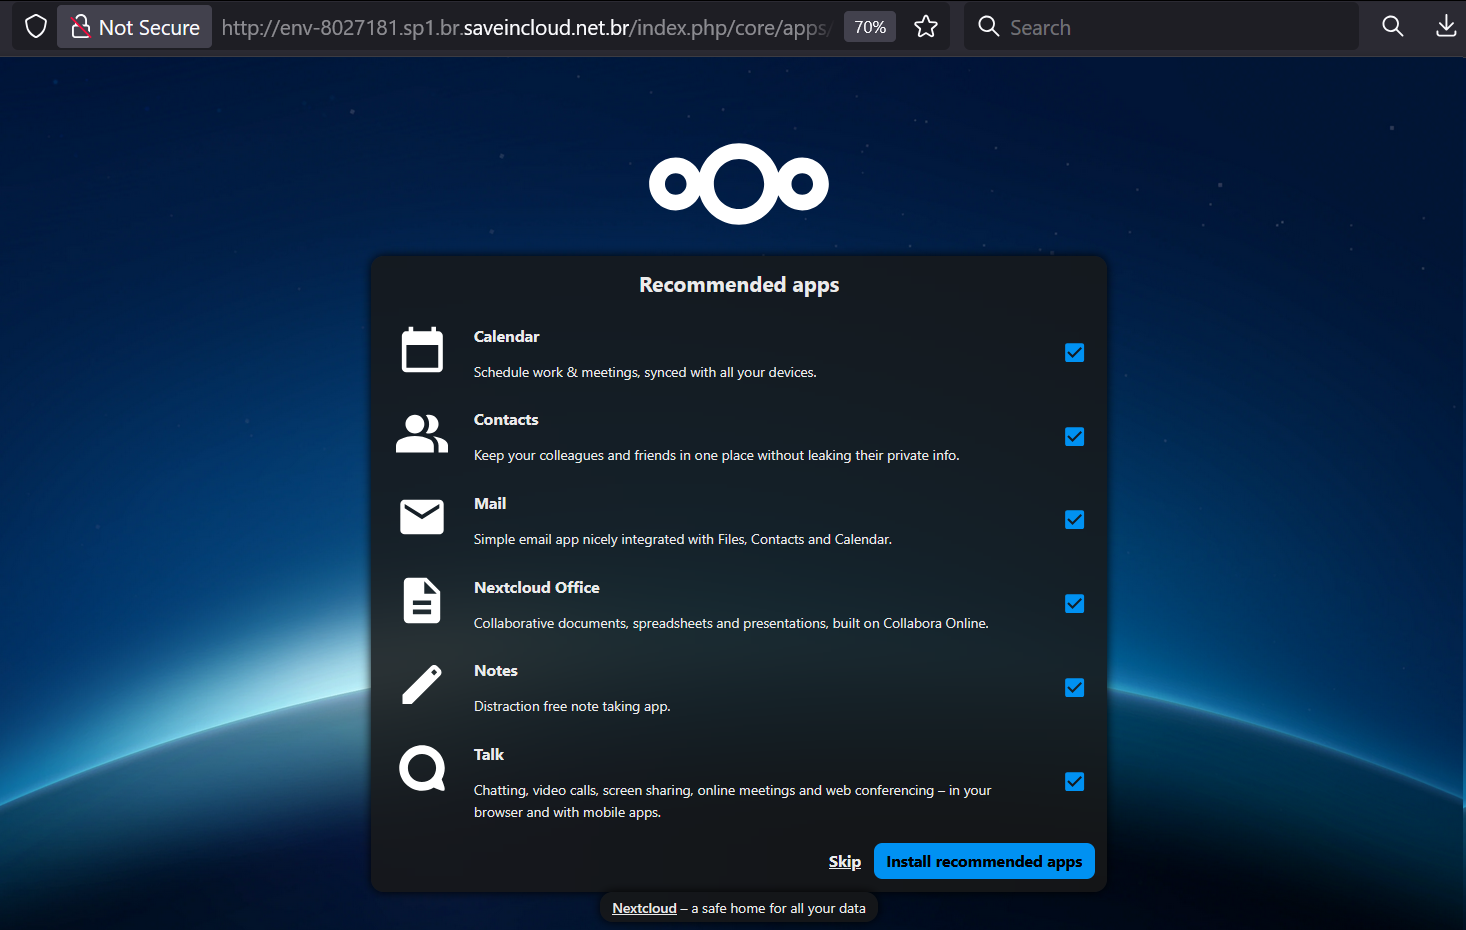
The first time you access the environment, a screen will appear to install additional Nextcloud features, such as:
- 📅 Calendar
- 👥 Contacts
- 🖥️ Nextcloud Office
- 📝 Notes
- 🗨️ Nextcloud Talk
You can choose to install these features or click Skip to go directly to the Nextcloud main dashboard.
🧱 Environment Architecture
During deployment, the following containers are automatically provisioned:
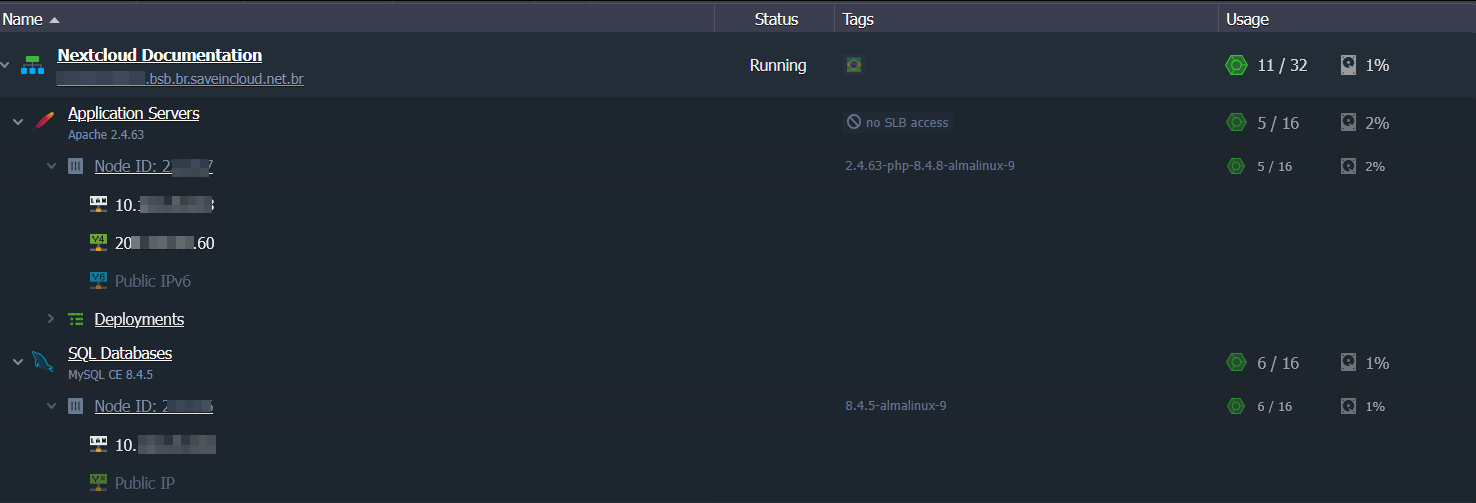
- 🔥 Apache Server
- Container with 16 Cloudlets
- 🐬 MySQL Database
- Container with 16 Cloudlets
🔎 Note:
16 Cloudlets equal 2 GiB of RAM and 6.4 GHz of CPU, and can be adjusted later according to your environment's demand.
🔐 Backup and SSL
- ☁️ The environment backup will be included only if the customer opts for High Performance Storage during the deployment process.
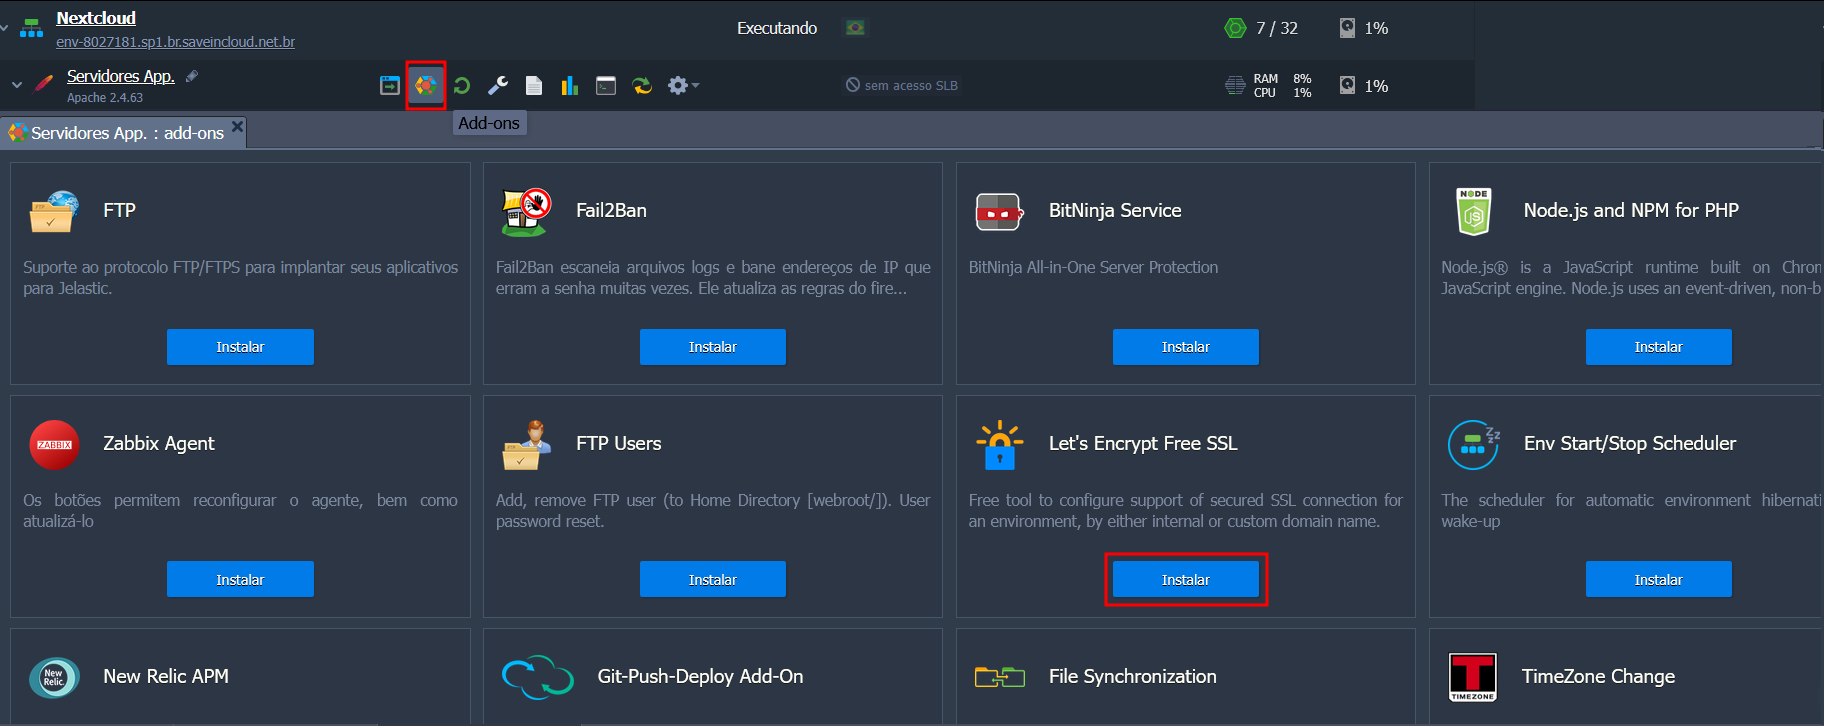
- 🔒 To activate SSL even without your own domain, the customer can use the platform's Let's Encrypt ADD-On, available in the Apache Instance Add-on settings.
🏁 Conclusion
With just a few clicks, you will have your own scalable Nextcloud environment, ready to securely store and share files with performance and full control.
📌 If you have any questions, contact Saveincloud support or consult the tutorials in the Help Center.