📬 How to Configure the Nextcloud Mail App with the Poste.io Server
This documentation details how to configure the Mail app of Nextcloud (v31) to work with a self-hosted mail server using Poste.io, with support for SSL via Let's Encrypt, integration with the Roundcube panel, and sending notifications through the system.
🧩 Prerequisites
- ✅ Mail app installed on Nextcloud
- ✅ Email account created on Poste.io (e.g.,
[email protected]) - ✅ Active SSL certificate (Let's Encrypt)
- ✅ DNS properly configured (A, MX, SPF, DKIM records)
- ✅ Functional Poste.io server with external access (e.g.,
mail.seudominio.com.br)
🔧 Installing the Mail App (if not already installed)
- Access the Nextcloud panel with the administrator account.
- Go to the Apps menu on the sidebar.
- In the Communication category, locate the Mail app.
- Click Install.
📥 Connecting an Email Account
The Mail app allows adding accounts using automatic detection or manual configuration.
🔹 Automatic Mode (Recommended)
- Open the Mail app in the sidebar menu.
- Enter the full email and password (e.g.,
[email protected]).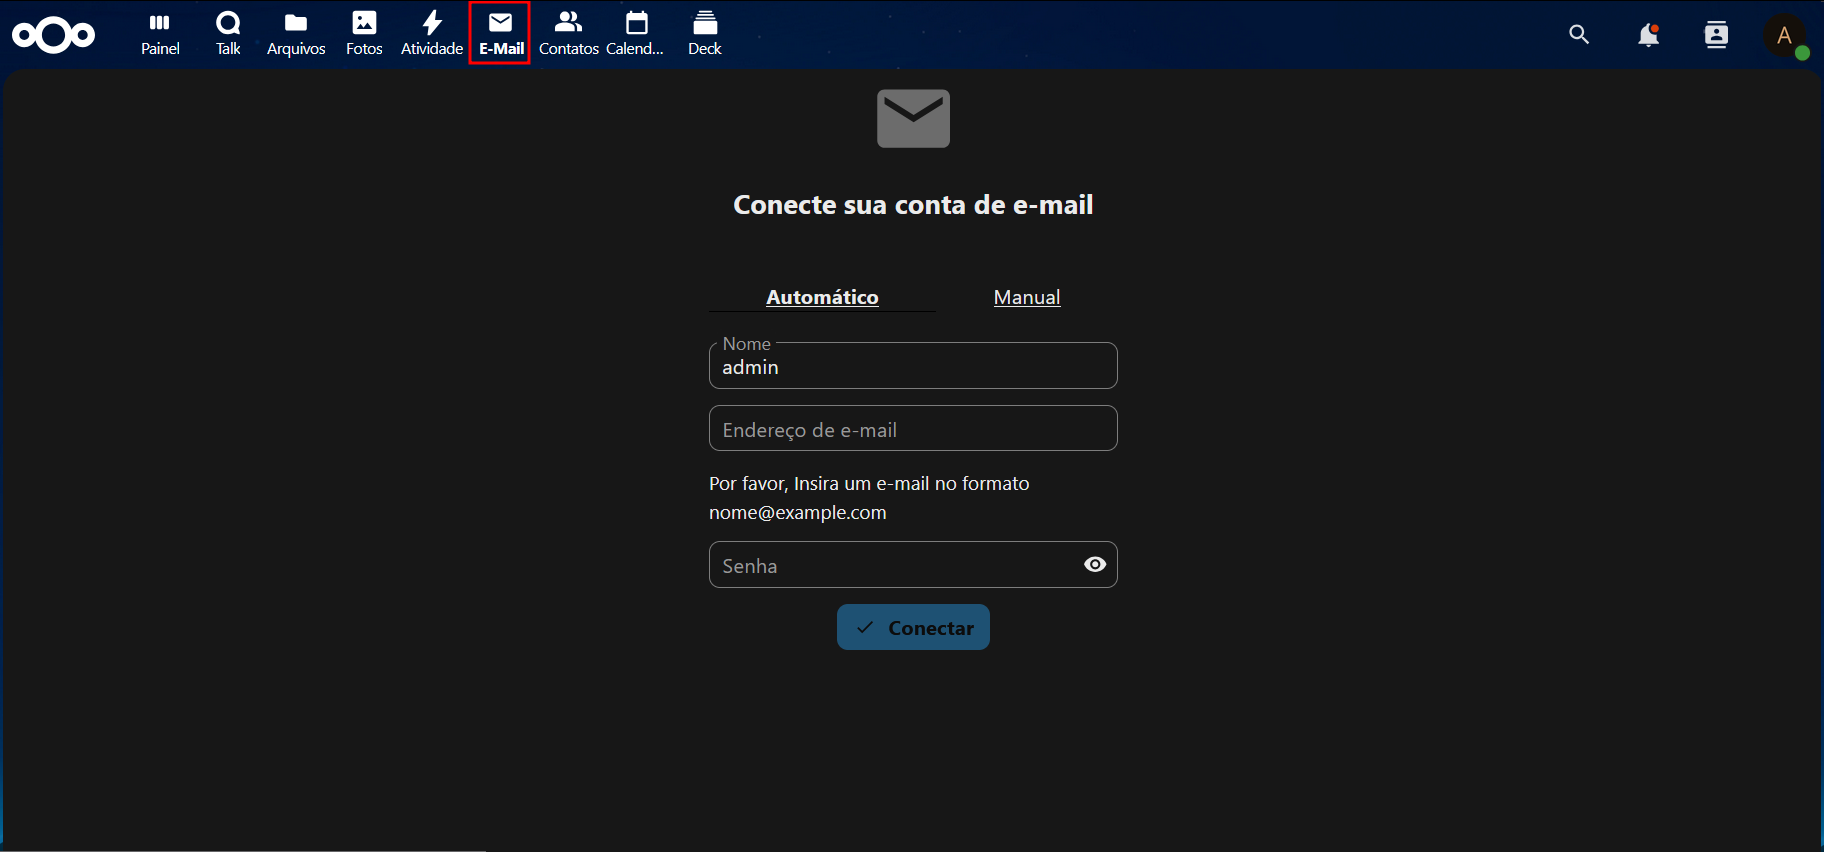
- Nextcloud will try to identify the IMAP and SMTP servers automatically based on the email domain.
- Once configured, you will see a screen with the inbox messages:
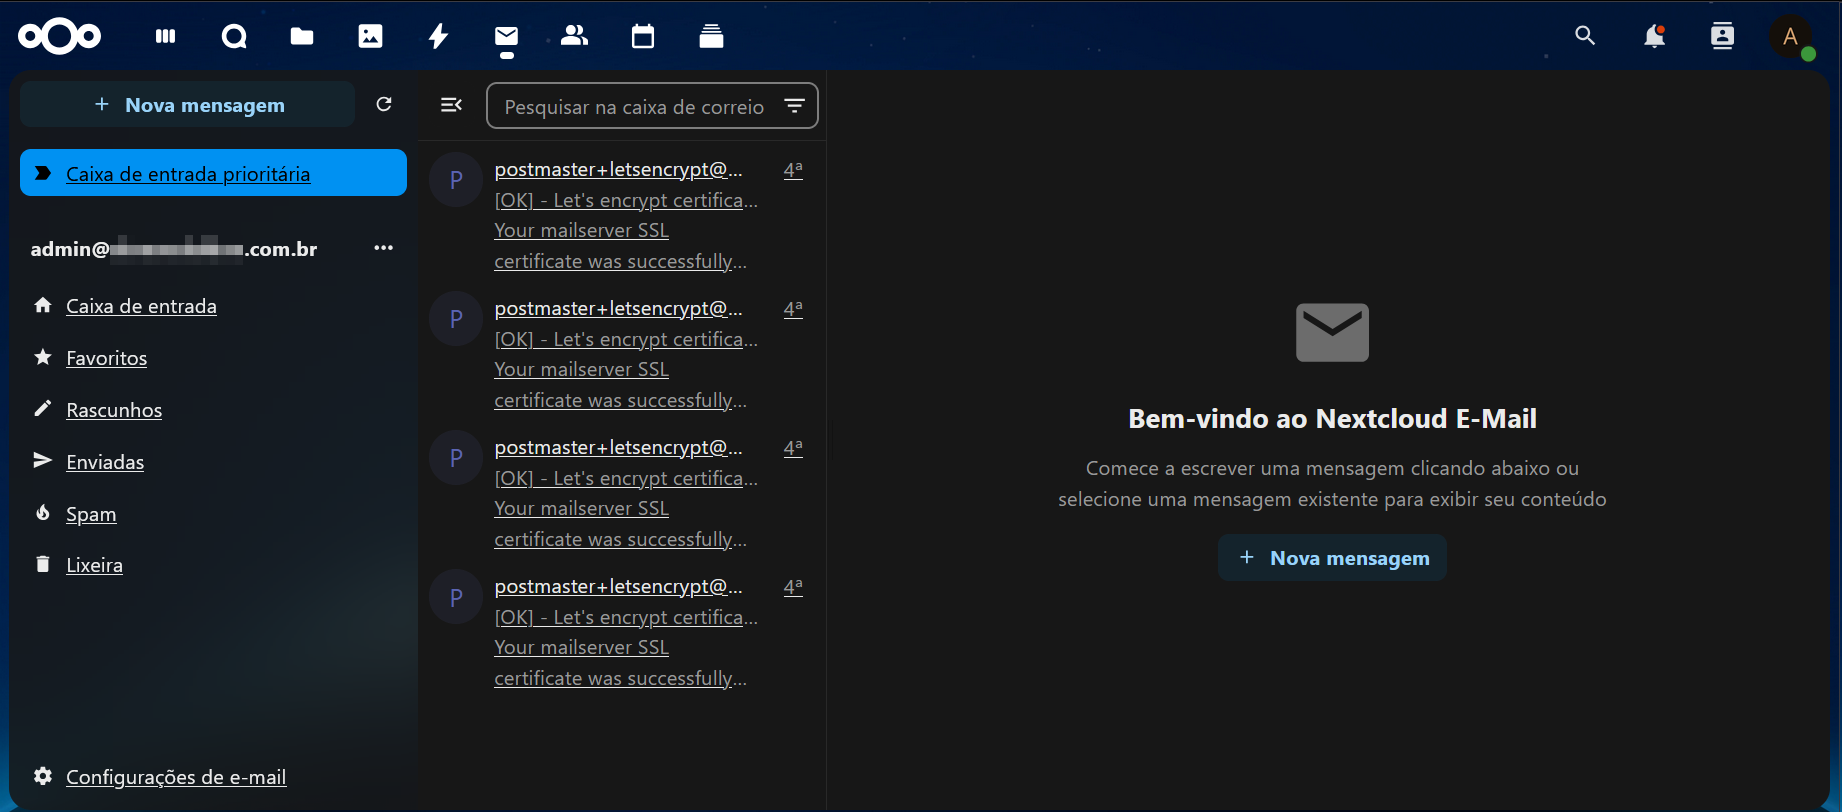
⚠️ Make sure that
mail.seudominio.com.brhas the correct A DNS record and open ports.
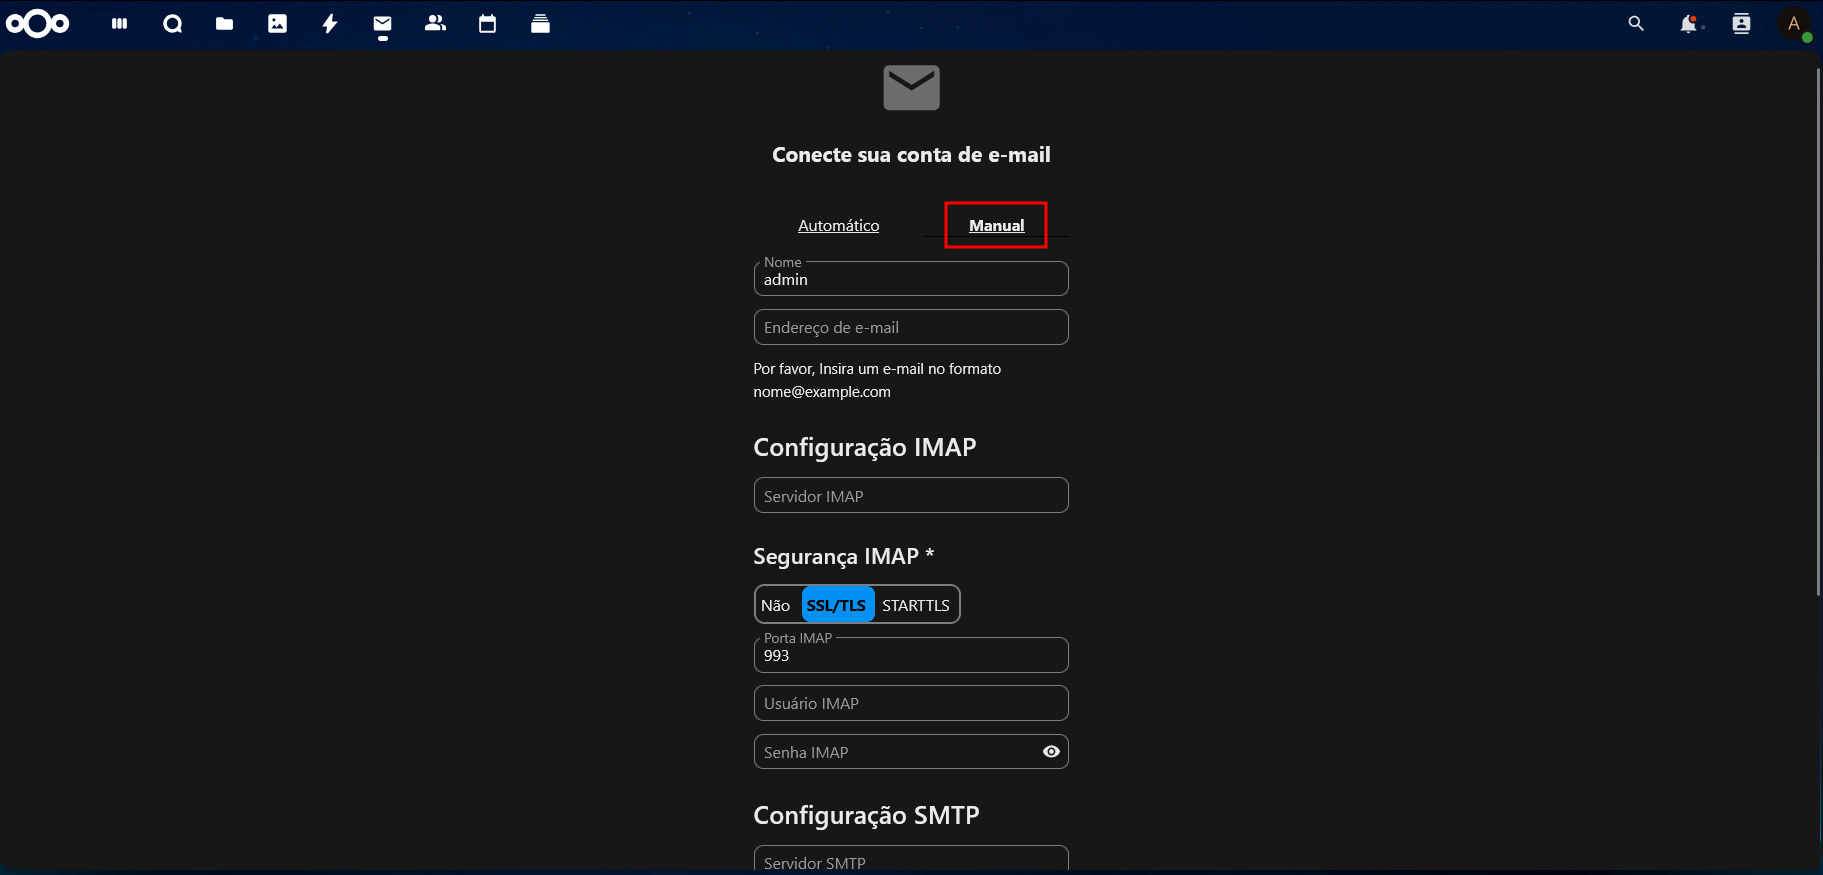
🔧 Manual Mode (Advanced Configuration)
If automatic configuration fails:
IMAP (Incoming)
- IMAP Server:
mail.seudominio.com.br - Port:
993 - IMAP Security: SSL/TLS
- Authentication: Yes
- IMAP User:
[email protected] - IMAP Password: Your password
SMTP (Outgoing)
- SMTP Server:
mail.seudominio.com.br - Port:
587 - Security: STARTTLS
- Authentication: Yes
- SMTP User:
[email protected] - SMTP Password: your password
👤 Email Account for the System
🎯 Recommendation:
Create an exclusive email account for internal system use, for example:
This account will be used for:
- Sending user registration emails
- Administrative alerts
- Notifications for calendar, tasks, activities, and workflows
📨 How Does Nextcloud Send System Emails?
Emails sent by the Nextcloud system (such as password recovery or notifications) are not sent from the user's personal email, but rather from the account configured as default in the administrator's Basic Email Settings.
🔧 To configure:
- Go to
Admin > Configurações > Configurações Básicas de E-mail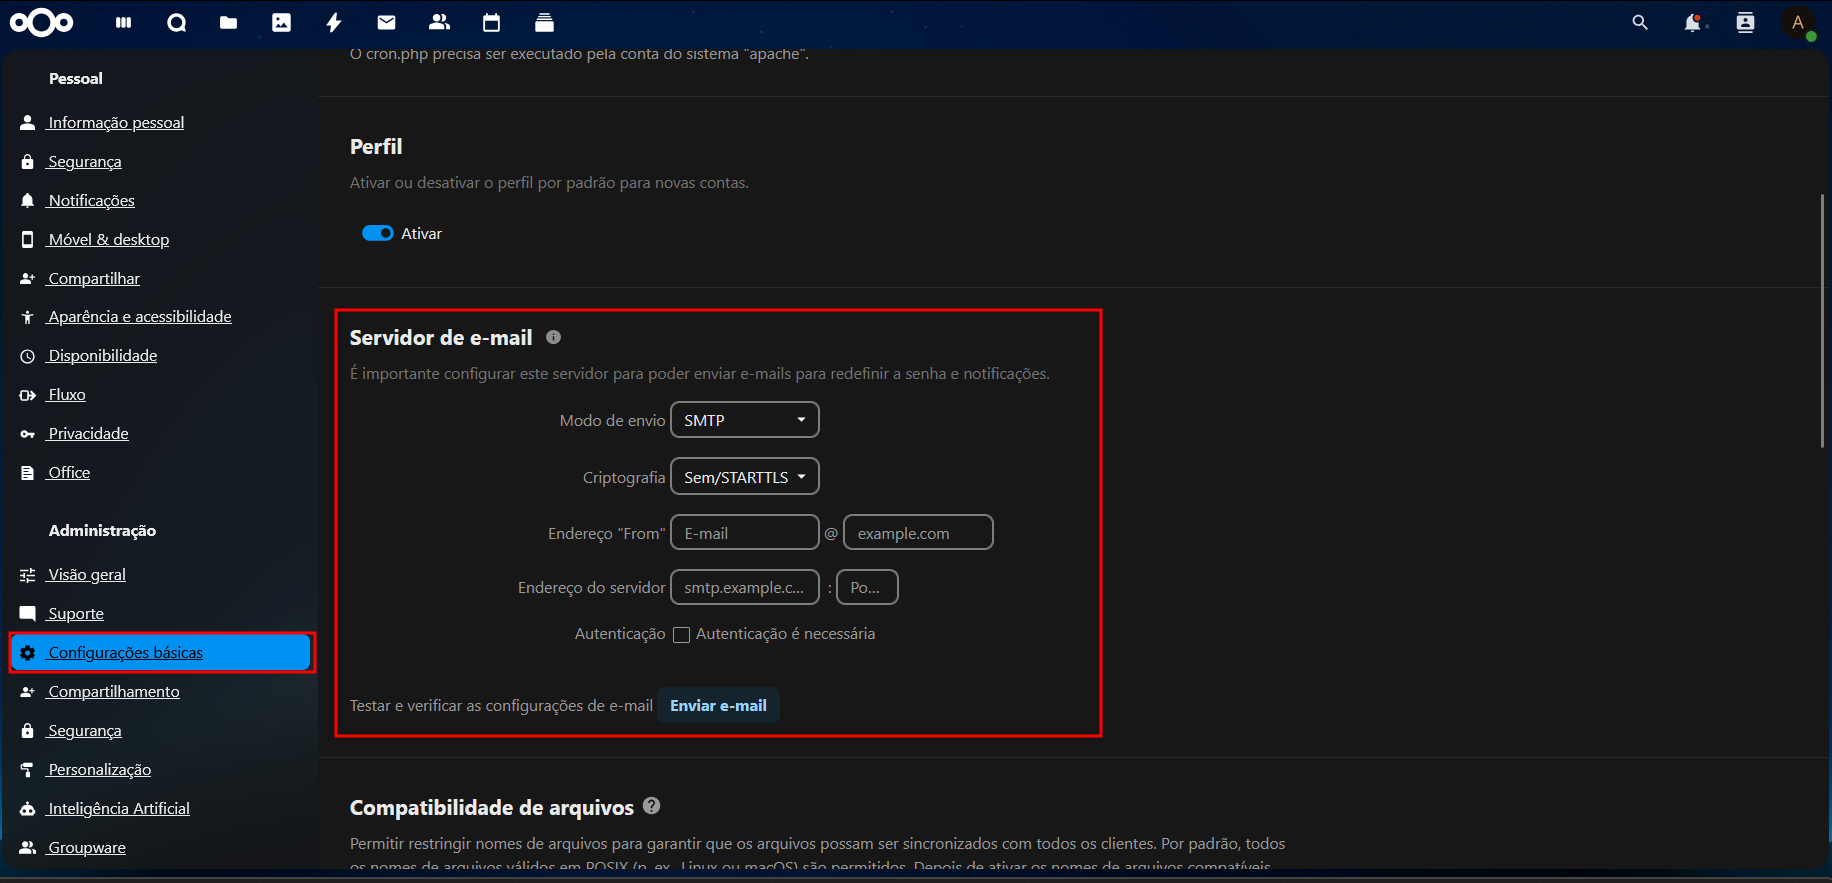
- Enter:
- Sender email (e.g.,
[email protected]) - Sender name
- SMTP server (e.g.,
mail.seudominio.com.br) - Port:
587 - Security: STARTTLS
- Authentication: Valid Poste.io username and password
- Sender email (e.g.,
📡 Required Ports
| Protocol | Port | Description |
|---|---|---|
| IMAP | 993 | Secure incoming mail |
| SMTP | 587 | Sending with STARTTLS |
| POP3 | 995 | (optional) POP receiving |
| Sieve | 4190 | (optional) Email filters |
🧪 Functionality Test
- Access the Mail app and send an email to any external account (e.g., Gmail).
- Verify if the email was delivered successfully.
- Send an email from another provider to the configured address.
- Check if it appears in the Nextcloud Mail app inbox.
🌐 Alternative Access via Webmail (Roundcube)
The same email accounts created in Poste.io can be accessed via browser:
- 🧭 Admin panel:
https://mail.yourdomain.com.br/admin/ - 📬 Webmail (Roundcube):
https://mail.yourdomain.com.br/webmail/
Log in with the email and password set in the Poste.io panel.
🛠️ Troubleshooting
❌ Authentication Error
- Check if the username and password are correct.
- Confirm the account exists in the Poste.io panel.
❌ IMAP or SMTP Not Responding
- Verify if ports
993and587are open. - Confirm if the domain
mail.seudominio.com.brcorrectly points to the server IP.
⚠️ Invalid Certificate
- In
https://mail.seudominio.com.br/admin/, go to:System Settings > TLS Certificates > Let's Encrypt > Enable + Save Changes.
❌ System Emails Not Arriving
- Properly configure the default sending account in
Configurações Básicas de E-mail. - Use a dedicated account for the system (e.g.,
[email protected]).
✅ Done! Now your Nextcloud instance is integrated with your own mail server via Poste.io!