📆 Nextcloud Calendar
The Calendar app in Nextcloud allows you to organize appointments, share events with other users, create reminders, and integrate your agenda with external applications via CalDAV and WebCal.
📦 Installing the Calendar App
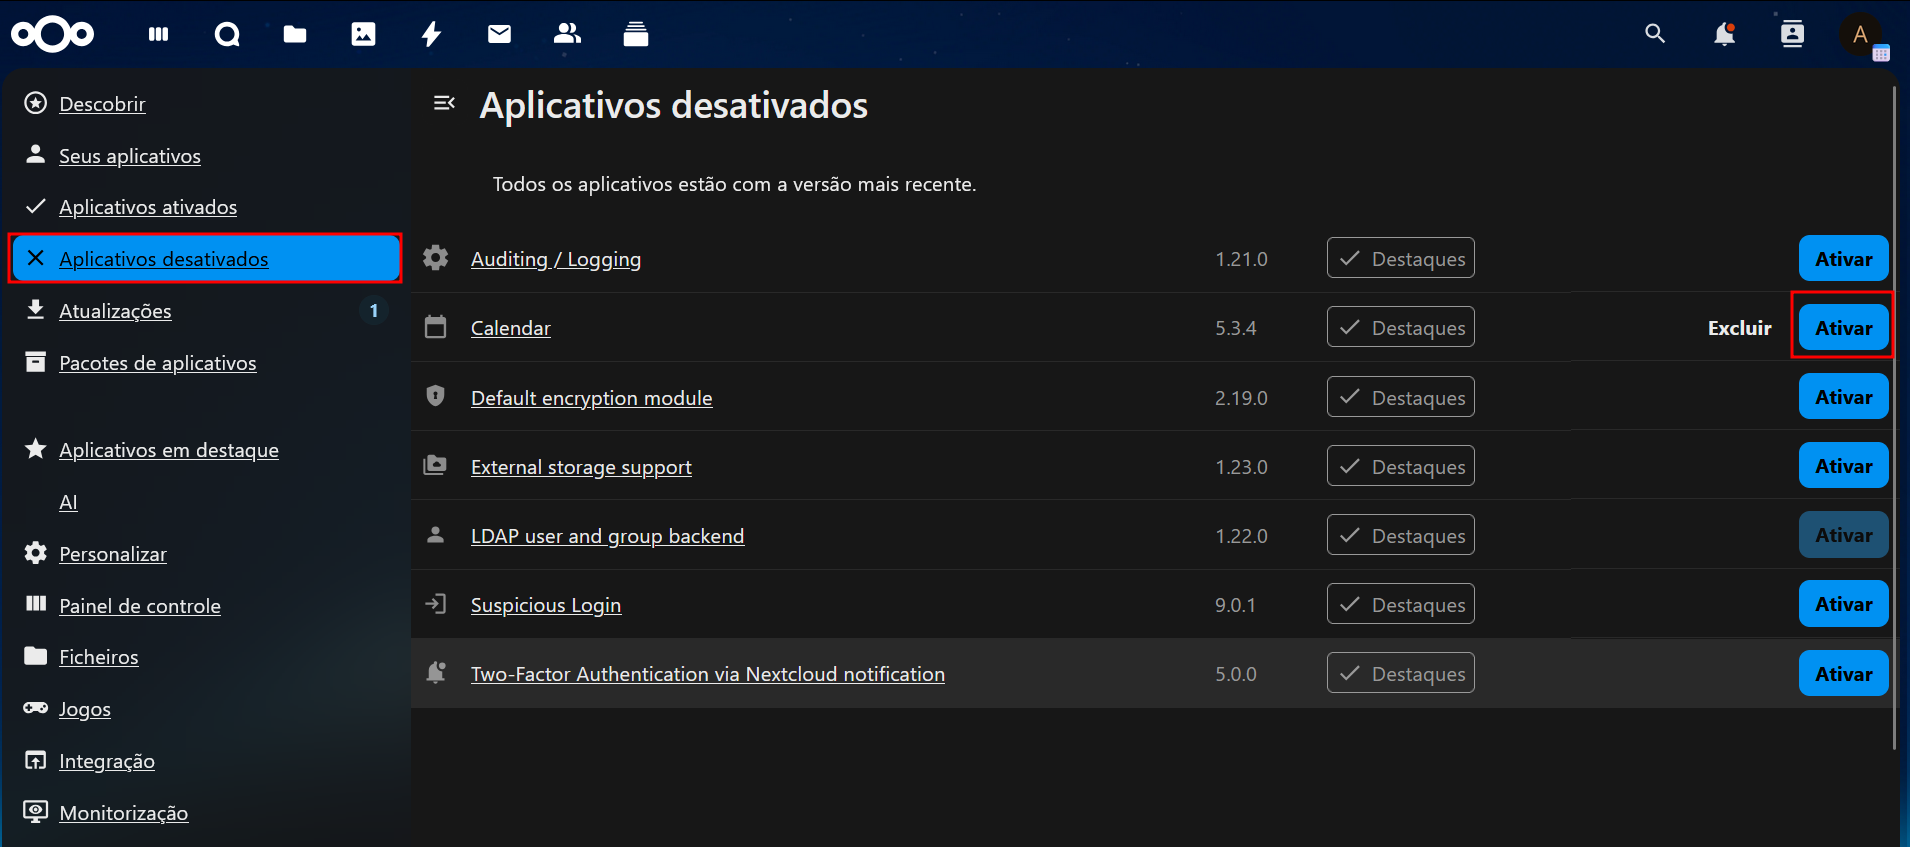
If the Calendar app is not yet available in your Nextcloud instance, follow the steps below to install it:
- Access the Nextcloud panel with your administrator account.
- Click the top right menu (user icon) and select Apps.
- In the side menu, go to Office & Text or Disabled Apps.
- Search for Calendar and click Install.
🗓️ Using the Calendar
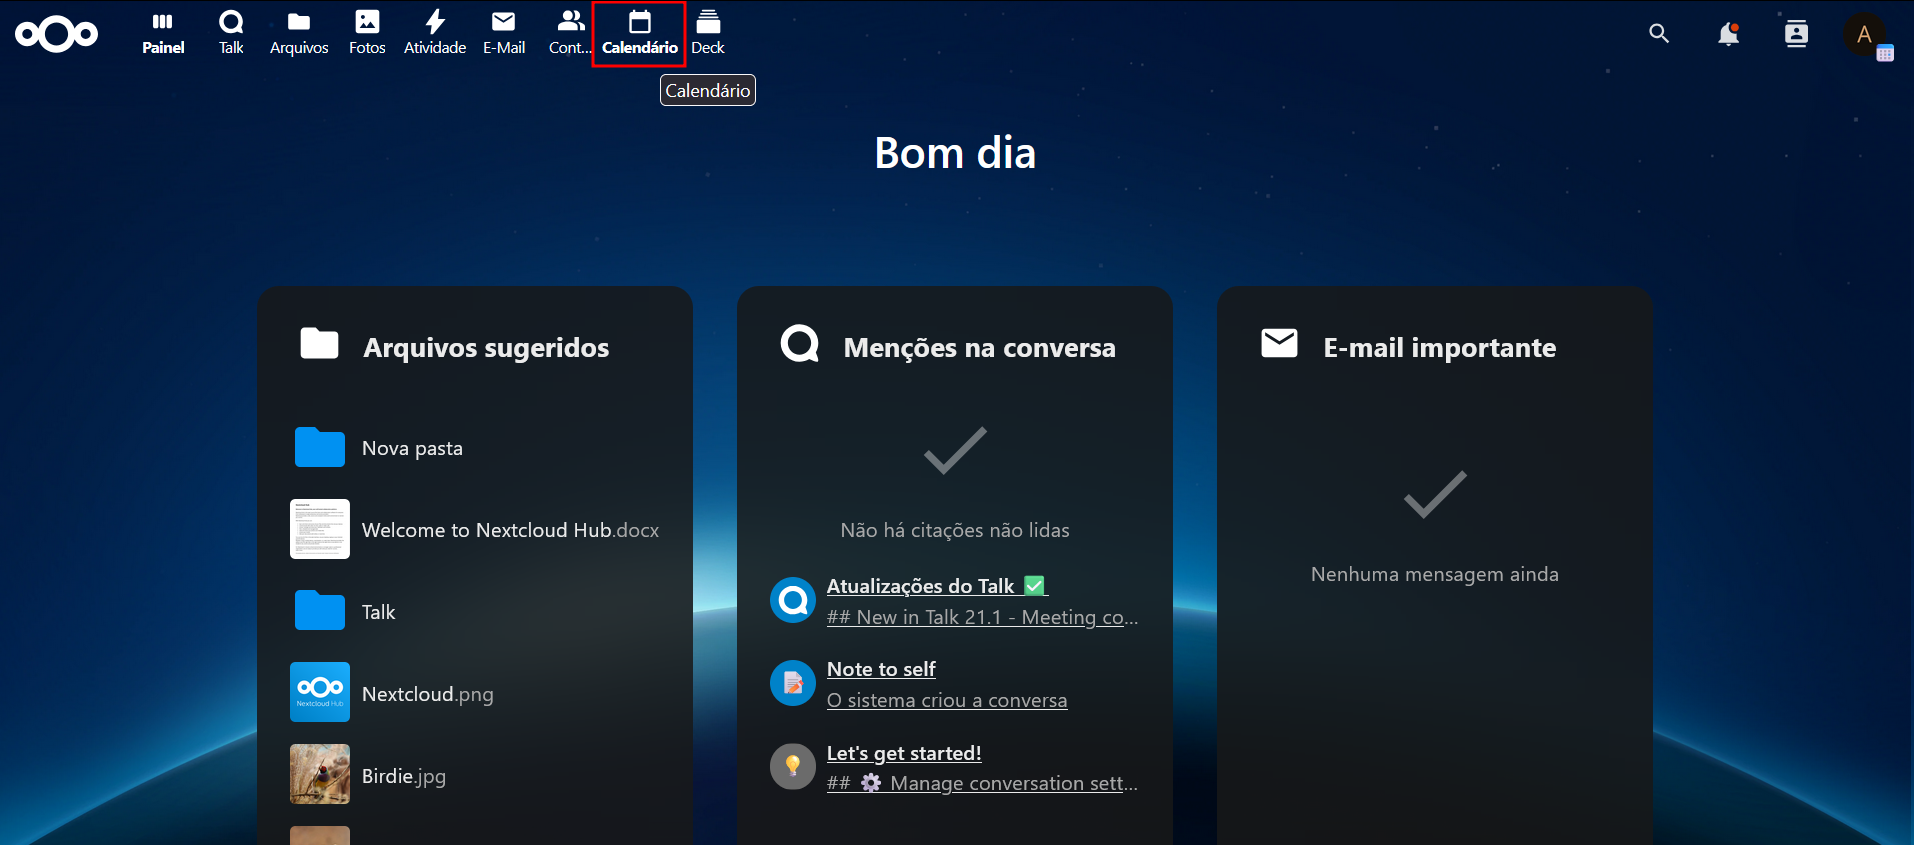
With the app installed, access the Calendar interface through the main Nextcloud menu.
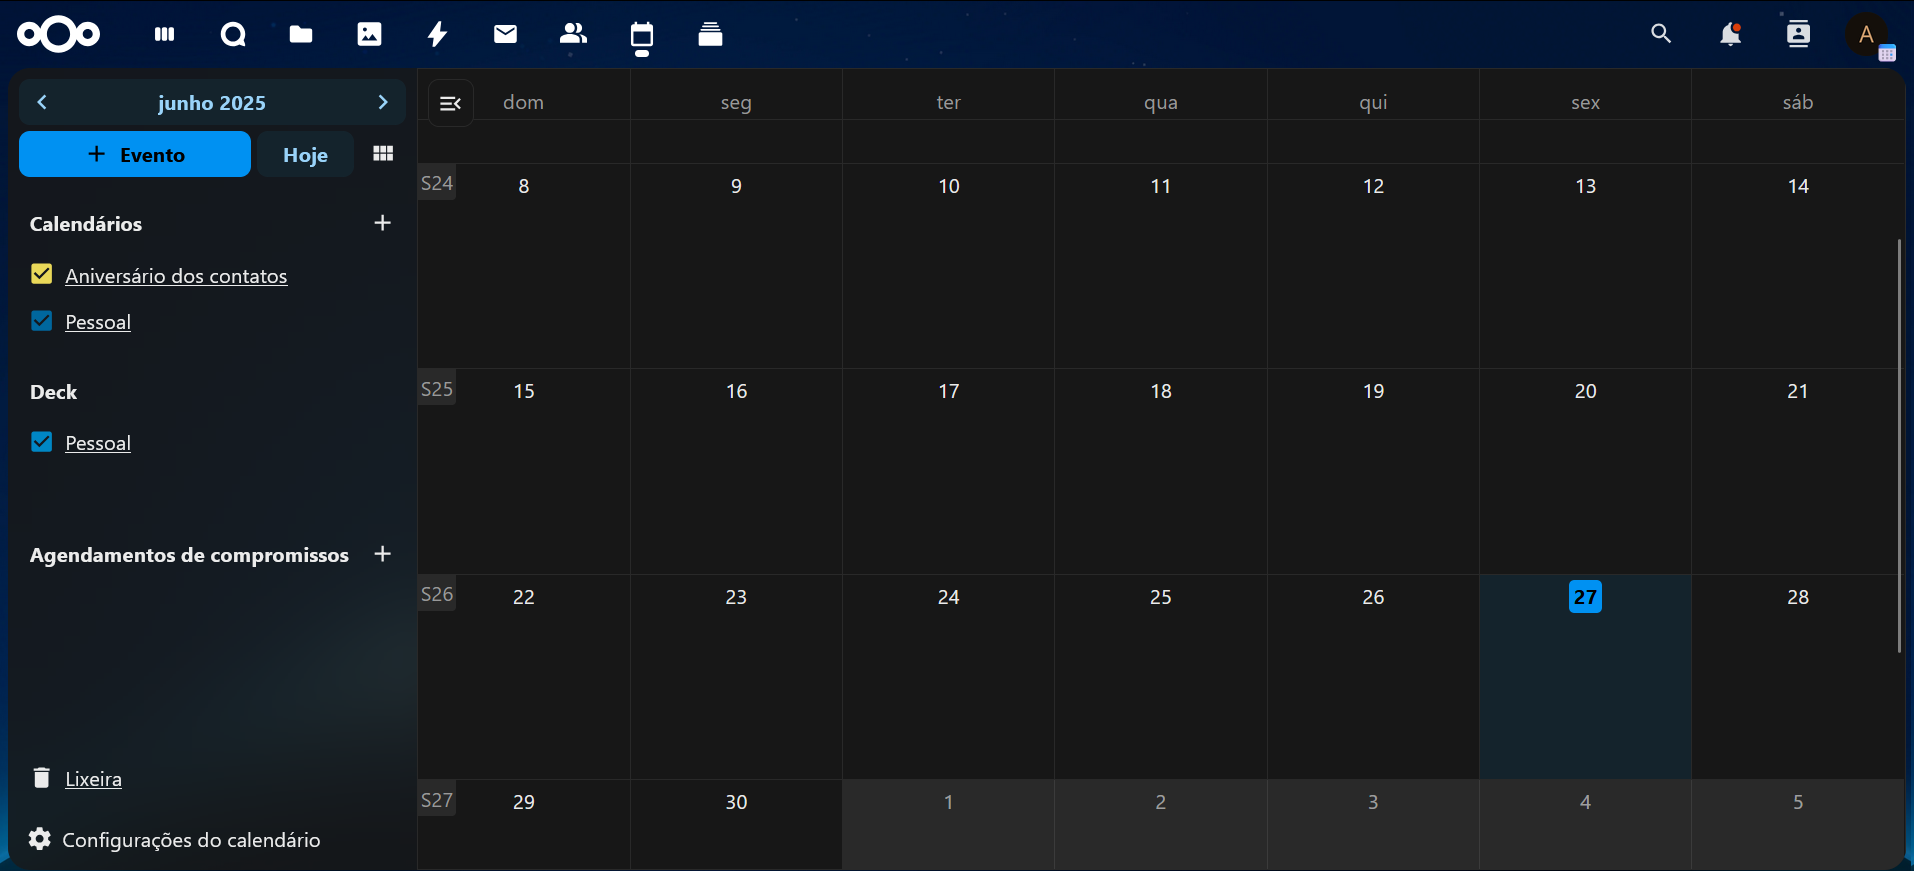
✅ Main Features:
- Create single and recurring events
- Add descriptions, location, and participants
- Set reminders and notifications
- Organize events in multiple calendars
- Sync via CalDAV with external devices
- Import and export
.icsfiles - Invite other Nextcloud users to shared events
⏰ Scheduling and Resources
With the Nextcloud calendar, you can:
- Schedule meetings or appointments
- Create specific calendars for meeting rooms, equipment, or projects
- Share resource calendars with multiple users
- Easily track resource availability
🔄 Integrations via CalDAV and WebCal
Nextcloud Calendar can be synchronized with external devices and apps (such as Thunderbird, Outlook, iOS, Android) using CalDAV or WebCal.
📱 CalDAV Address
For synchronization, use the following address:
https://yourdomain.com.br/remote.php/dav
Your CalDAV client will ask for:
- User: your Nextcloud login
- Password: the same password used for login
- Server address:
https://seudominio.com.br
➕ Create Event
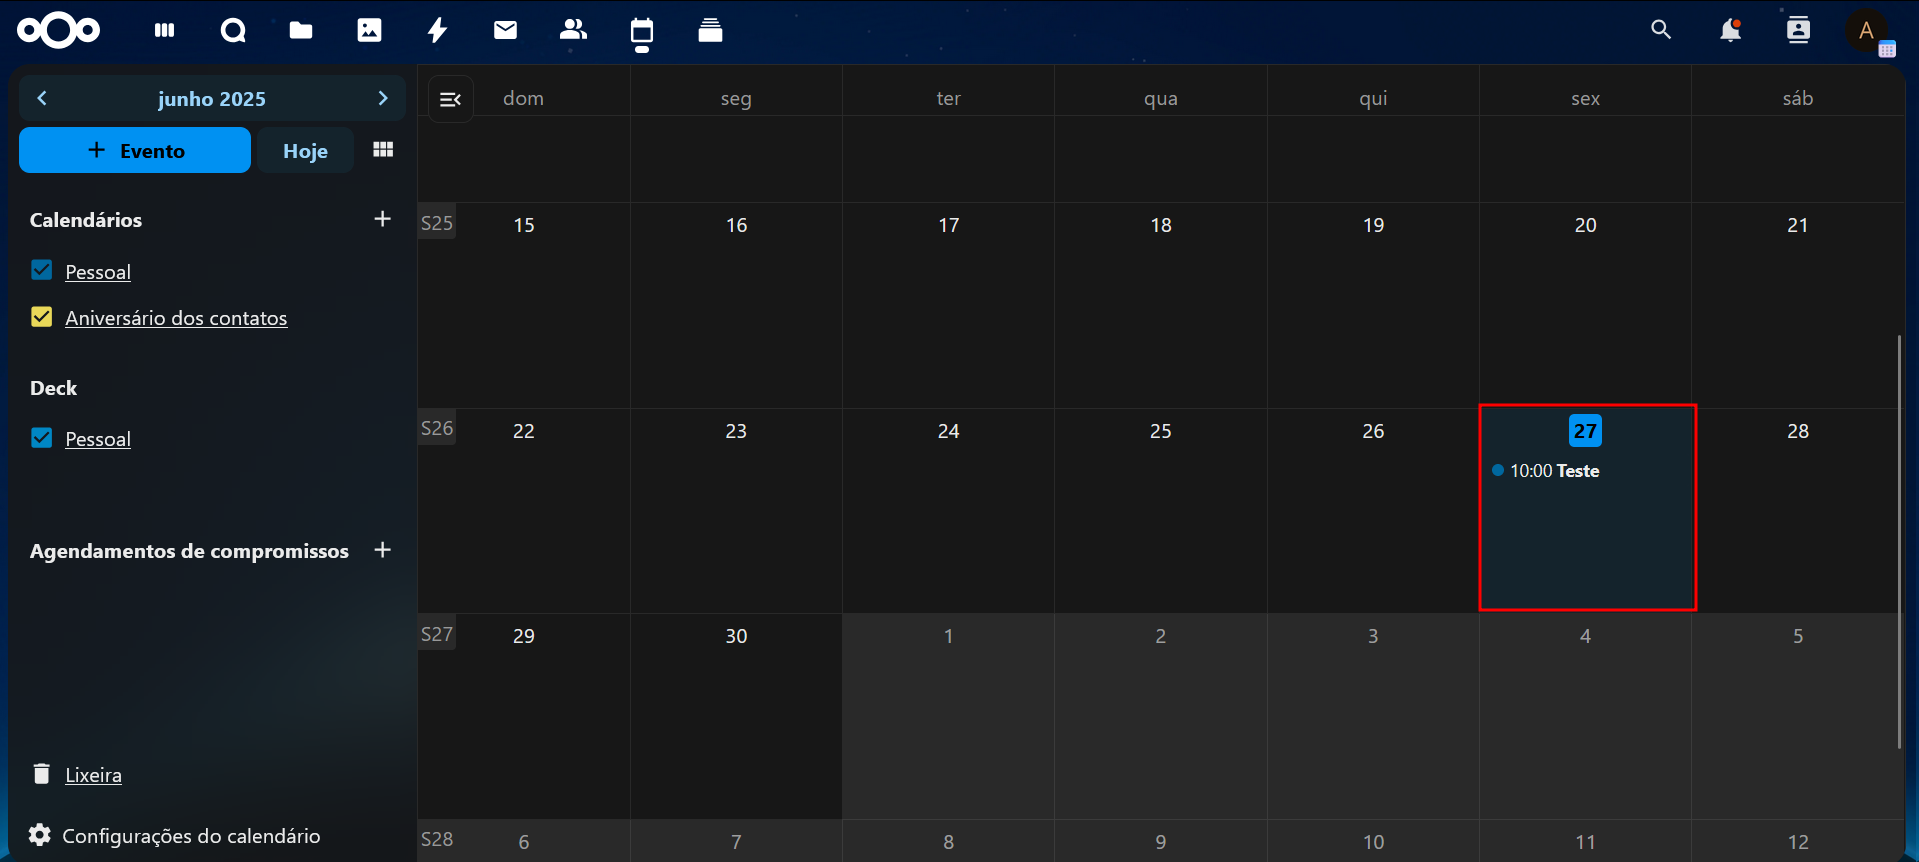
- Click on the desired area of the calendar.
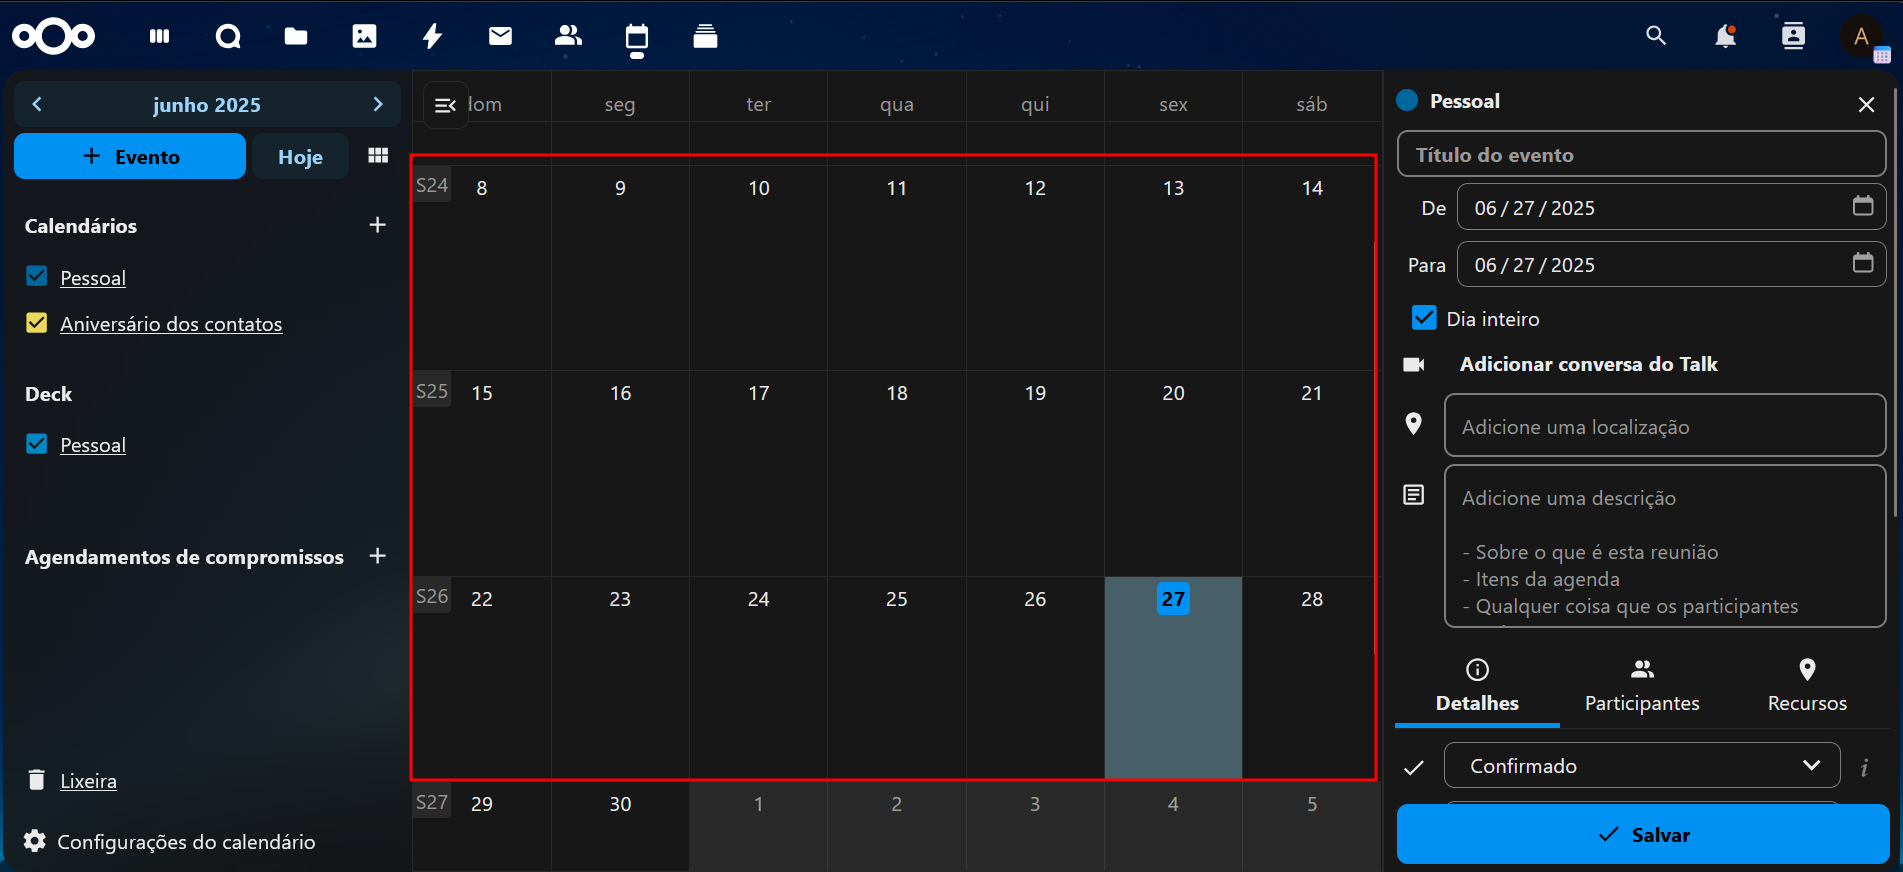
- Add name, location, description, and time.
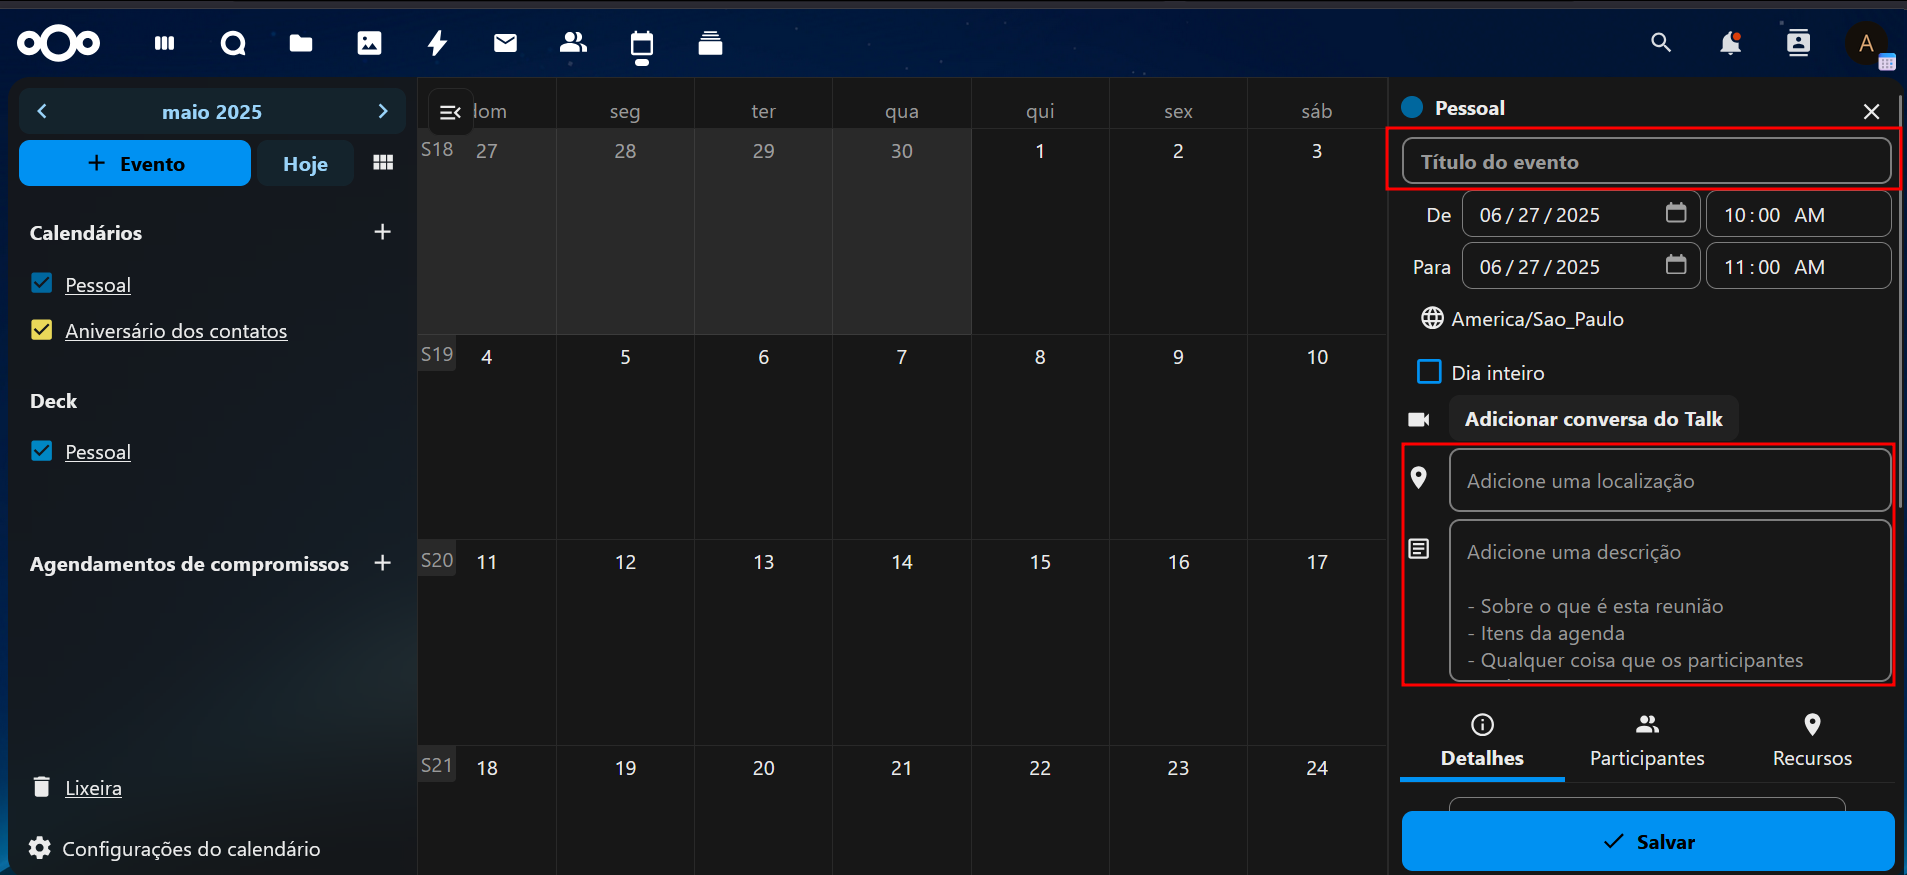
- Mark if it is a recurring or single event.
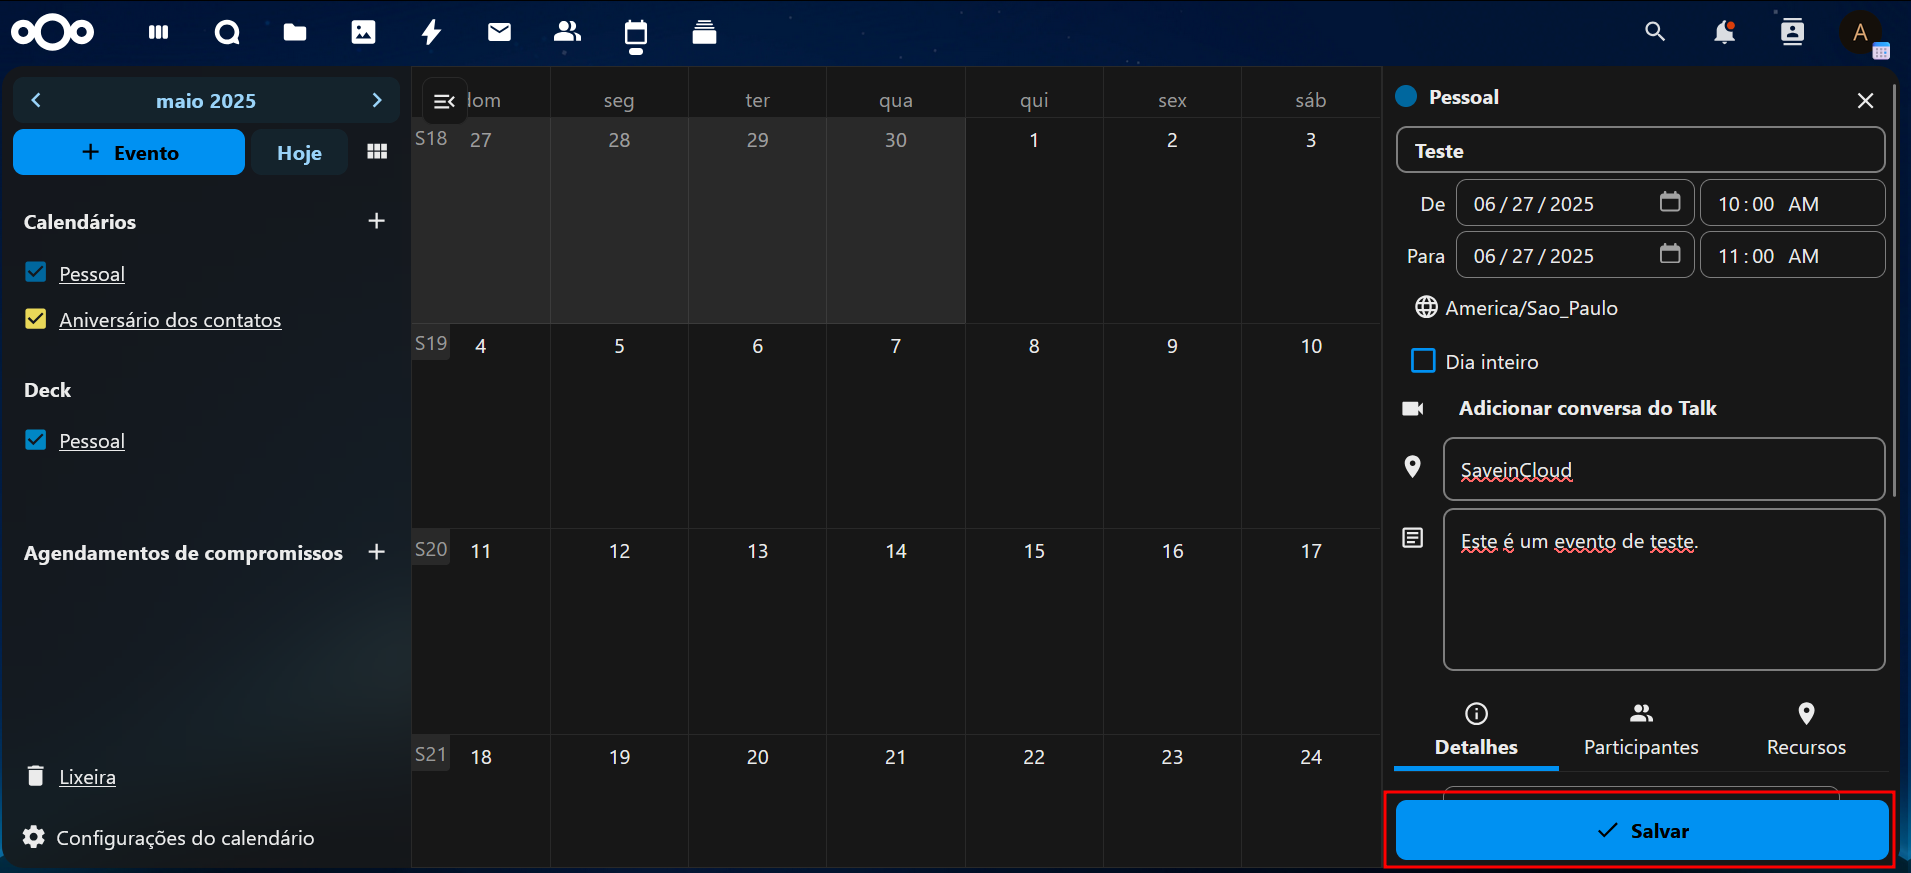
- Click Save.
🔄 Import and Export Calendars
📥 Import
- Click the Calendar Settings button next to the calendar.
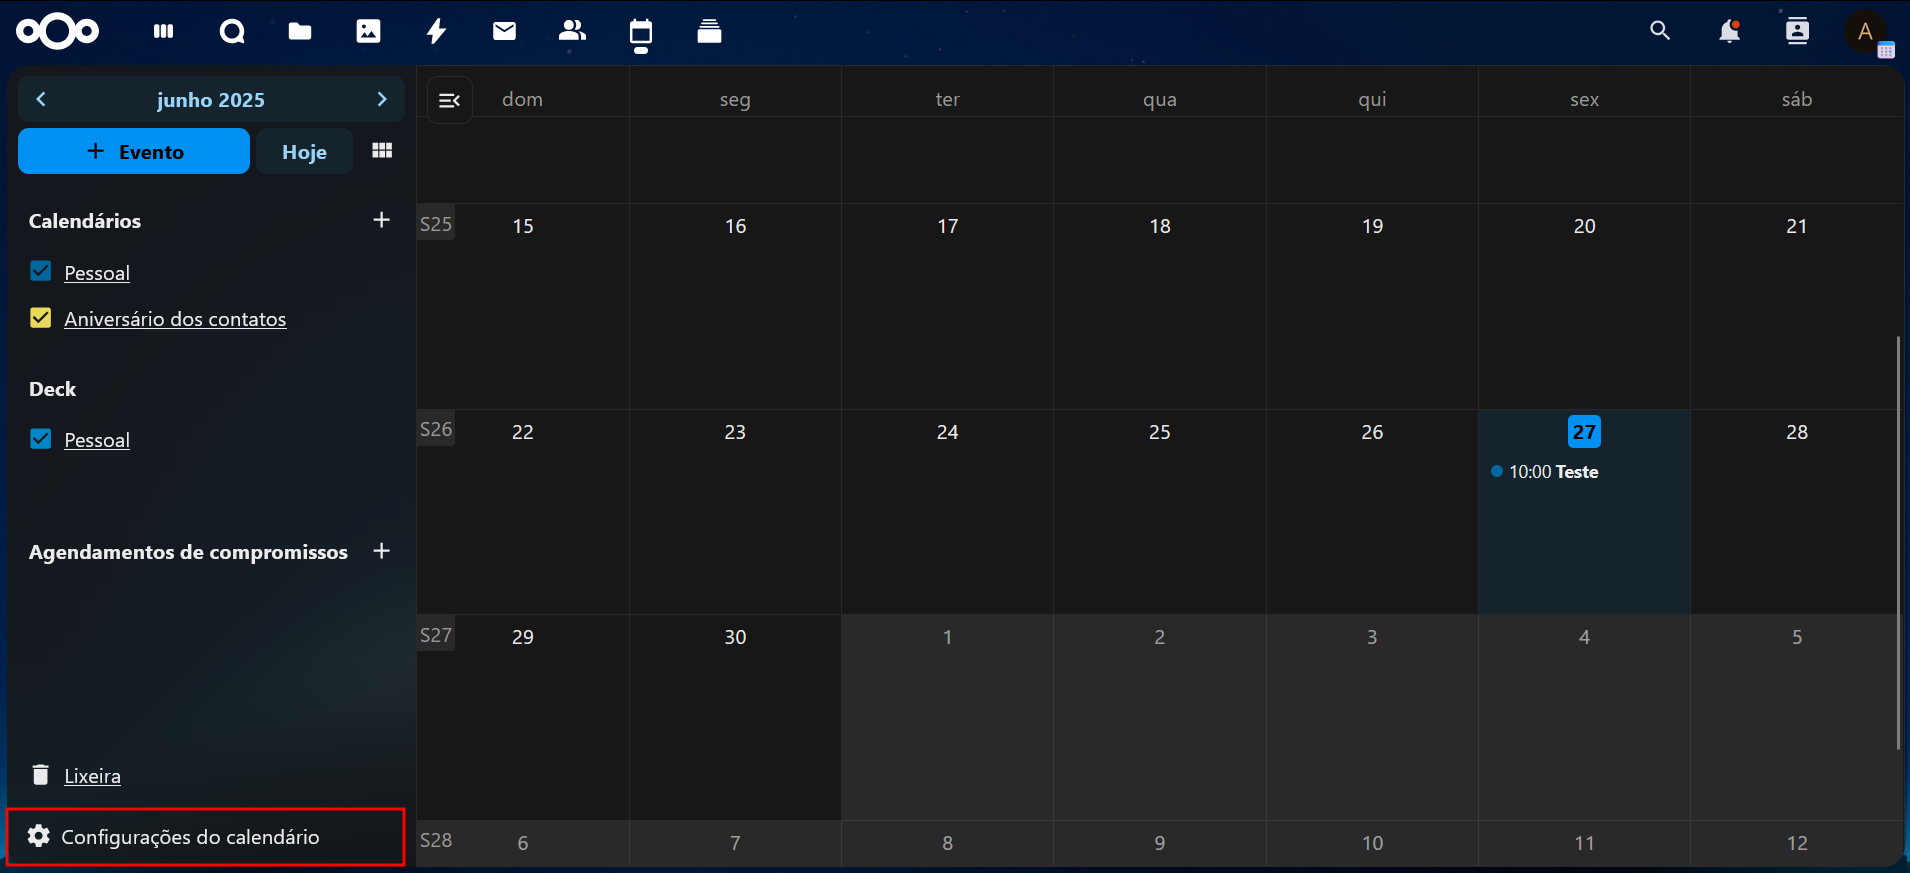
- Select Import calendar.
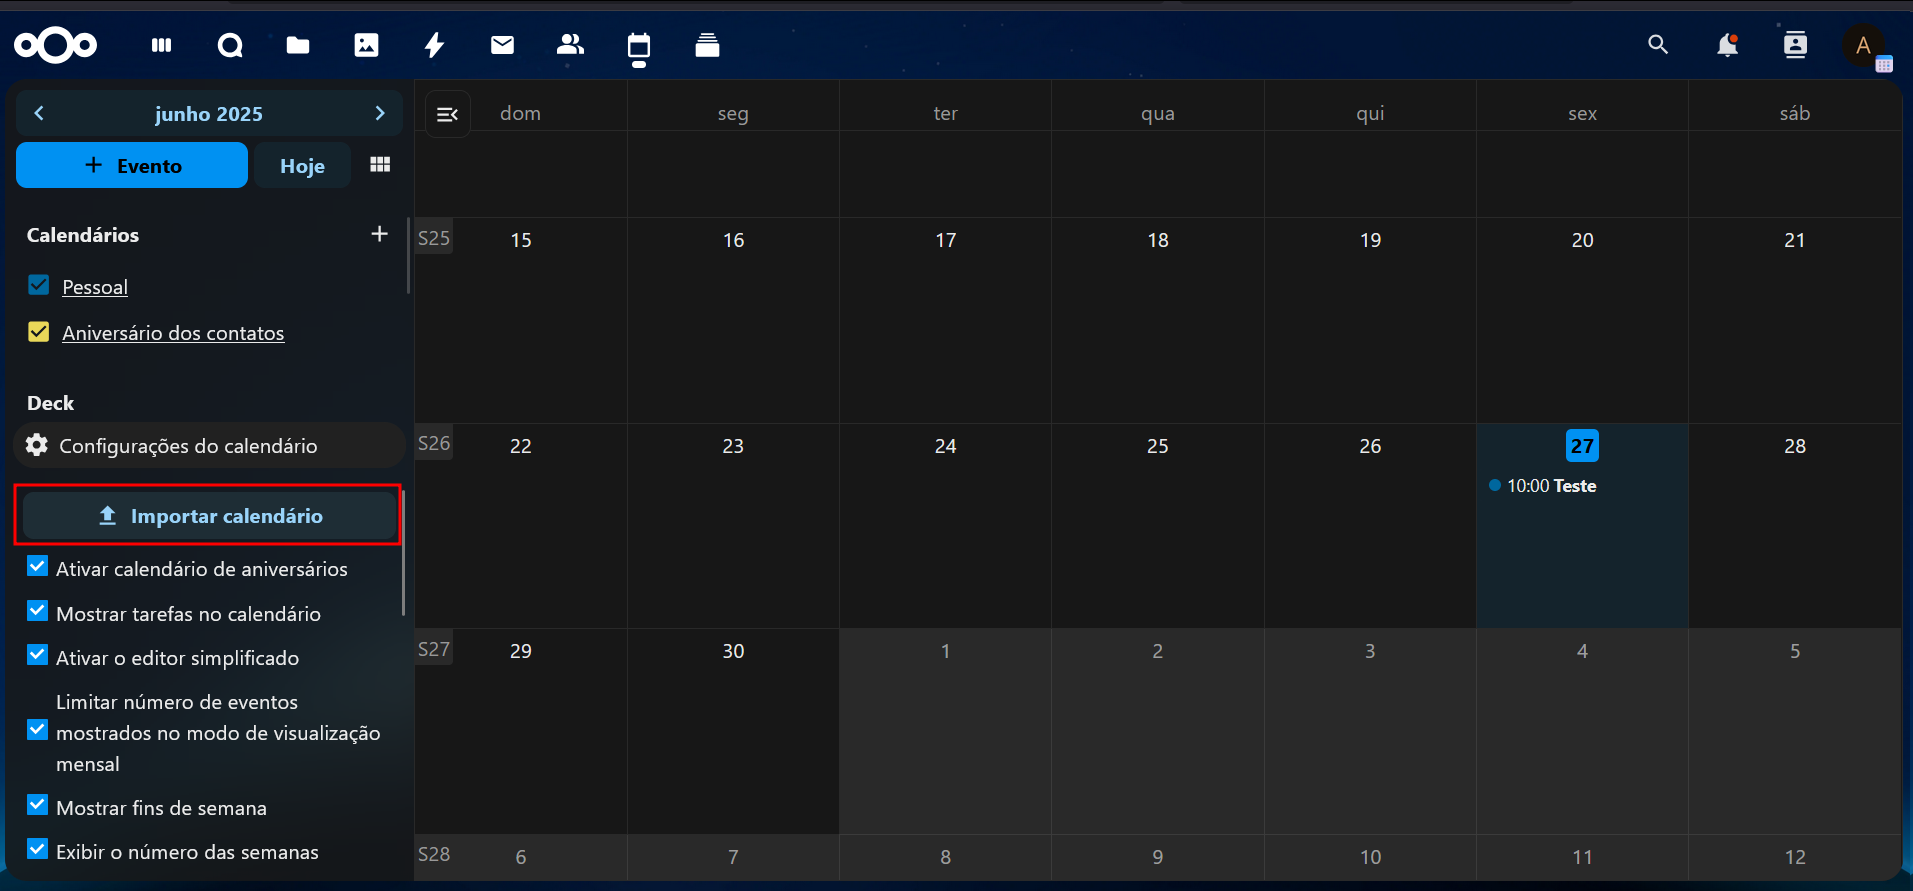
- Upload a
.icsfile.
📤 Export
- From the same menu, select Export.
- A
.icsfile will be generated for download.
🔔 Notifications
You can configure notifications by email or browser:
- When creating an event, click Add reminder
- Select the advance time and type (notification or email)
🌍 External Access
If you want to view your calendar on another device via the internet:
- Make sure your Nextcloud has SSL enabled (https).
- Use clients like Thunderbird, Outlook, iOS Calendar, or DAVx⁵ (Android).
- Configure the client with the CalDAV link and your credentials.
🛠️ Troubleshooting
❌ Common Issues:
- Events not showing? → Check if the calendar is marked as visible.
- Sync failing? → Verify CalDAV is properly configured.
- Wrong times? → Check the time zone in personal settings.
- Error importing .ics? → Confirm the file is not corrupted and is in the correct format.
🗣️ Extra Tip: Language
To change the Nextcloud interface language (including the calendar):
- Go to Personal Settings.
- Navigate to Personal Info.
- Choose the desired language under Language.
With the Nextcloud Calendar, you organize your routine with full control, security, and collaboration!