✉️ Deploying the Poste.io Mail Server
Poste.io is a complete solution for managing email servers with a web panel, support for TLS/SSL, SPF, DKIM, integrated antivirus, and antispam. This documentation guides you through deploying the application via the SaveinCloud Marketplace.
🚀 How to Install
- Access the SaveinCloud Panel.
- Search for
Poste.ioin the Marketplace. - Click Install.
- Fill in the fields:
- Platform Hostname
- Display Name
- Datacenter Region
❗ Important: To use Poste.io correctly, you need an external domain (do not use only the platform hostname).
📦 Provisioned Environment
A Docker environment will be created with the following docker-compose.yaml:
version: '3'

services:
  mailserver:
    image: analogic/poste.io
    container_name: poste
    restart: always

    ports:
      - "80:80"
      - "443:443"
      - "25:25"
      - "110:110"
      - "143:143"
      - "587:587"
      - "993:993"
      - "995:995"
      - "4190:4190"

    environment:
      - TZ=America/Sao_Paulo
      - h=change-me.here
      - HTTP_PORT=80
      - HTTPS_PORT=443

    volumes:
      - /etc/localtime:/etc/localtime:ro
      - /data/mailserver:/data
🧠 The value h=change-me.here must be edited manually after provisioning.
🛠️ Adjusting the Hostname in YAML
After the environment is running:
- Access the instance terminal.
- Run:
nano /home/poste/docker-compose.yaml - Locate the line:
- h=change-me.here - Replace it with your domain (example):
- h=mail.seudominio.com.br - Save and restart the environment:
docker-compose down && docker-compose up -d
🌐 DNS Configuration
For proper operation, configure the following DNS records at your provider (e.g., Registro.br, Cloudflare):
| Type | Name | Value |
|---|---|---|
| A | mail.yourdomain.com | [Public IP of the instance] |
| MX | @ | mail.yourdomain.com |
| TXT | @ | v=spf1 mx ~all |
| TXT | _dmarc | v=DMARC1; p=none; |
| TXT | default._domainkey | (provided after DKIM is active) |
🔐 SaveinCloud does not provide DNS/Nameserver — use your domain's control panel.
🧪 Initial Setup
Access the URL:
http://mail.seudominio.com.br/admin/install/server
You will see the following screen:
📌 First poste.io configuration
- Mailserver hostname: Fill in with
mail.seudominio.com.br - Administrator email: Will be filled automatically.
- Password: Create the administrator password.
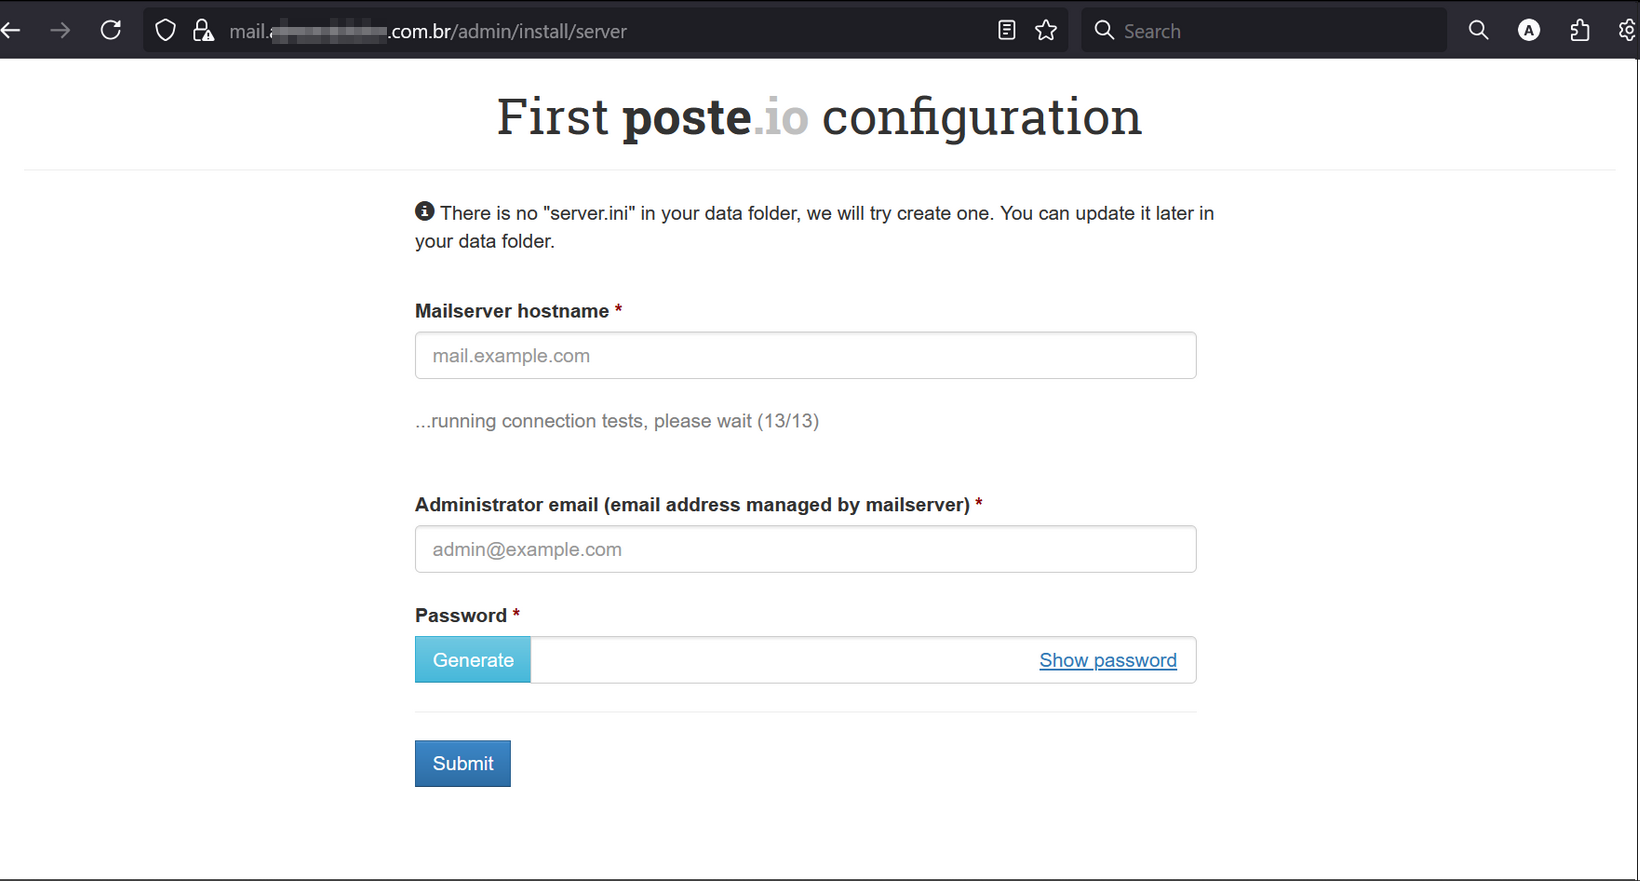 Click Submit to complete the initial setup.
👤 Creating Email Accounts
- Access the panel:
http://mail.seudominio.com.br/admin/box/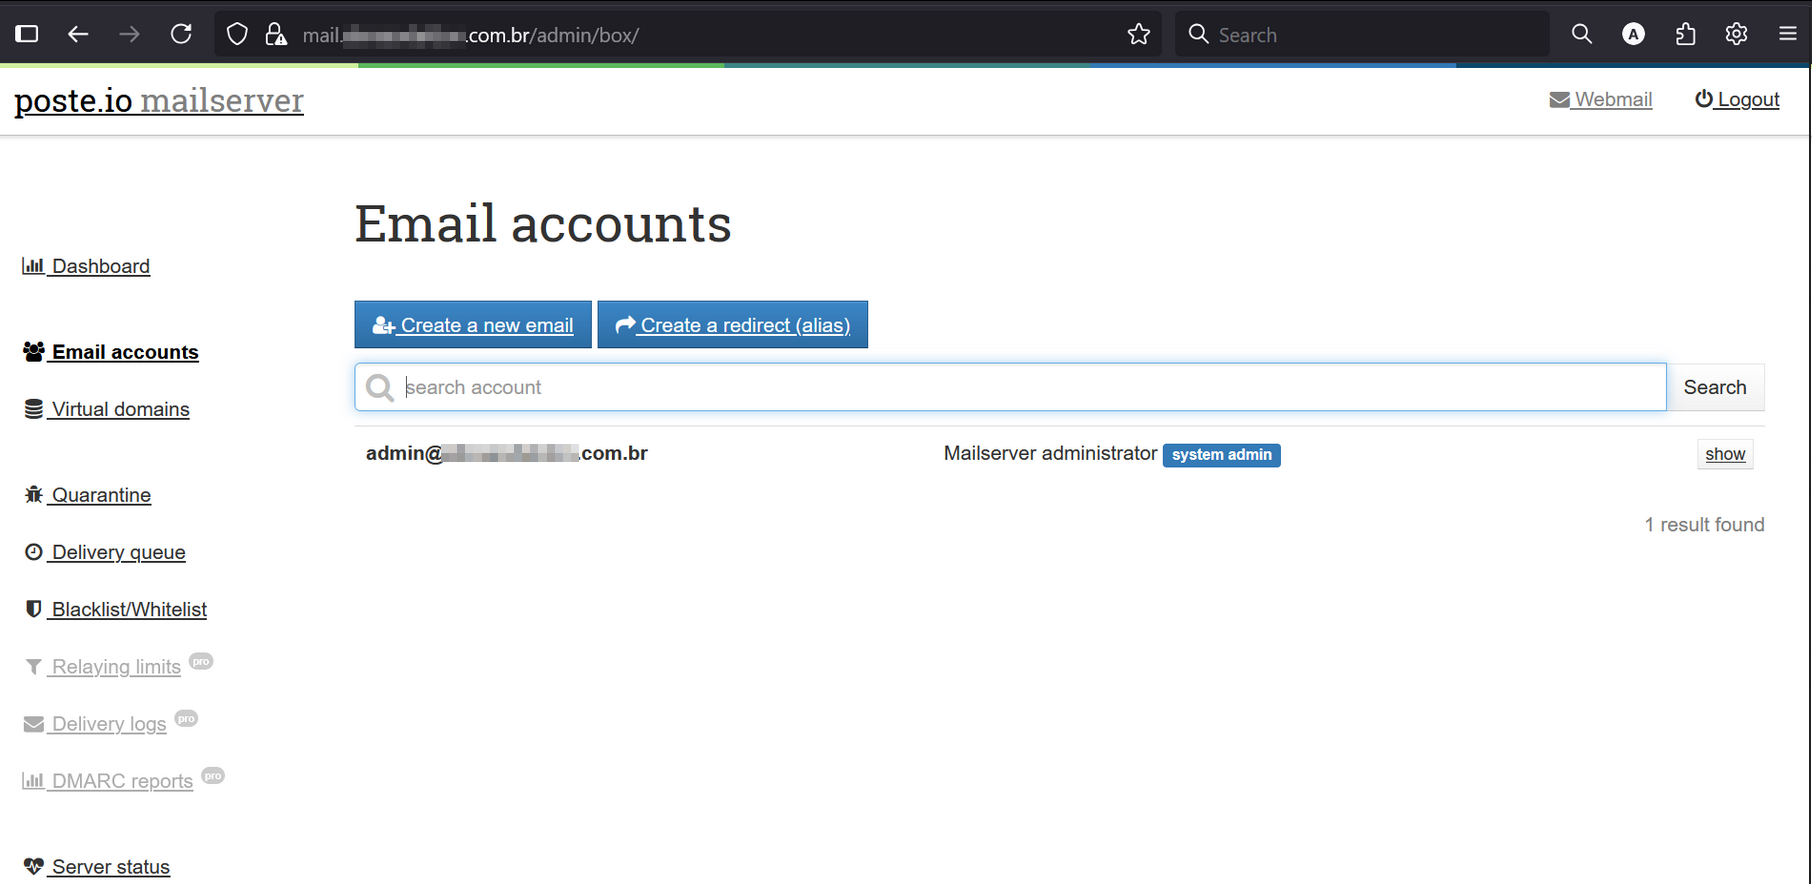
- Go to Email accounts
- Click Create a new email
- Fill in the account details (name, password)
You can also create:
- Redirect (alias) for forwarding
- Alias for alternative addresses
🔒 Enabling HTTPS with Let's Encrypt
To issue a free TLS certificate:
-
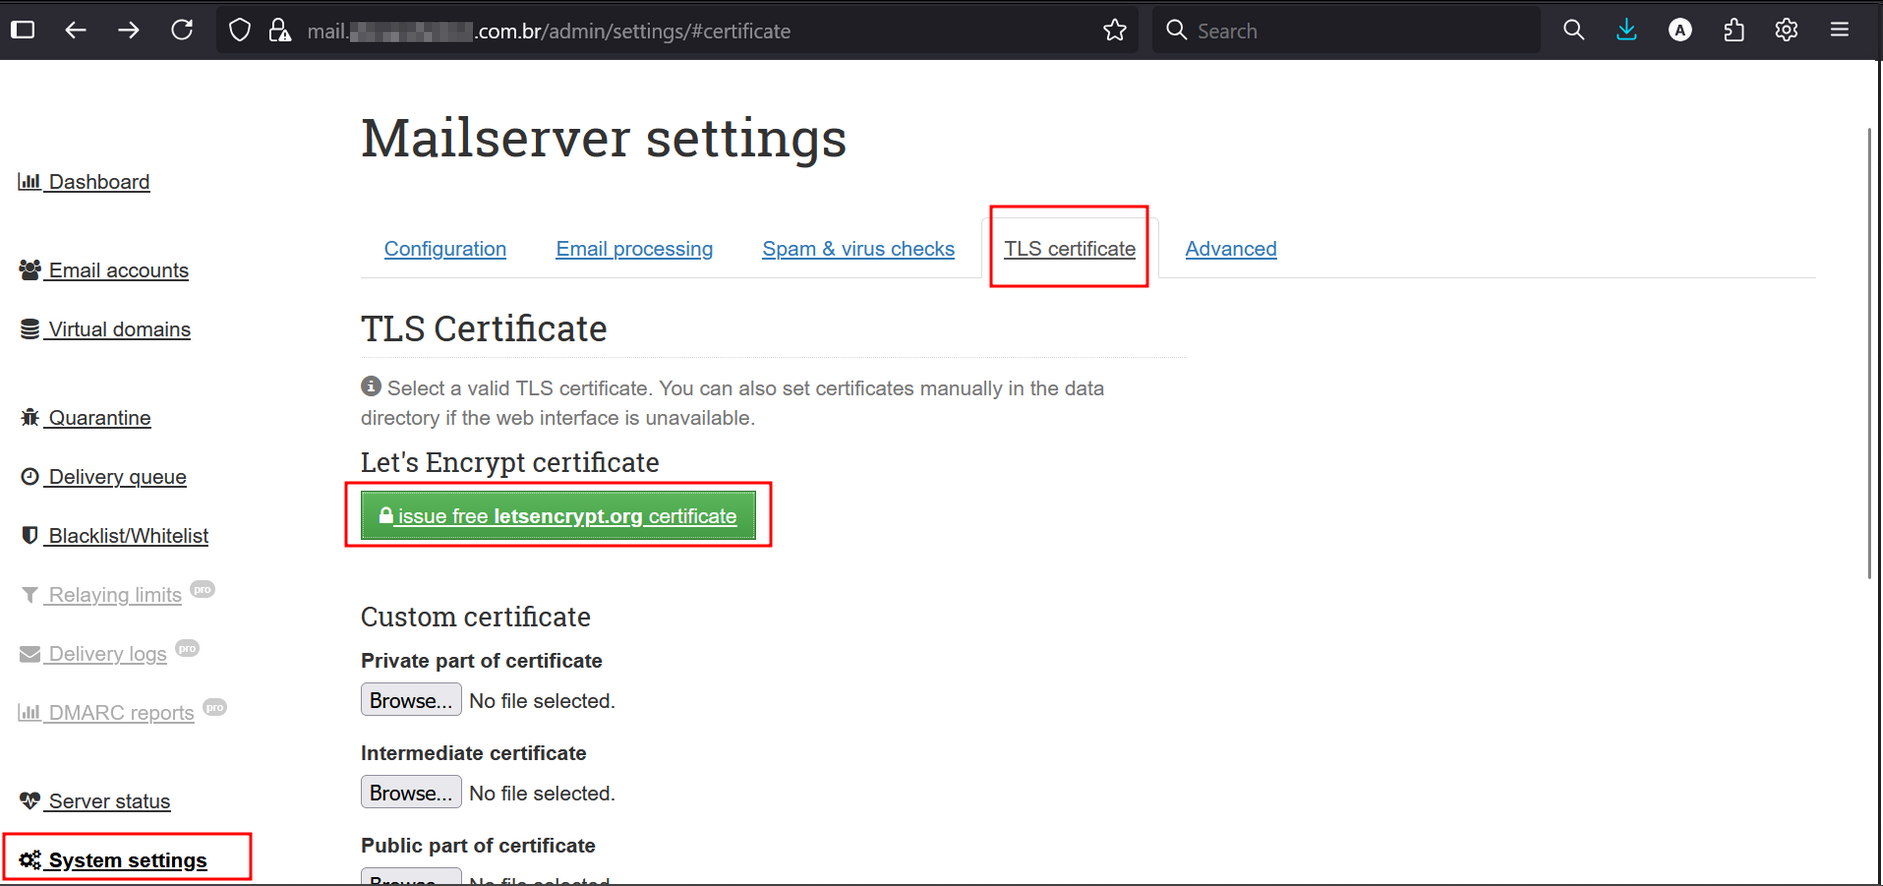
Access:
System settings>TLS Certificate -
Click Issue free letsencrypt.org certificate
-
Check the Enabled option
-
Click Save changes
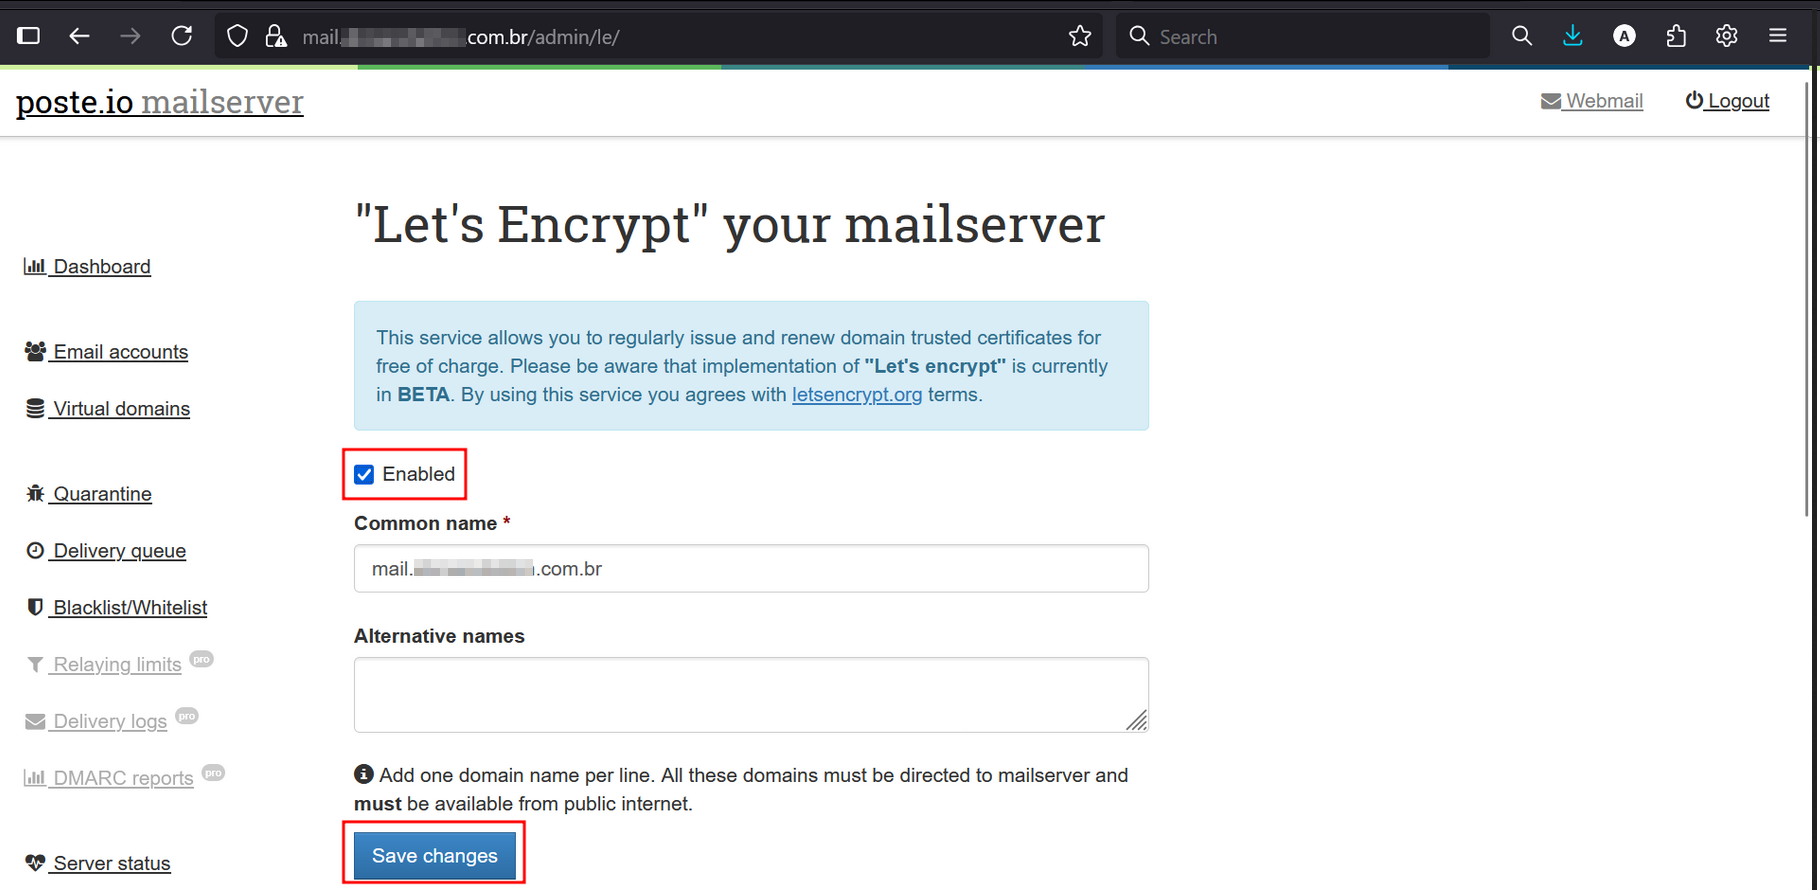
Within seconds, your domain will have HTTPS enabled and be Ready to Use.
📬 Accessing Webmail (Roundcube)
Poste.io comes with Roundcube Webmail integrated, allowing users of created email accounts to access, send, and receive messages directly through the browser.
🔑 Access URLs
-
Admin Panel:
Accessible via: mail.yourdomain.com/admin/Use the administrator account created during the initial setup to access the Poste.io admin panel.
-
Webmail (Roundcube):
Accessible via: mail.yourdomain.com/webmail
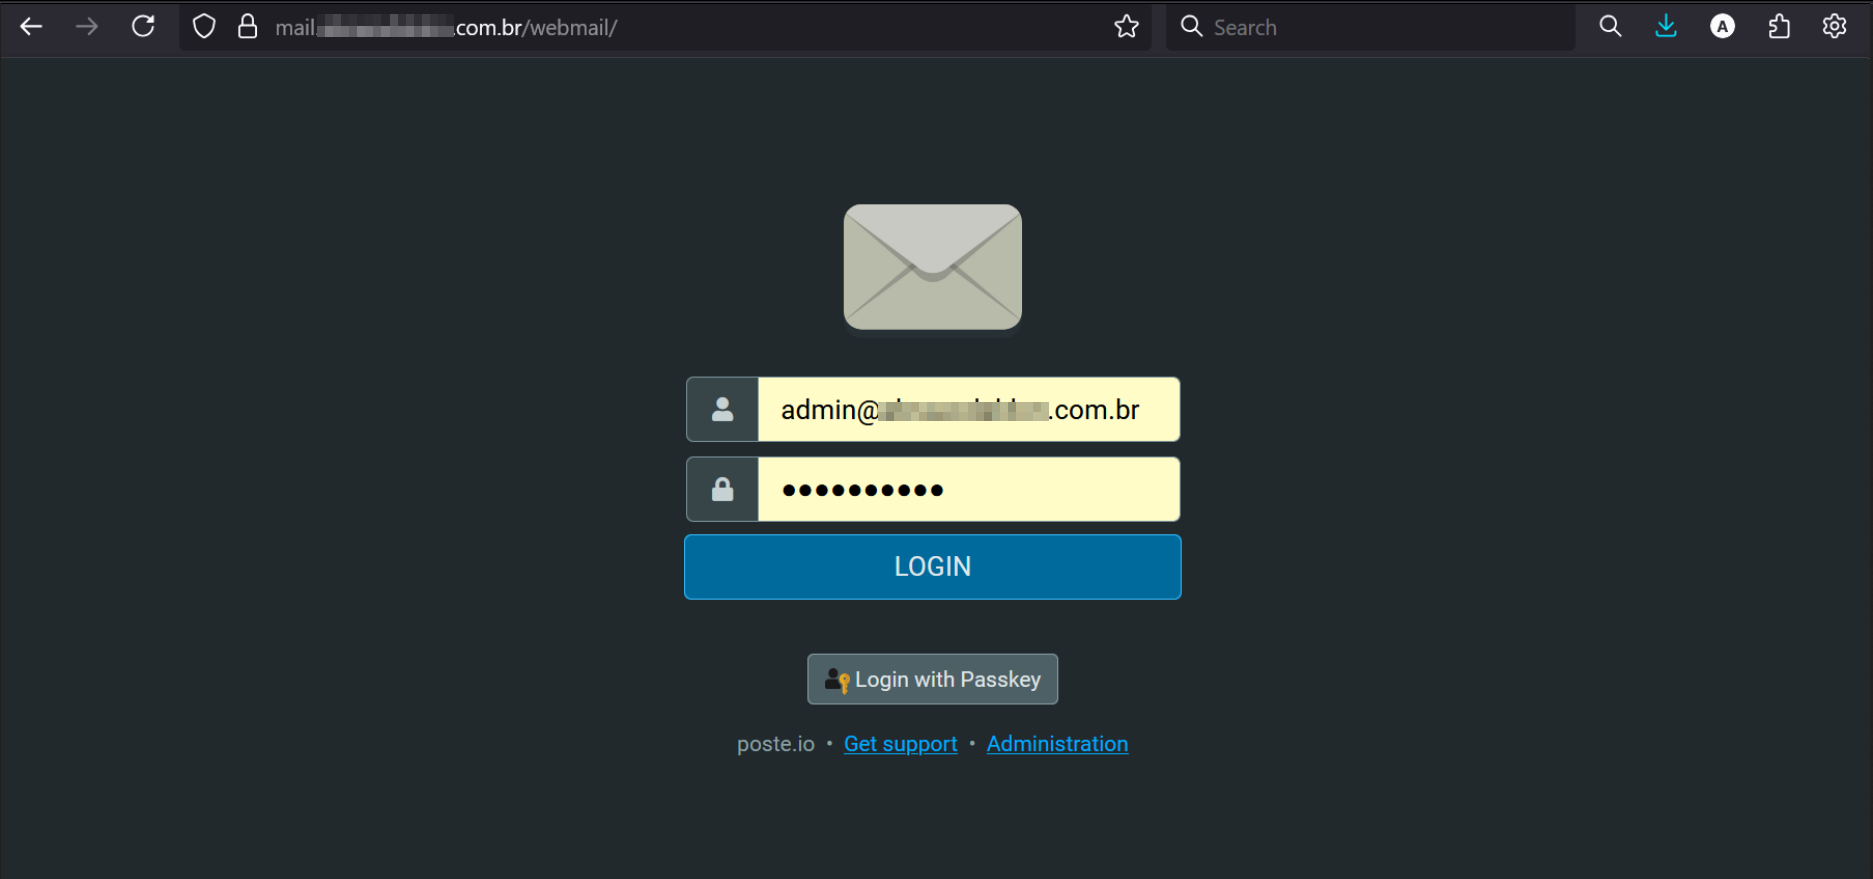
Users can log in with the email and password created in the Poste.io panel.
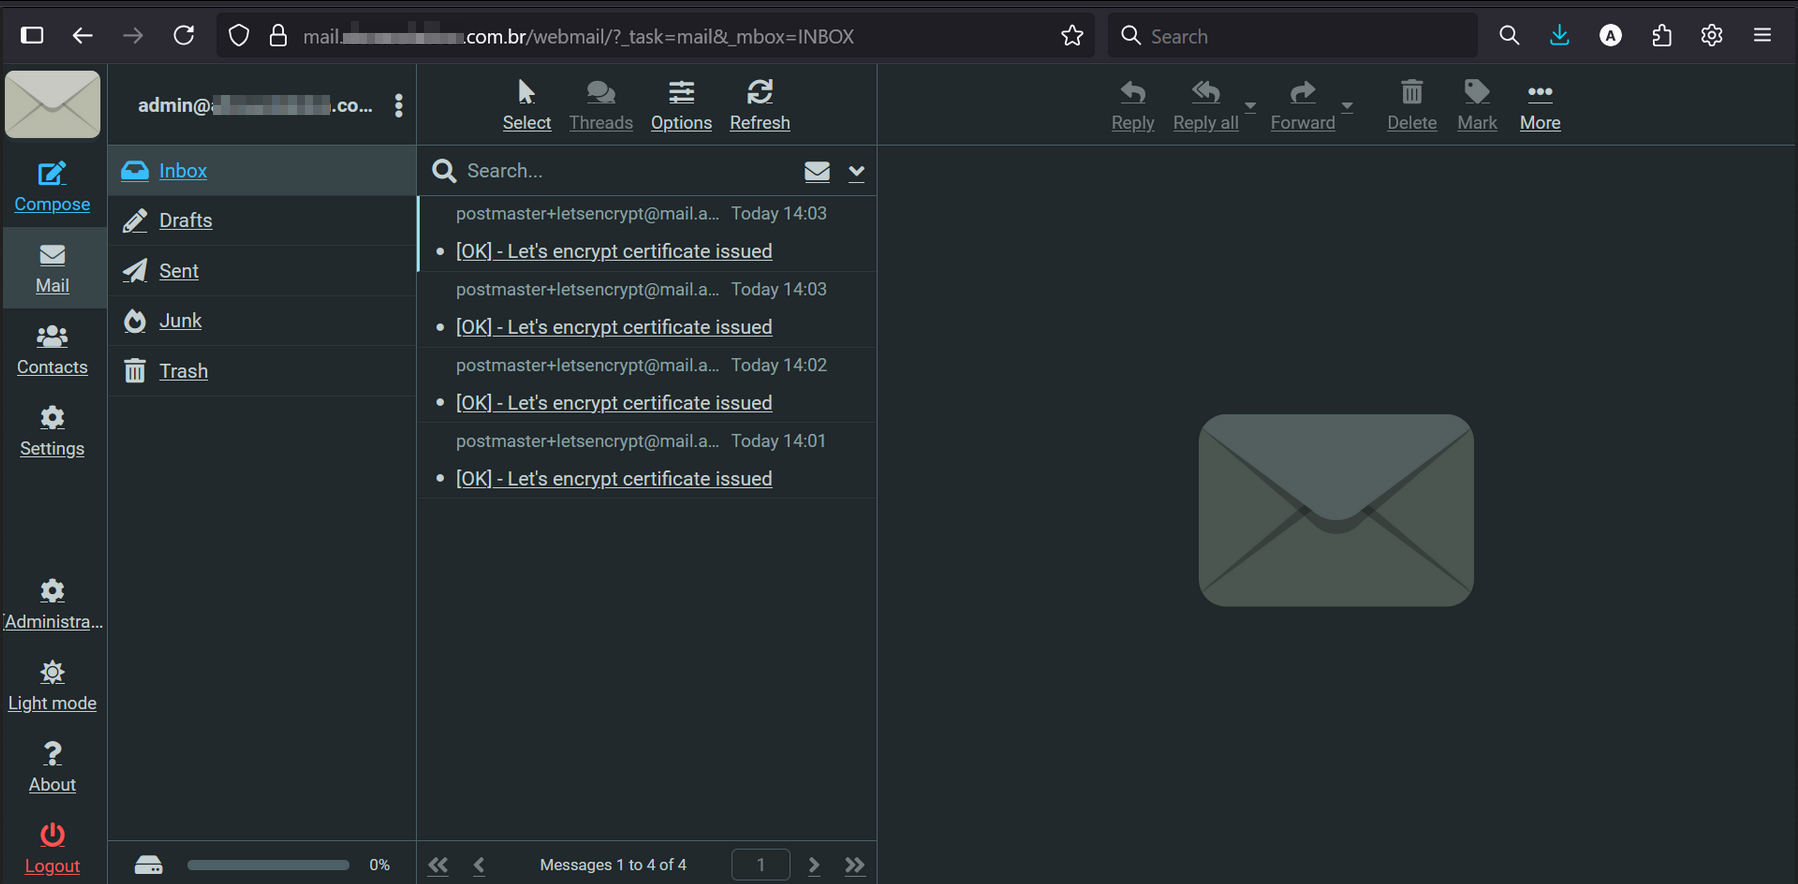
💡 Example login:
[email protected]+ defined password
🧪 Interface
The Roundcube interface is modern, responsive, and supports:
- Sending and receiving emails
- Folder creation
- Filters, auto-replies, and signatures
- Multi-language support
- Attachments and HTML
🛡️ Note: To ensure a secure connection, make sure the TLS certificate was successfully issued for the domain. Otherwise, the browser may show "not secure site" warnings.
⚙️ Environment Specifications
- Environment Type: Dockerized via Compose
- Persistence: Volume at
/data/mailserver - Resources: 28 Cloudlets
(Each cloudlet = 400MHz CPU + 128MiB RAM ≈ 11.2GHz + 3.5GB RAM) - Exposed Ports:
- 80 (HTTP)
- 443 (HTTPS)
- 25, 587 (SMTP)
- 110, 995 (POP3)
- 143, 993 (IMAP)
- 4190 (Sieve)
📝 Final Notes
- The TLS certificate will only be issued if the domain is correctly pointed with an A record to the environment's IP.
- On first access, the browser may show a "not secure site" warning. This is normal until HTTPS is active.