🔐 How to Change the Default RDP Port on Windows Server
Changing the default RDP (Remote Desktop Protocol) port is a security practice that helps protect your server against brute force attacks.
We will show you the visual and intuitive step-by-step! 🚀
🔥 Opening the new port in Windows Defender Firewall
-
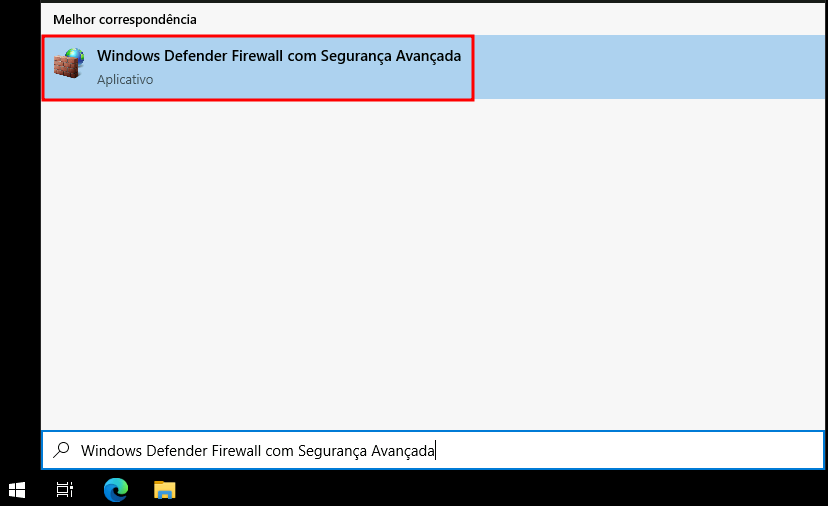
🧭 Open the Start menu and search for Windows Defender Firewall with Advanced Security
-
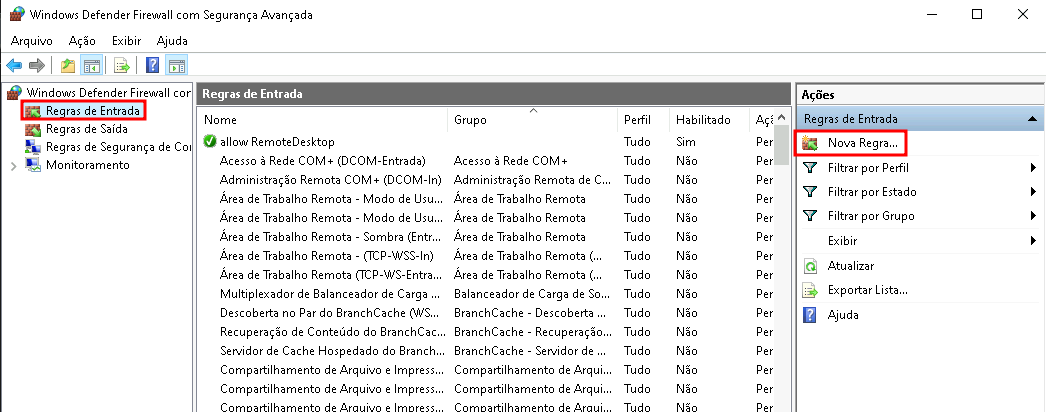
➕ Click on Inbound Rules in the left menu and select New Rule...
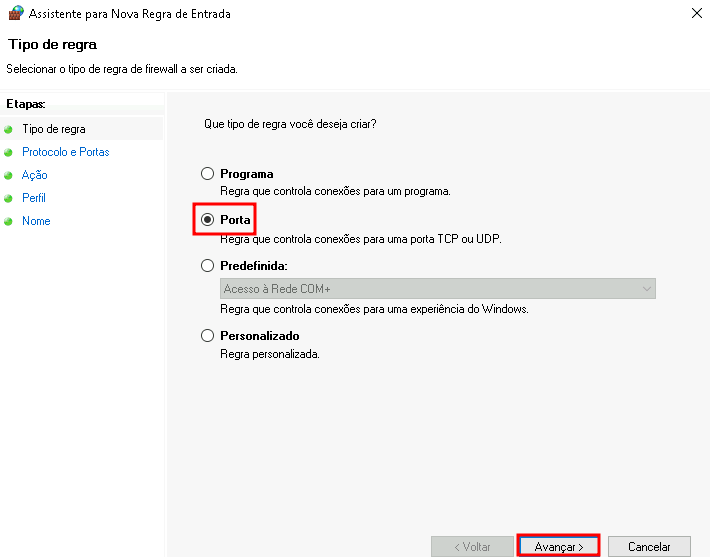
- 🔢 In the wizard, select Port and click Next
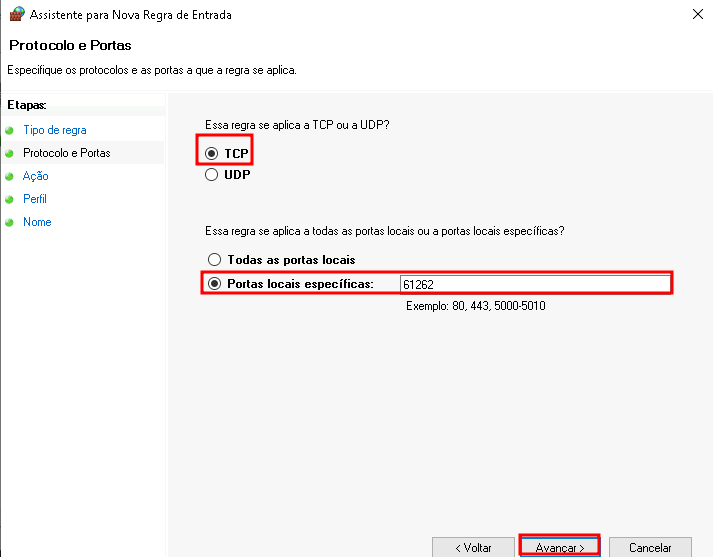
- 📍 Select TCP and enter the new port number in Specific local ports
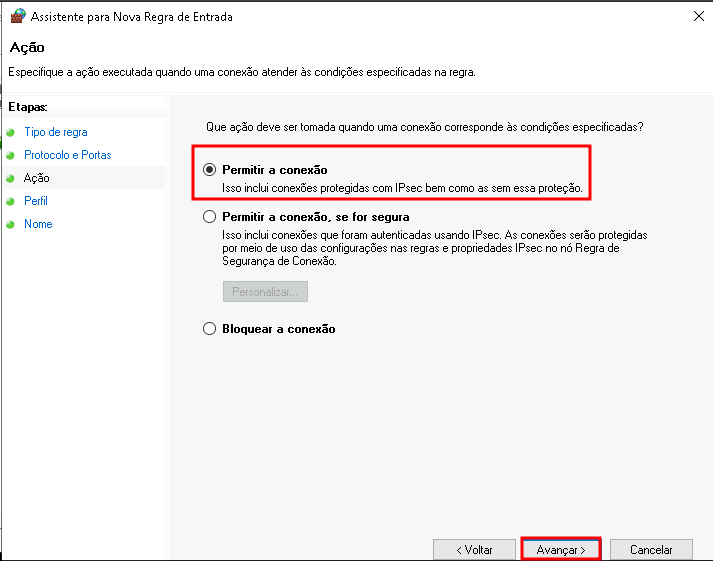
- ✅ Choose Allow the connection
- 🧩 In the profile step, check according to your needs (Domain, Private and/or Public)
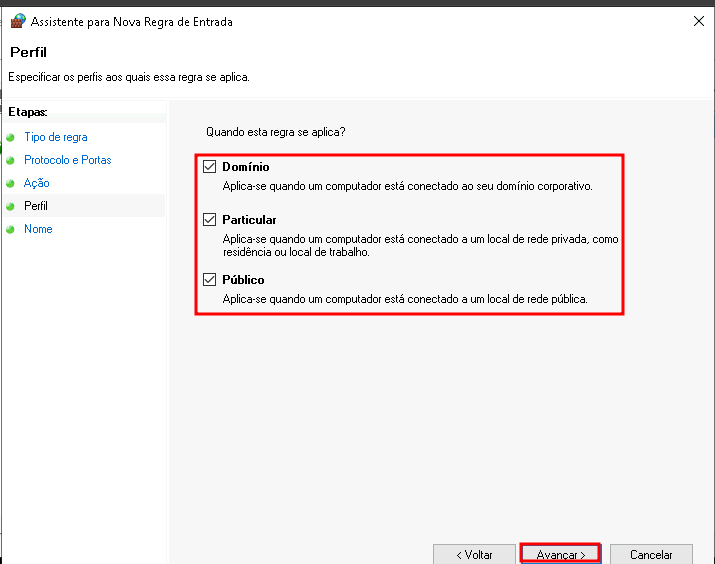
For internet (public) connections, do not forget to check "Public"!
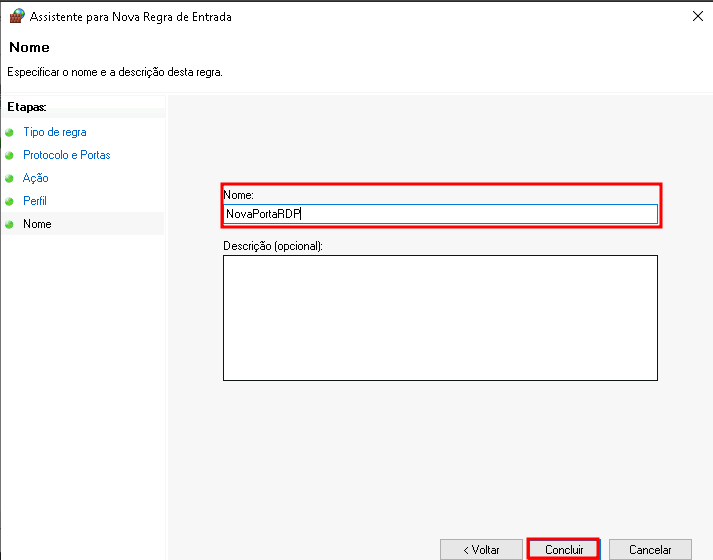
- 🏷️ Give a name to the rule and finish
🧠 Changing the RDP port in the Windows Registry
- 🪟 Press
Win + R, type regedit and press Enter
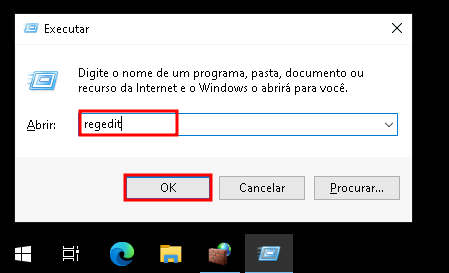
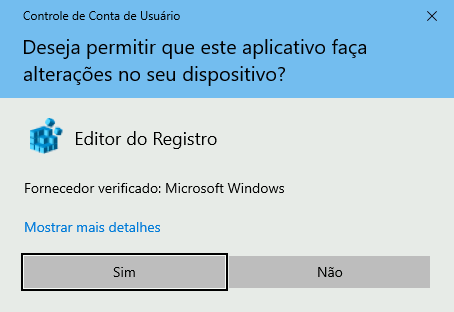
- 🛑 Authorize the execution by clicking Yes on the permission screen
-
🗂️ Navigate to the key:
HKEY_LOCAL_MACHINE\SYSTEM\CurrentControlSet\Control\Terminal Server\WinStations\RDP-Tcp -
🔁 Double-click on PortNumber
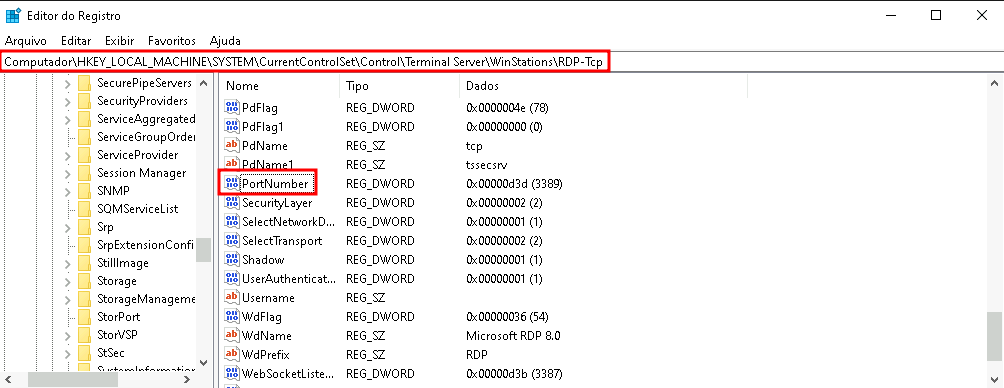
- 🔄 Check the Decimal option to see the current port number
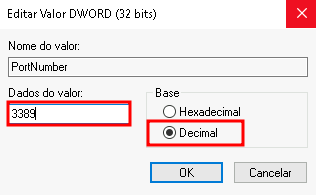
- ✍️ Change to the new port allowed in the firewall
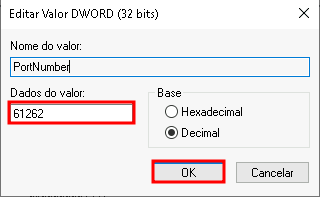
⚠️ Follow the steps carefully! A wrong configuration can leave you without remote access to the server!
After completing the steps above, restart your Windows Server for the settings to take effect!
💡 Alternative: use the NGINX load balancer
You may be adding an NGINX load balancer to your topology and then configure the stream so that the load balancer receives the access request on a high port and redirects it to your Windows Server via private IP and default port, preventing it from being directly exposed to the public network with the default port.
To learn more, click here!
🧠 Questions?
Contact technical support and send your question; we will be available to help you!