🐍 Configuring Apache with Python (WSGI) on SaveinCloud
⚠️ All configurations shown in this manual are simple and hypothetical examples. Adaptations may be necessary depending on your environment topology.
This guide shows how to deploy a Flask application using Apache with WSGI within the SaveinCloud platform.
✅ Recommended Requirements
Before starting the deployment, make sure the project contains:
- A correctly configured
wsgi.pyfile; - A
requirements.txtfile with the application dependencies.
Part 1 - Configuring Apache Python in the Topology
🔧 Step 1 – Topology Setup
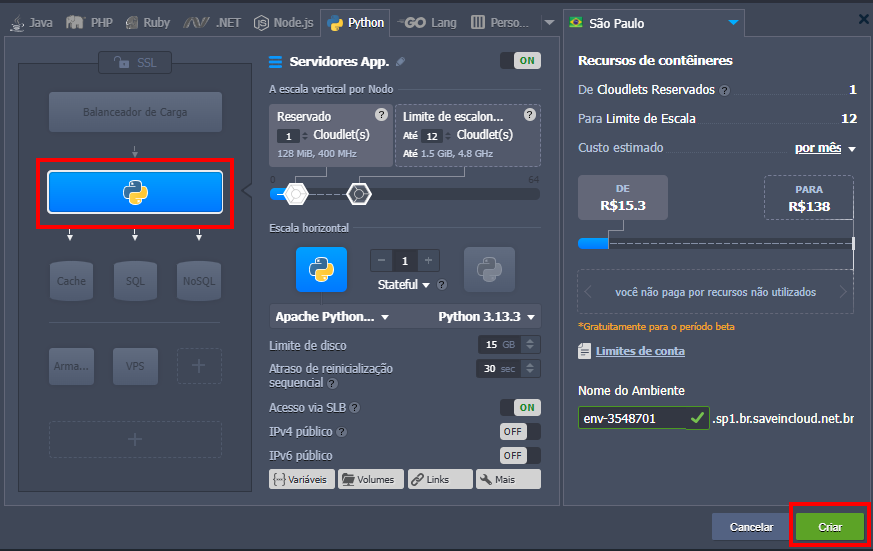
Add Apache Python to the application layer. Adjust the reserved cloudlets and scalability limit according to your project's needs and apply the change.
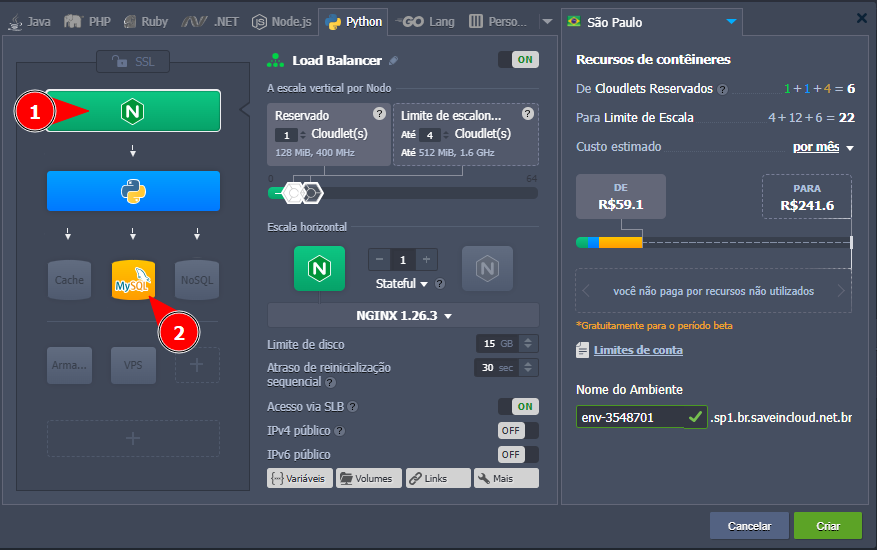
Optional: Add an NGINX as Load Balancer and/or a database (e.g., MariaDB, MySQL).
If using NGINX, follow the specific documentation.
📦 Step 2 – Application Deployment Methods
SaveinCloud offers the following deployment methods:
- Local file (.zip, .tar, etc.)
- External URL
- Git/SVN repositories
In this guide, we will use the .zip file method.
Select the Apache Python node to perform the deployment:

Then, upload your compressed project:
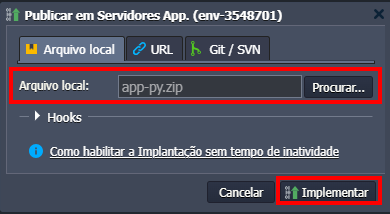
⚠️ The project used in this example already has the
requirements.txtandwsgi.pyfiles configured. Otherwise, you will need to manually install dependencies via SSH.
📥 Step 3 – Installing Dependencies
After deployment, access the node via SSH to install the project dependencies inside a virtual environment.
Open the terminal:
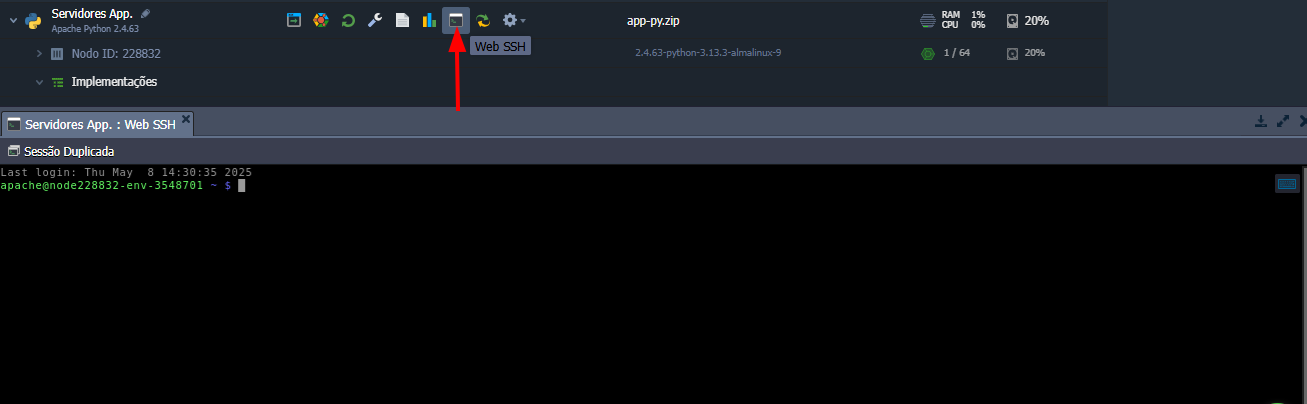
Access the project directory:
cd /var/www/webroot/ROOT
If requirements.txt does NOT exist, create it manually:
source venv/bin/activate
pip freeze > requirements.txt
deactivate
If the project has requirements.txt:
mv venv venv-old                # Opcional: renomeia a venv antiga
python -m venv venv            # Cria nova venv
source venv/bin/activate       # Ativa a venv
pip install -r venv-old/requirements.txt
deactivate
Manual package installation (if necessary):
mv venv venv-old
python -m venv venv
source venv/bin/activate
pip install flask pacote2 pacote3
deactivate
⚙️ Step 4 – WSGI Configuration (Apache)
Edit the wsgi.conf file in the platform panel to point to the correct path of the application and the venv.
Replace the following lines:
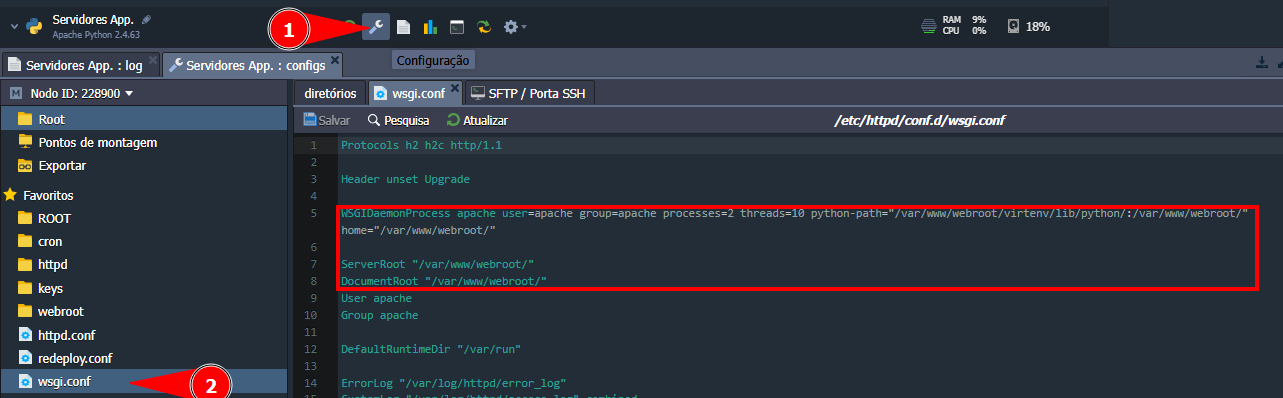
New lines:
WSGIDaemonProcess apache user=apache group=apache processes=2 threads=10 python-path=/var/www/webroot/ROOT/ python-home=/var/www/webroot/ROOT/venv/

ServerRoot "/var/www/webroot/ROOT/"
DocumentRoot "/var/www/webroot/ROOT/"
🧩 Step 5 – Configuring the Project's wsgi.py File
Access the wsgi.py file inside the project directory.
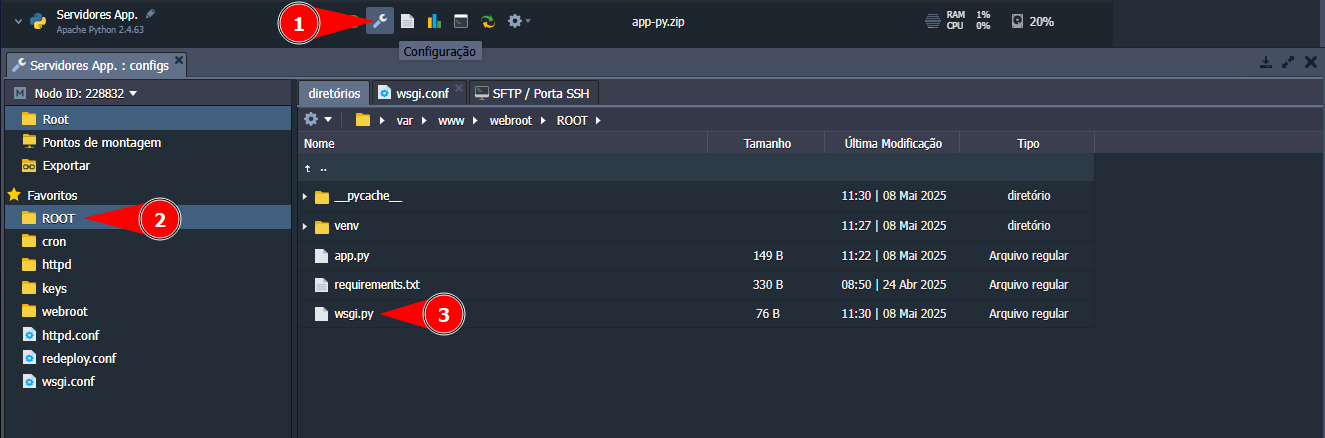
⚠️ If the
wsgi.pyfile does not exist, create it at the root of the project.
Example 1:
from app import app as application

if __name__ == "__main__":
    app.run()
Example 2:
import sys
import os

sys.path.insert(0, '/var/www/webroot/ROOT')

from run import app as application
🔎 Step 6 – Testing the Application
After saving all configurations:
-
Access the environment's public URL:

-
Check if the application is running:
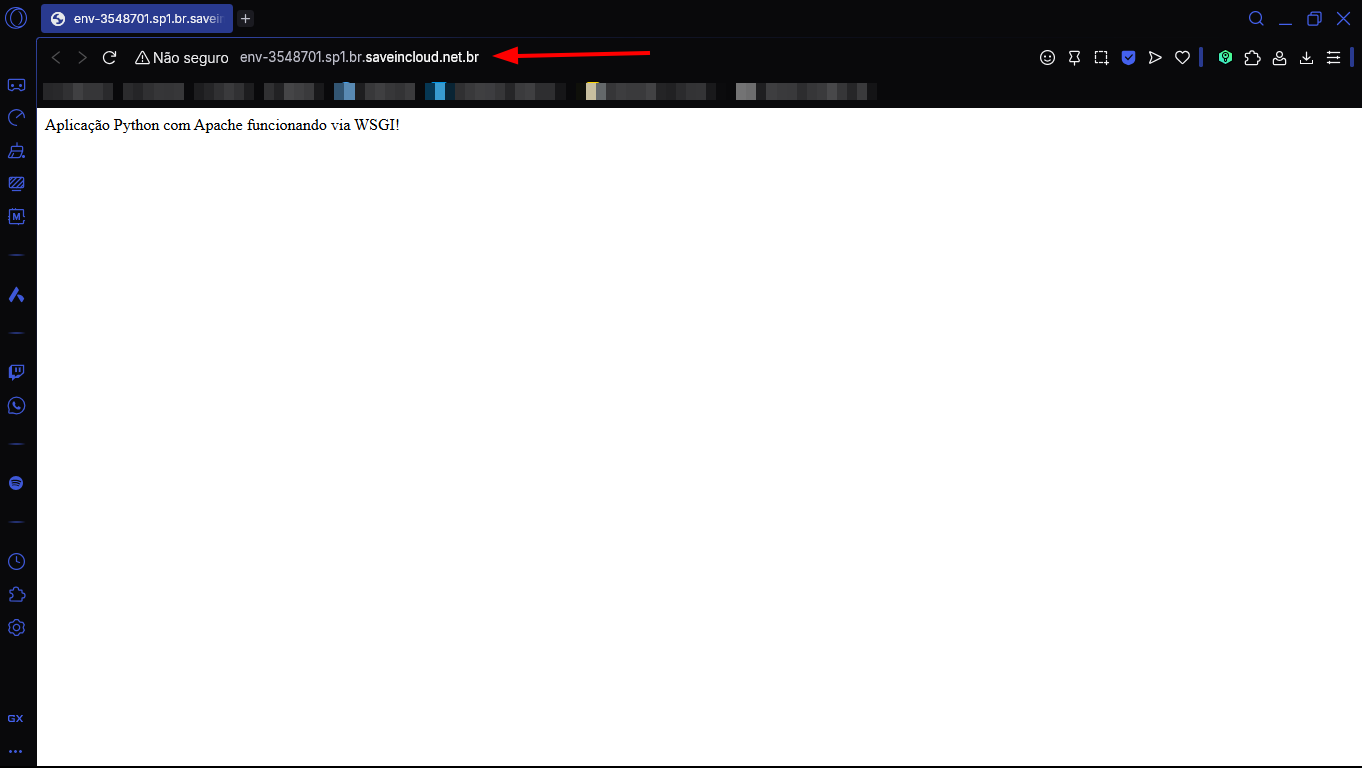
If everything is correct, your Flask application will be accessible.
📘 Additional documentation:
🛠️ Troubleshooting
❌ 1. Error 500 when accessing the application
Possible cause:
- Incorrect permissions on the application directory or files.
- Errors in the Python code (e.g.,
ImportError,SyntaxError).
How to check:
Access the Apache logs in the terminal via SSH:
cat /var/log/httpd/error_log
Solutions:
- Fix errors in the code (e.g., wrong module or function name).
- Give proper permission to the directory:
chown -R apache:apache /var/www/webroot/ROOT
chmod -R 755 /var/www/webroot/ROOT
❌ 2. Blank page or “Not Found”
Possible cause:
WSGIScriptAliasconfigured with incorrect path.wsgi.pyis missing or misconfigured.
How to check:
Edit the wsgi.conf file and validate the path with:
WSGIScriptAlias / /var/www/webroot/ROOT/wsgi.py
And confirm that wsgi.py contains:
from app import app as application
❌ 3. Code changes do not update in the browser
Possible cause:
- Browser cache or Apache cache.
Solution:
-
Try restarting the Apache node from the platform itself.
-
Clear the browser cache or open in incognito mode.
❌ 4. Error: ModuleNotFoundError
Possible cause:
- Virtual environment (
venv) is not properly activated. - Path to the
venvwas not provided to WSGI.
Solution:
- Check if
python-homeis correct inwsgi.conf:WSGIDaemonProcess apache ... python-home=/var/www/webroot/ROOT/venv/ - Make sure the
venvwas created and activated correctly:source venv/bin/activate