🐍 Configuring Apache with Python Django (WSGI) on SaveinCloud
⚠️ All configurations shown in this manual are simple and hypothetical examples. Adaptations may be necessary depending on your environment topology.
This guide shows how to deploy a Django application using Apache with WSGI within the SaveinCloud platform.
✅ Recommended Requirements
Before starting the deploy, make sure the project contains:
-
A correctly configured
wsgi.pyfile; -
A
requirements.txtfile with the application dependencies; -
The
settings.pyfile with theALLOWED_HOSTSparameter filled.
Part 1 - Configuring Apache Python in the Topology
🔧 Step 1 – Topology Setup
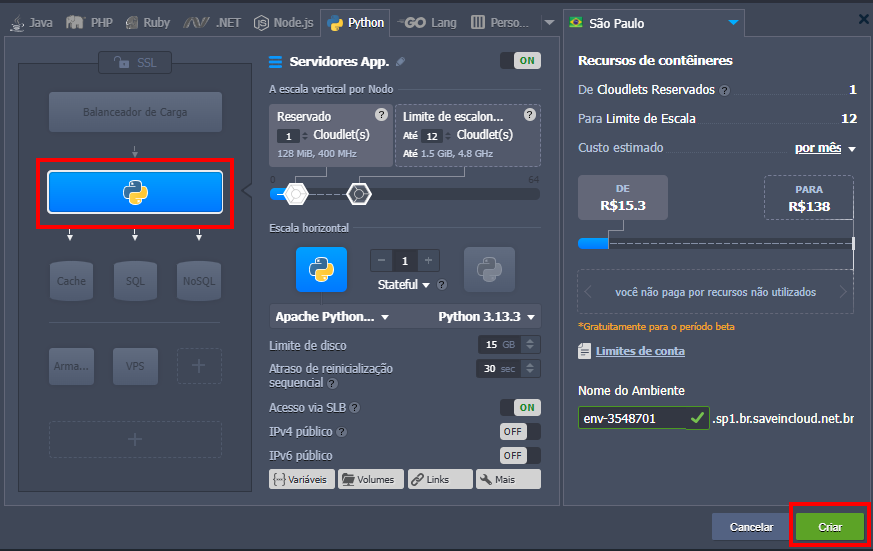
Add Apache Python to the application layer. Adjust the reserved cloudlets and scalability limit according to your project needs and apply the change.
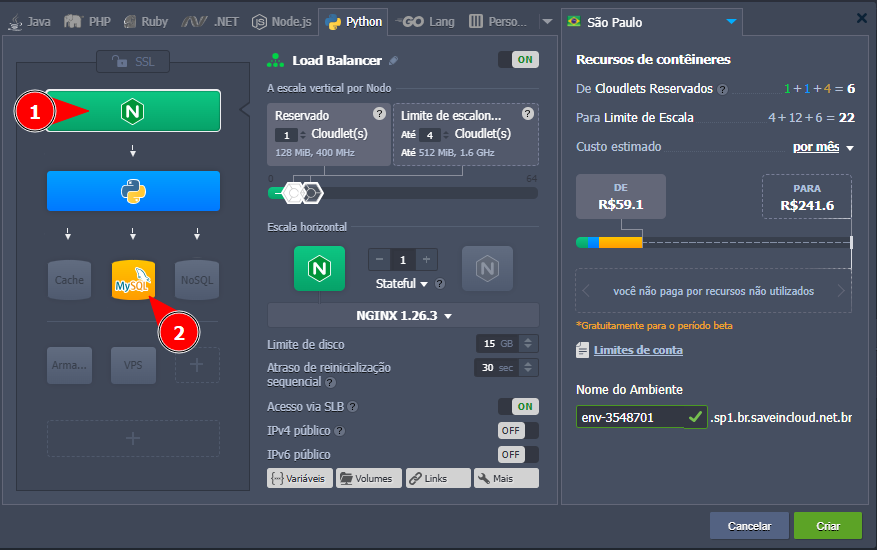
Optional: Add an NGINX as Load Balancer and/or a database (e.g., MariaDB, MySQL).
If using NGINX, follow the specific documentation.
📦 Step 2 – Application Deploy Methods
SaveinCloud offers the following deploy methods:
-
Local file (.zip, .tar, etc.)
-
External URL
-
Git/SVN repositories
In this guide, we will use the via Git method.
Select the Apache Python node to start the deploy:

🔓 Deploy via Public Repository
- Access the deploy menu and choose the Git/SVN option:
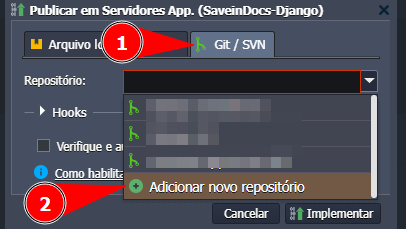
- Click Add new repository:
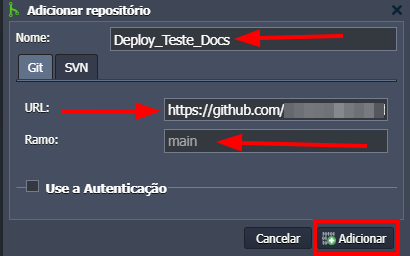
- After configuring, monitor the deploy progress:

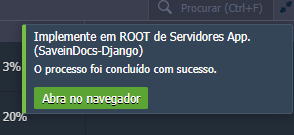
- When successfully finished, the following message will be displayed:
🔐 Deploy via Private Repository
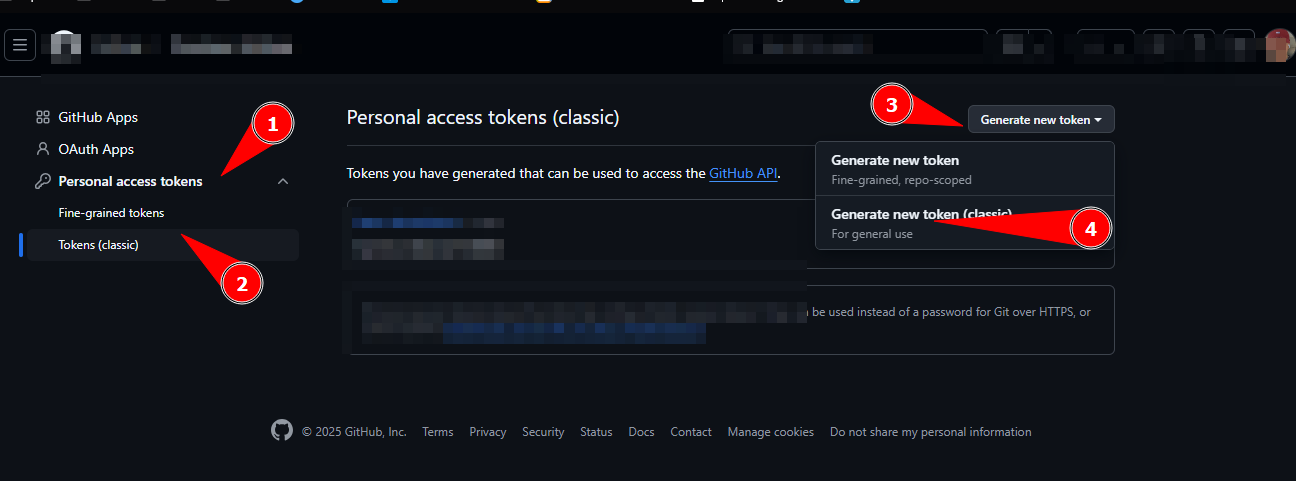
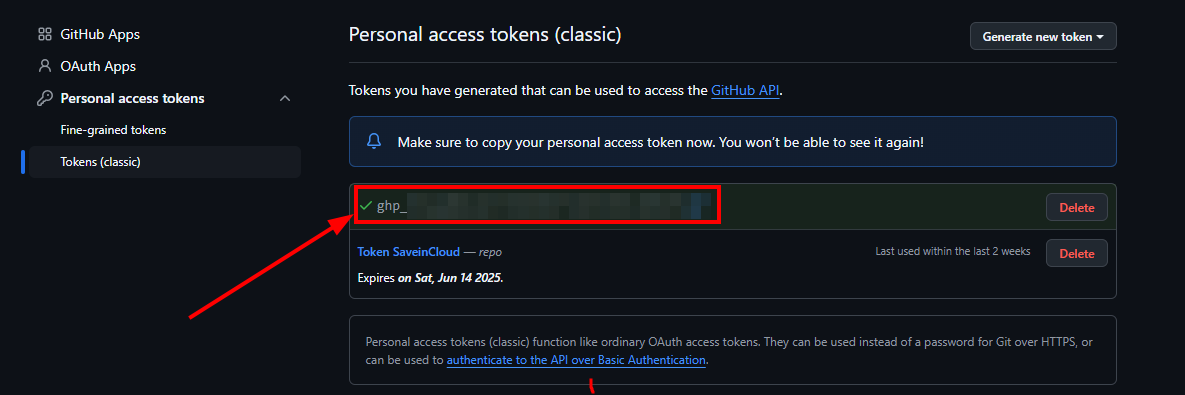
- Generate a Personal Access Token on GitHub:
-
Go to: Settings > Developer settings > Personal access tokens
-
Create a token with permission
repo
-
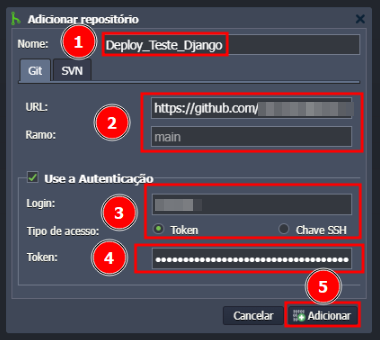
In the SaveinCloud panel, access the deploy menu again and select Git/SVN.
-
Fill in the repository data:
-
Check the Use authentication option
-
Enter the username and the generated token
Part 2 - Django Project Configuration
⚙️ Step 3 – Configuring the Environment
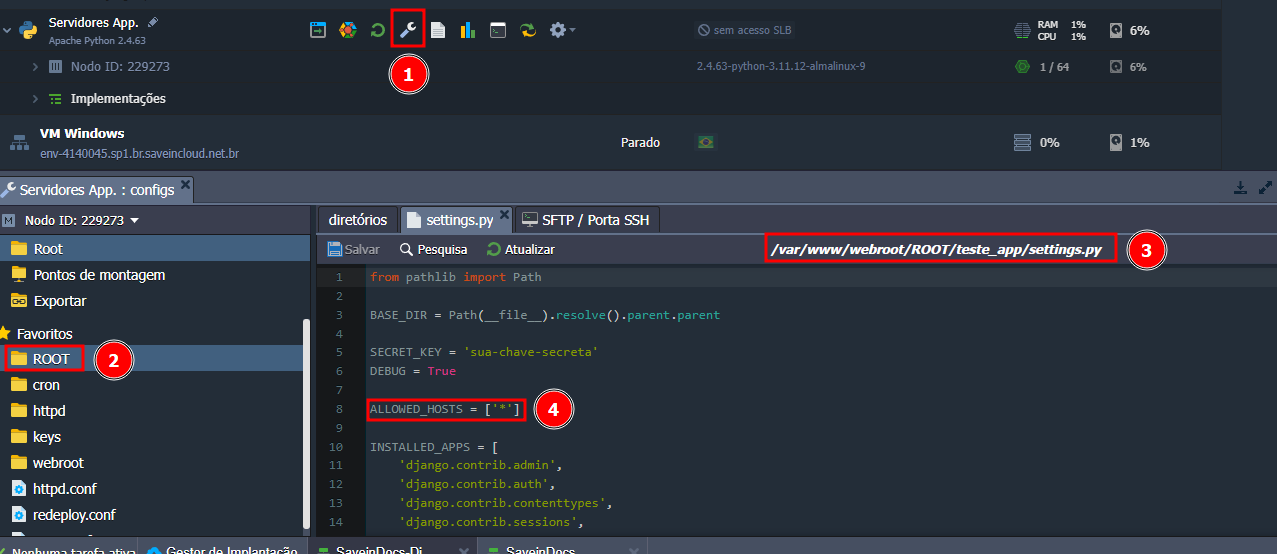
settings.py – Updating the ALLOWED_HOSTS:
ALLOWED_HOSTS = ['*']
wsgi.conf – Configuring WSGI (Apache):
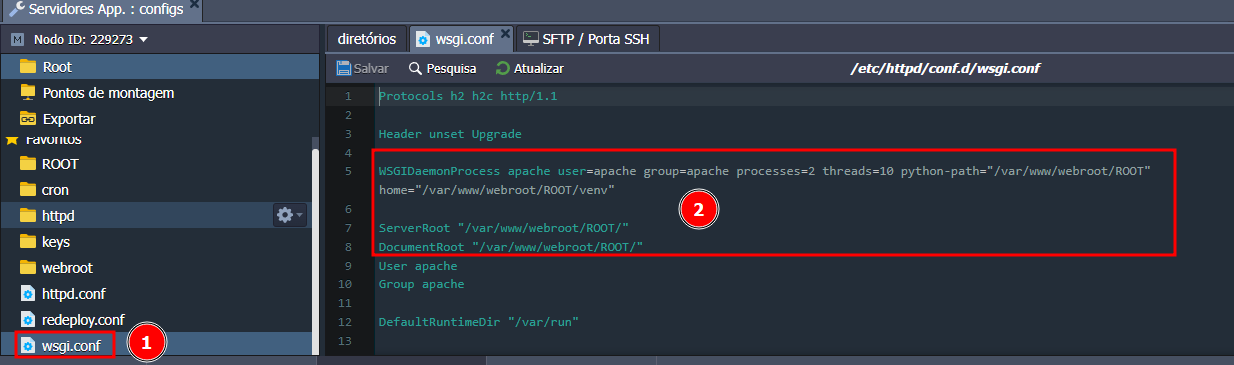
Edit the wsgi.conf file on the platform:
WSGIDaemonProcess apache user=apache group=apache processes=2 threads=10 python-path="/var/www/webroot/ROOT" python-home="/var/www/webroot/ROOT/venv"


ServerRoot "/var/www/webroot/ROOT/"

DocumentRoot "/var/www/webroot/ROOT/"
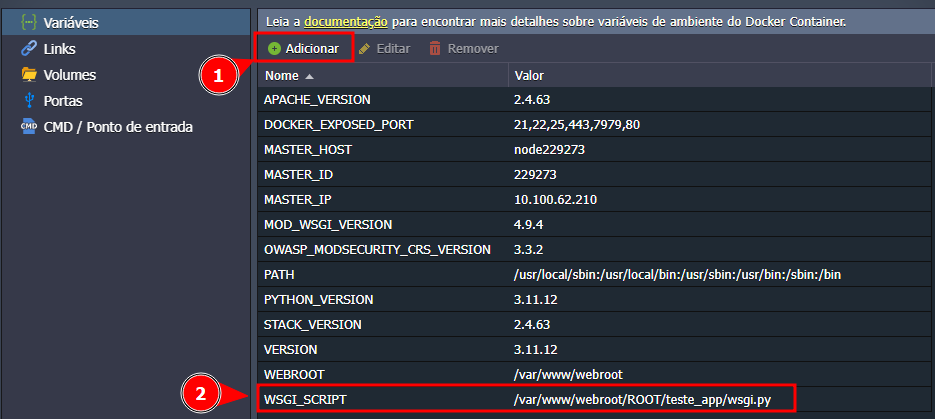
Variable WSGI_SCRIPT – Defining the path of wsgi.py
Go to the Variables tab on the platform and configure:
WSGI_SCRIPT=/var/www/webroot/ROOT/seu_app/wsgi.py
🐍 Step 4 – Creating and Activating the Virtualenv
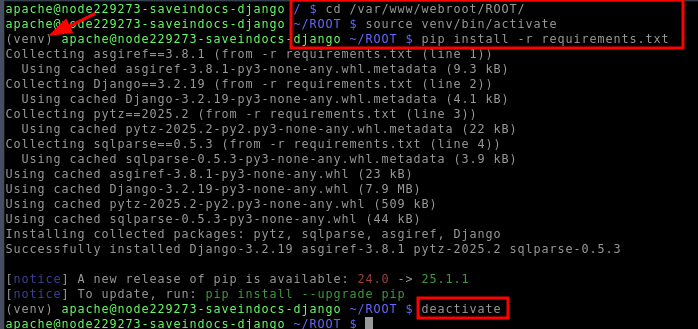
Open WebSSH:
cd  /var/www/webroot/ROOT

python  -m  venv  venv

source  venv/bin/activate

pip  install  -r  requirements.txt

deactivate
⚠️ Django versions above 5.0 are not compatible with SQLite.
🔎 Step 5 – Testing the Application
Restart the environment and access the public URL to test.

If everything is correct, your Django application will be accessible.
📘 Additional documentation:
🛠️ Troubleshooting
❌ 1. Error: OperationalError: no such table: ...
Cause: Migrations not applied.
Solution:
python  manage.py  makemigrations

python  manage.py  migrate
❌ 2. Error: ModuleNotFoundError: No module named 'django'
Cause: venv deactivated or Django not installed.
Solution:
source  venv/bin/activate

pip  install  django
❌ 3. Application does not load after restart
Common cause: Incorrect path of WSGI_SCRIPT or error in wsgi.conf.
Check:
-
python-path,python-home -
ServerRoot,DocumentRoot -
Path of
wsgi.py