🛠️ Creating a Custom Image
The SaveinCloud platform allows you to easily deploy custom containers based on any Docker image. This guide shows how to create your own Docker image, push it to a repository, and deploy it directly through the platform dashboard.
We will use as a practical example the creation of an image with the WildFly server, but the same process can be applied to any other technology (such as Node.js, Python, NGINX, etc).
📄 Step 1 – Compose the Dockerfile
- Create a file named
Dockerfile. - Define a base image. Example:
FROM jelasticdocker/almalinuxbase:latest
- Add metadata and environment variables, if necessary:
LABEL maintainer="Seu Nome <[email protected]>"
ENV VARIAVEL_EXEMPLO=valor
- Install dependencies with
RUN:
RUN dnf -y install java-17-openjdk-devel tar && dnf -y update
-
Download, unpack, and configure your software (like WildFly in the example). Use
curl,tar,ln -s, etc. -
Add configuration files, create directories and permissions:
RUN mkdir -p /var/log/app && useradd app && chown -R app:app /var/log/app
- Expose ports that will be used in the container:
EXPOSE 8080 8443
- Set the default command with
ENTRYPOINT:
ENTRYPOINT ["/bin/bash"]
💡 Tip: Check the official Dockerfile documentation for details and best practices.
The base image uses systemd services to start the application; if the application/stack does not have it, you need to create it or change the entrypoint to start the service directly (less recommended).
You can also use other images as the base for FROM, but the operating system used must be compatible with those supported on the platform
🏗️ Step 2 – Build and Push the Image
1. Build the image locally:
docker build -t meurepo/minha-imagem:latest .
2. Verify if the image was created:
docker images
3. Push to the repository (e.g., Docker Hub):
docker push meurepo/minha-imagem:latest
ℹ️ You can use
docker loginbeforehand to avoid authentication prompts.
☁️ Step 3 – Deploy on SaveinCloud
- Access the SaveinCloud dashboard.
- Click New Environment and go to the Custom Image or Docker Image tab.
- Click Select Image and then Add New Image.
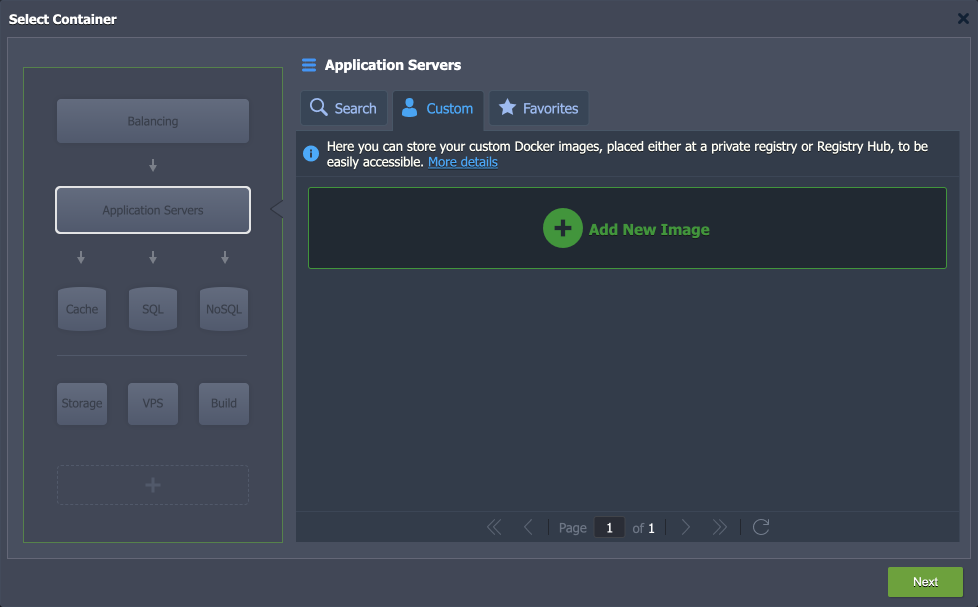
- Enter the image name in the format:
[{registry_host}/]{namespace}/{nome-imagem}
Example:
meurepo/minha-imagem:latest
- If the repository is private, provide credentials (username/password).
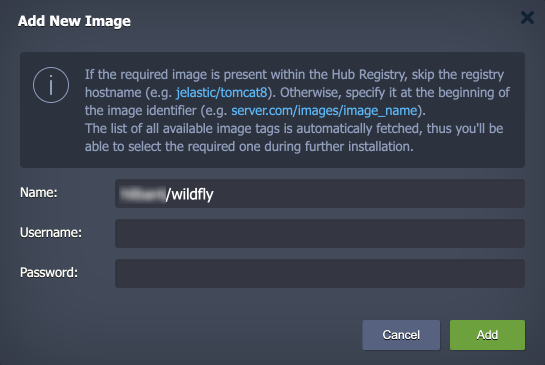
- Click Add and select the image to add it to the topology.
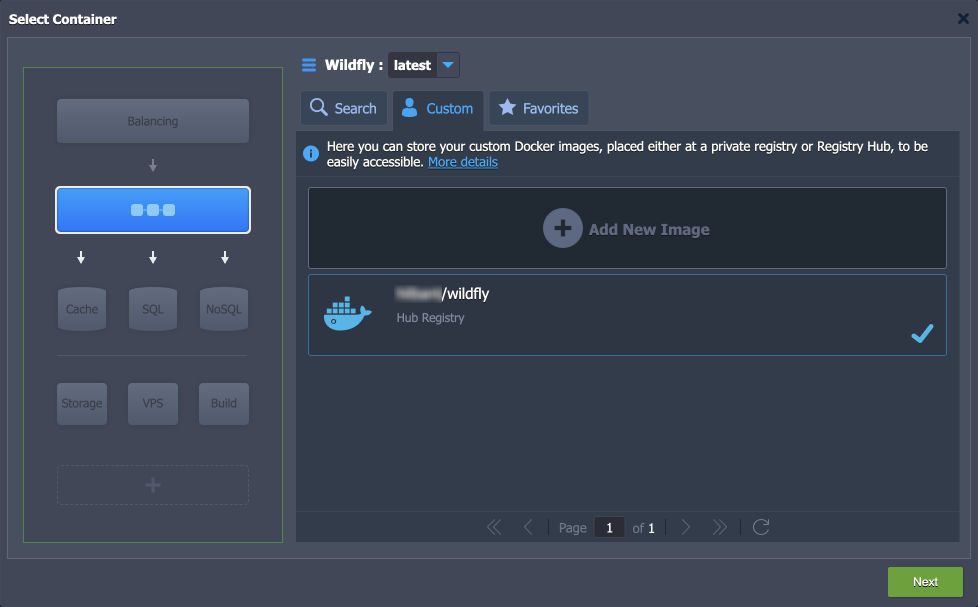
Here you can select the image version, which can be changed later while keeping or not the data as a deployment method following the guide on Continuous Deployment with Custom Images
- Complete the environment creation.
✅ Result
After creation, you can open the container in the browser with the Open in Browser button. The behavior and interface will depend on what was configured in the Dockerfile.
Done! Now you can create and run any custom Docker container on SaveinCloud.