🌐 Exposing Applications with Public IP on Kubernetes
This guide shows two ways to expose applications using a public IP on SaveinCloud's Kubernetes: through a Dedicated Load Balancer or directly on a Worker node.
🚀 Method 1: Dedicated Load Balancer
1. Cluster Creation and Application Deployment
Access the MARKETPLACE, install the Kubernetes cluster, and deploy the desired application. In this example, we use dominio.com (Jakarta EE).
2. Changing the Topology
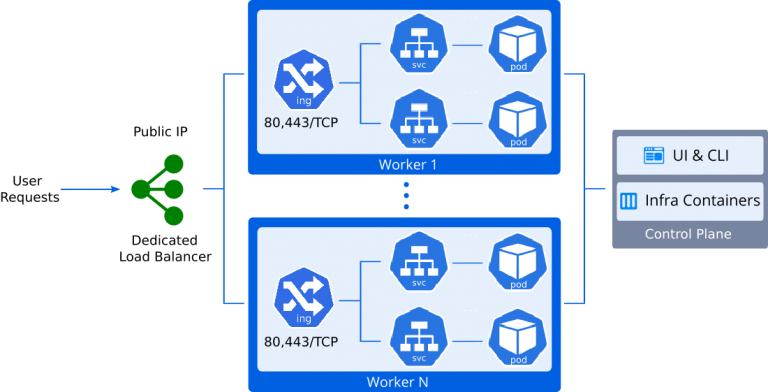
Click Change Topology next to the Kubernetes environment and add a Dedicated Load Balancer with a public IP.
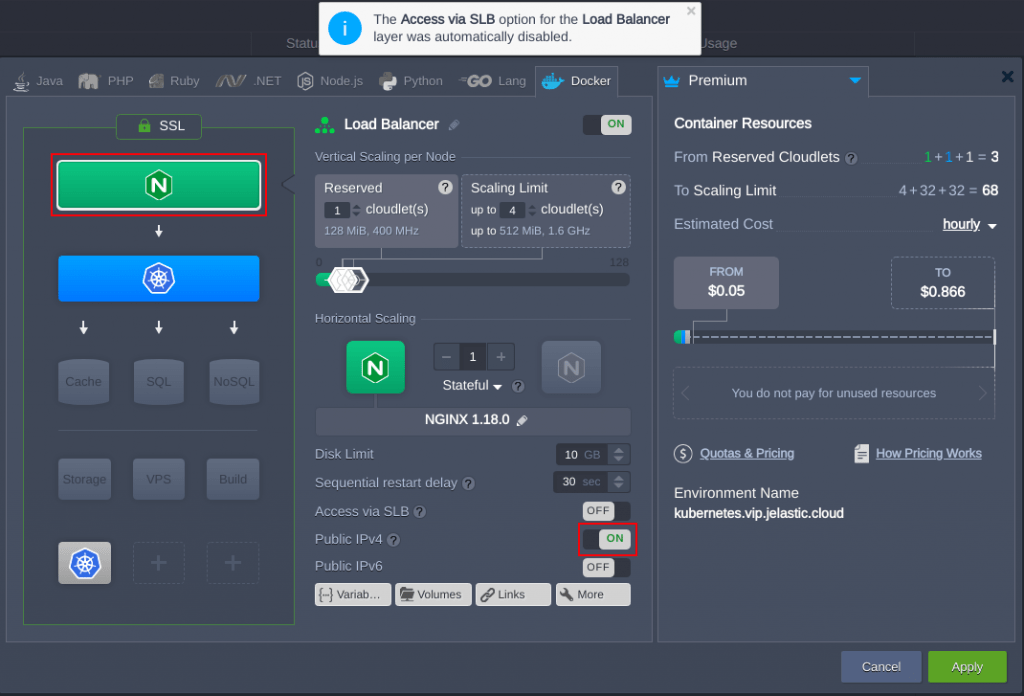
You can choose NGINX, HAProxy, LS Web ADC, or Varnish as the load balancer.
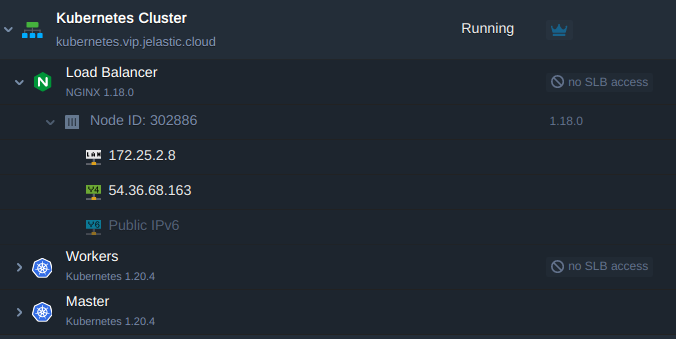
The topology will look like:
3. Create A Record and Custom Domain
Create an A record in your domain pointing to the allocated public IP. Example: dominio.com.jele.website.
4. Issue SSL Certificate
- Access the Load Balancer Add-Ons.
- Install the Let's Encrypt Free SSL.
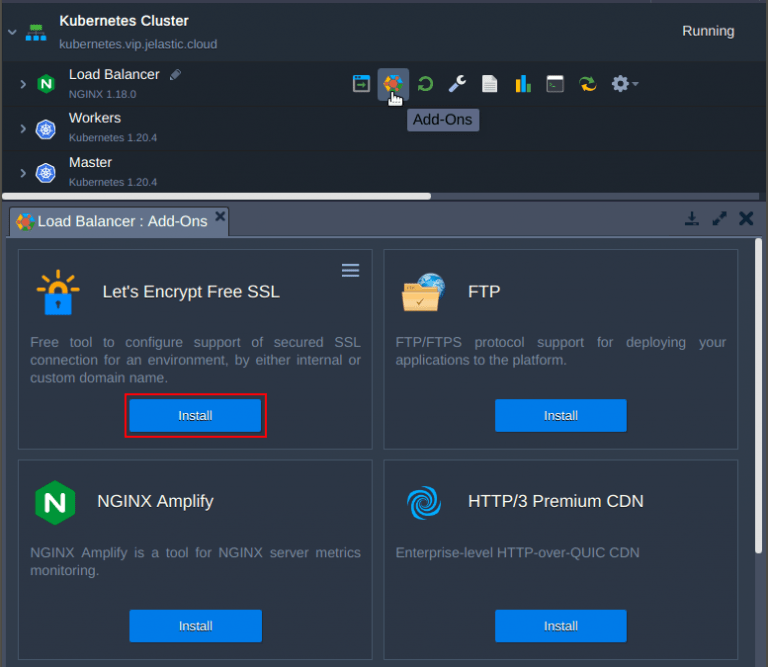
- Enter the pointed domain and apply.
After this, your application will be available with its own domain and encrypted traffic via HTTPS:
https://dominio.com.jele.website
🔄 Method 2: Direct Public IP on the Worker
In this method, the application is accessed directly via the public IP of a Worker node in the cluster.
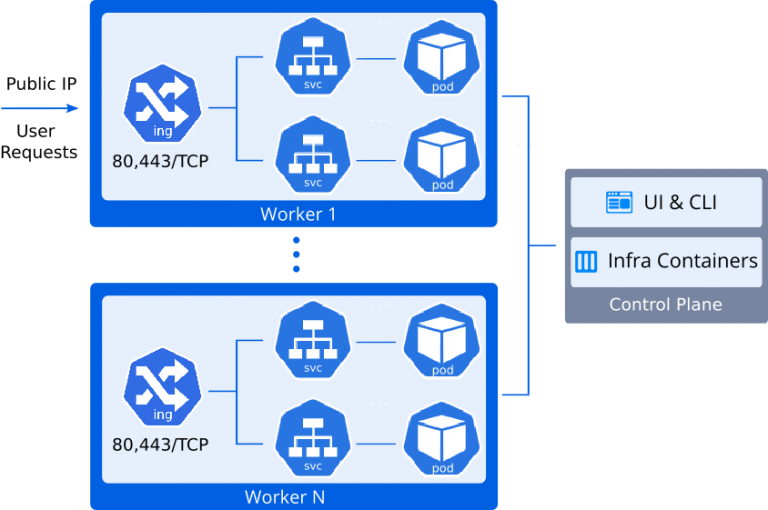
1. Allocate Public IP on the Worker
Go to Change Topology and add a Public IP to the Worker node.
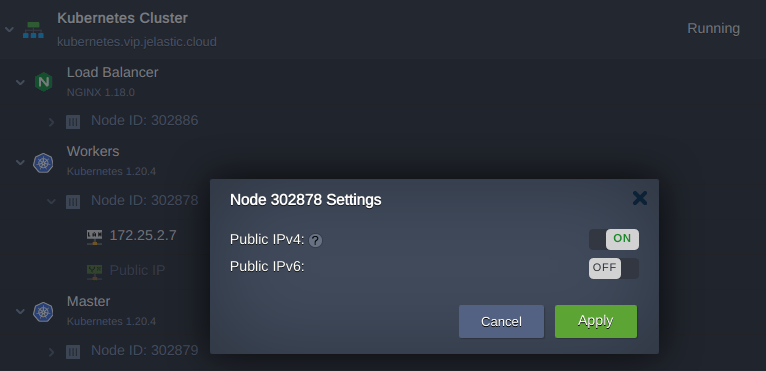
2. Create A Record for New IP
Create an A record pointing to the new IP. Example: dominio-com-worker.jele.website.
3. Install Cert-Manager and Ingress Controller
- Go to the Control Plane Add-ons.
- Install the Certificate Manager.
- This will also install an NGINX Ingress Controller with LoadBalancer support.
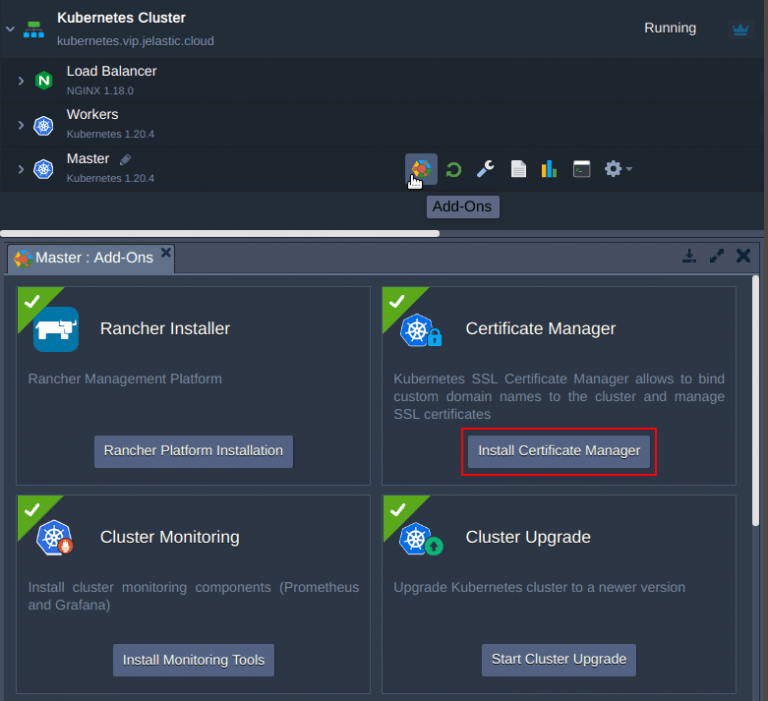
4. Apply Domain
Enter the custom domain during installation.
5. Clean Test App
Remove the default test application created:
kubectl delete deploy hello-cert-manager
kubectl delete svc hello-cert-manager
kubectl delete ing helloworld-cert
6. Create Ingress with TLS
Create a file named dominio-com-worker-ingress.yaml with:
apiVersion: networking.k8s.io/v1
kind: Ingress
metadata:
  name: dominio-com-worker
  namespace: default
  annotations:
    kubernetes.io/ingress.class: nginx-cert
    cert-manager.io/cluster-issuer: "letsencrypt-prod"
    nginx.ingress.kubernetes.io/affinity: "cookie"
    nginx.ingress.kubernetes.io/affinity-mode: "persistent"
    nginx.ingress.kubernetes.io/session-cookie-expires: "172800"
    nginx.ingress.kubernetes.io/session-cookie-max-age: "172800"
spec:
  tls:
    - hosts:
        - dominio-com-worker.jele.website
      secretName: external-domain-tls
  rules:
    - host: dominio-com-worker.jele.website
      http:
        paths:
          - path: /
            pathType: ImplementationSpecific
            backend:
              service:
                name: dominio-com
                port:
                  number: 80
Apply it to the cluster with:
kubectl apply -f dominio-com-worker-ingress.yaml
7. Test Access
After about 1 minute, the certificate will be automatically issued. Access:
https://dominio-com-worker.jele.website
✅ Result
You now have two active ingresses:
dominio.com- via the Load Balancer's public IPdominio-com-worker- via the Worker node's public IP
In production, it is recommended to choose only one approach, according to your access and load balancing strategy.
📚 Related Resources
🧠 Questions?
Contact our SaveinCloud technical support team!