Learn to manage your deployments on SaveinCloud
The Deployment Manager is a feature of the SaveinCloud platform used to store and deploy applications simply and efficiently. It supports deploys via local file or URL, as well as integration with Git/SVN repositories.
- File: allows uploading files from the local computer or via external link.
- Git/SVN: allows managing remote repositories with authentication support.
📦 Deploy via File
On the File tab, you can view the uploaded files and their respective information:
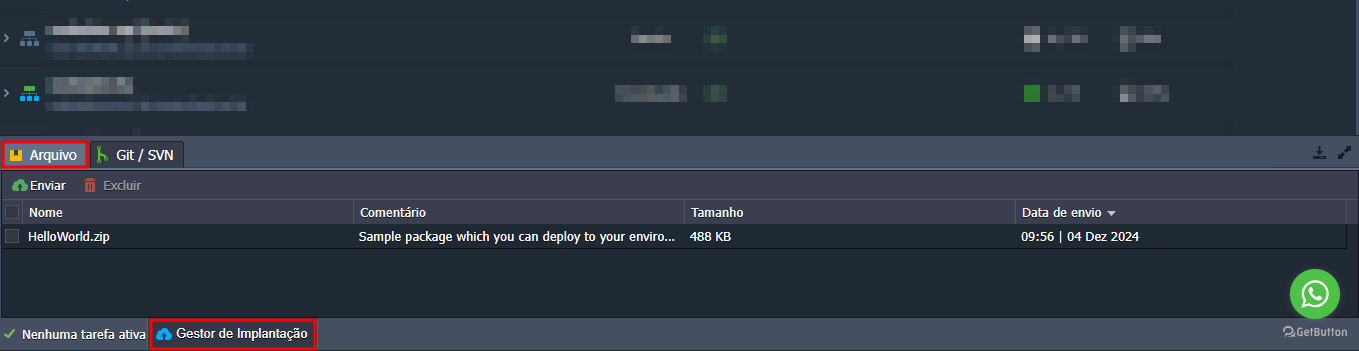
- Name: name of the uploaded file
- Comment: optional description entered by the user
- Size: file size
- Upload date: date the file was added to the Manager
To upload a new file, click the  button and choose between uploading a local file or providing a URL:
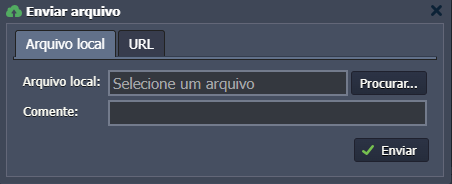
Uploads from the local computer accept files up to 200MB. For larger files, use the URL upload option.
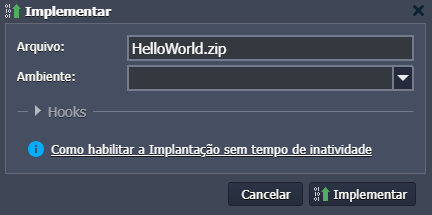
After uploading, hover over the desired file and click the deploy button:

Then, select the application server and, if necessary, configure the hooks:
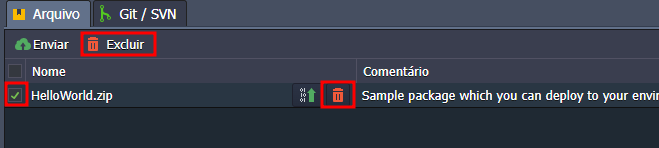
To delete an uploaded file, simply select it and click Delete, or hover over it and click the delete icon:
🚀 Deployment configuration via File
This is a simple process started in a few seconds, where you can adjust your deploy according to your needs.
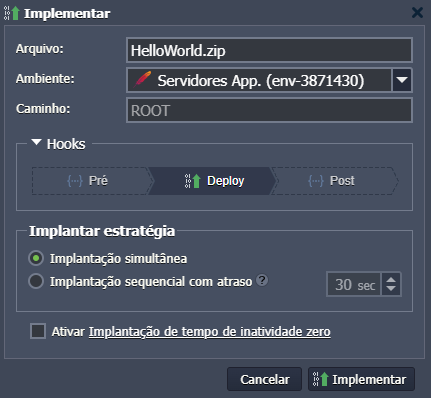
- Local file: compressed file to be deployed;
- Environment: selects the target environment with the application server;
- Path: defines where the application will be accessed. Some languages (like Python and Node.js) have a fixed path;
- Hooks: allows adding custom scripts to run before or after the deploy;
- Deployment strategy: choose between:
- Simultaneous (faster, with a short downtime);
- Sequential with delay (runs on each server with delay between them, keeping the app online — only for clustered servers);
- Enable zero downtime deployment: adjusts the deployment flow to avoid application downtime (only for PHP application servers).
🔗 Deploy via Git/SVN
On the Git/SVN tab, you can manage the repositories added to your account:
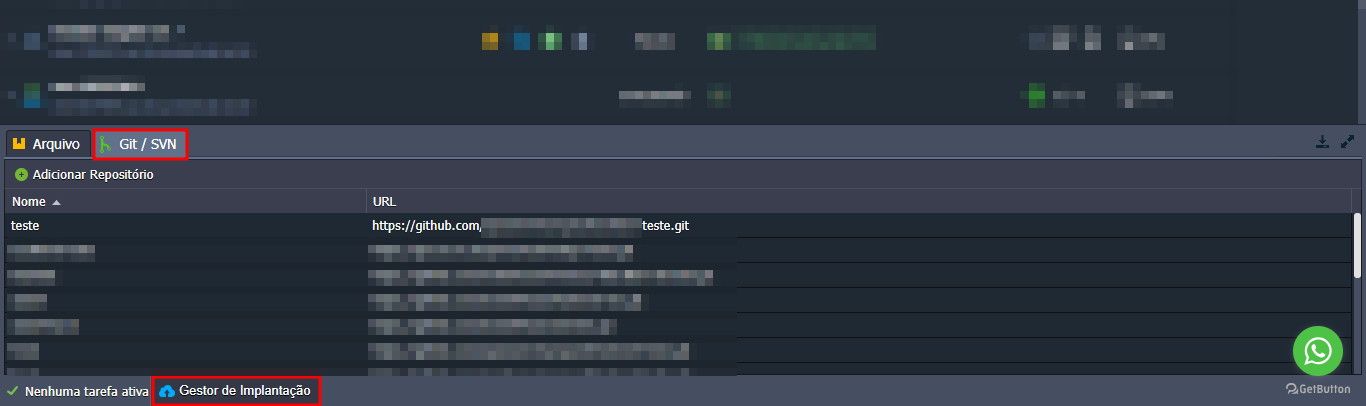
To add a new repository, click  . The registration screen will display the following fields:
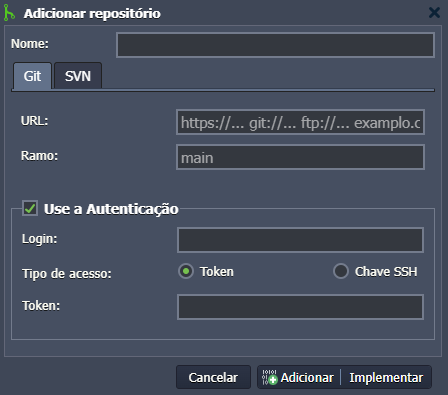
- Name: descriptive project name
- URL: remote repository address (e.g.,
https://github.com/usuario/projeto) - Branch: target branch (e.g.,
main,master,develop) - Use authentication: enable if the repository is private
🔐 If your account uses two-factor authentication, use a personal access token (PAT) instead of the password. Make sure to properly configure the token's permission scopes.
For SVN repositories, provide:
- Project name
- Repository URL
- Login and password (if necessary)
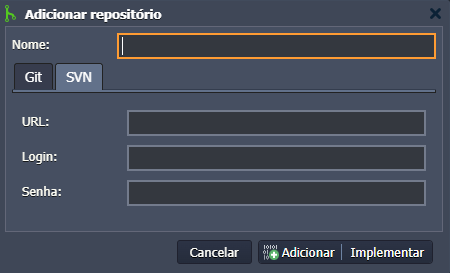
You can either add the repository by clicking Adicionar, or deploy immediately by clicking Adicionar | Implementar.
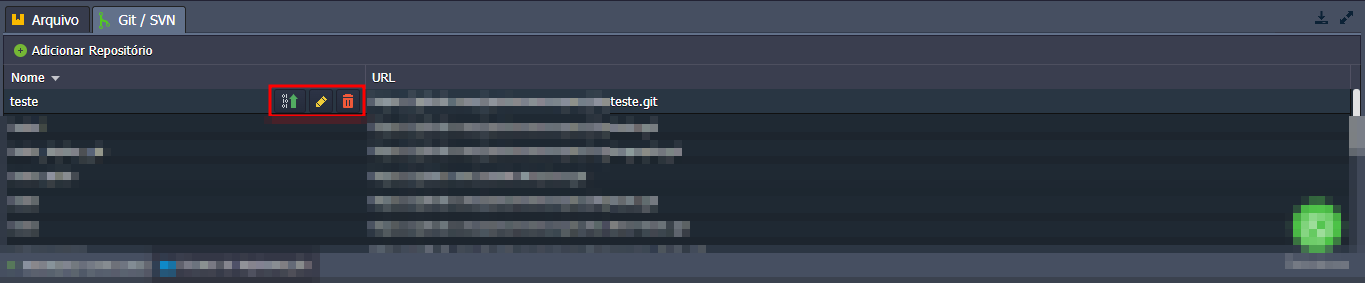
After adding, when hovering over the listed repository, you can:
- Deploy the application
- Edit the settings
- Delete the repository
🔄 Deployment configuration via Git/SVN
This is a simple process started in a few seconds, where you can adjust your deploy according to your needs.
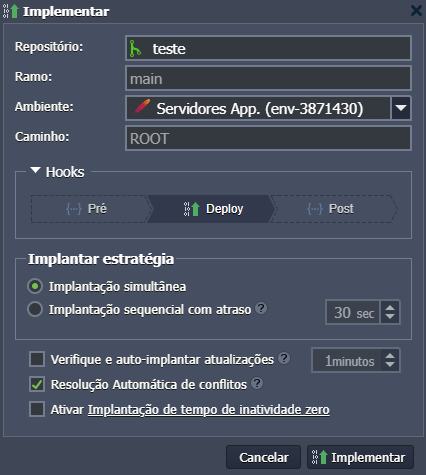
- Repository: select your Git/SVN project repository available in the Deployment Manager;
- Branch: defines the branch of your repository;
- Environment: selects the target environment with the application server;
- Path: defines where the application will be accessed. Some languages (like Python and Node.js) have a fixed path;
- Build: allows choosing the existing Maven node to compile the project (for Java application deployments);
- Hooks: allows adding custom scripts to run before or after the deploy;
- Deployment strategy: choose between:
- Simultaneous (faster, with a short downtime);
- Sequential with delay (runs on each server with delay between them, keeping the app online — only for clustered servers);
- Check and auto-deploy updates: enables automatic repository checks and deploys if there are changes;
- Automatic conflict resolution: ensures repository files are prioritized, discarding local changes;
- Enable zero downtime deployment: avoids downtime during deploy (only for PHP application servers).
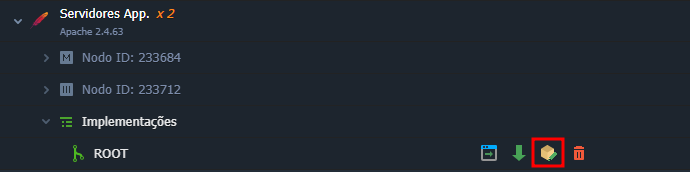
Also, you can change your deployed Git/SVN project by clicking the highlighted button below.
🧠 Questions?
Contact technical support and send your question—we are available to help you!