🔐 Performing External SSH Access Using the SaveinCloud Platform Gate
⚠️ All configurations shown in this manual are simple and hypothetical examples. Adaptations may be necessary according to each user's needs.
This guide shows how to perform external SSH access using a key pair generated by PuTTYgen and access with the PuTTY client.
✅ Recommended Requirements
Before starting, make sure you have installed:
Alternatively, you can use tools like ssh-keygen (on Linux or Git Bash on Windows).
🔐 Part 1 – Key Pair Generation
🛠️ Step 1 – Generating keys with PuTTYgen
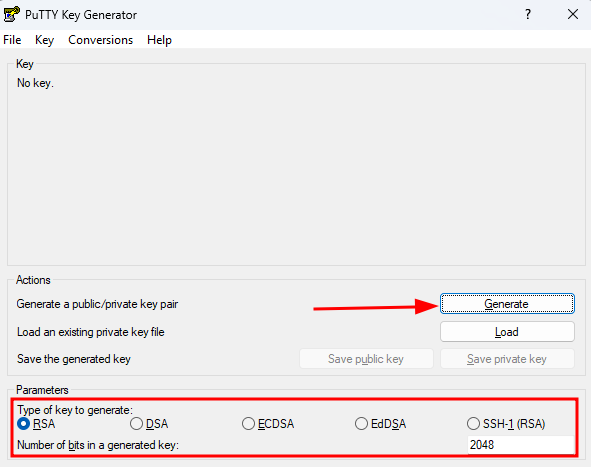
Open PuTTYgen to start the key pair creation process:
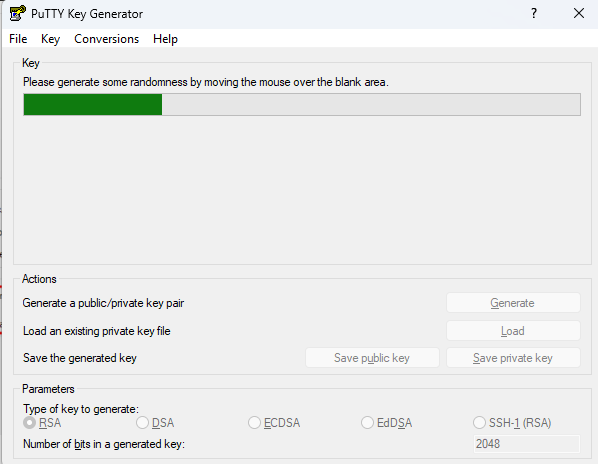
Move the mouse inside the window to generate entropy and complete the progress bar:
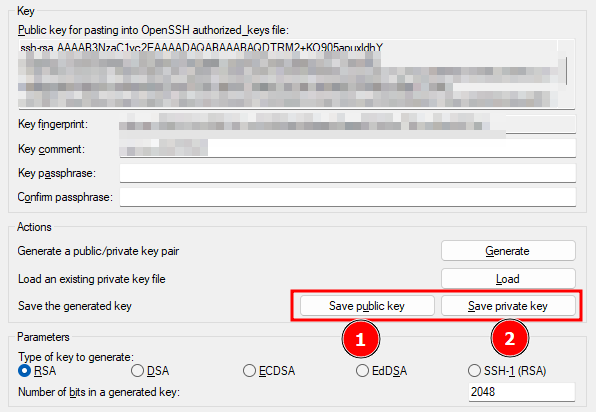
After generated, save the public and private keys in a secure location on your computer:
🌐 Part 2 – Gate Configuration on the Platform
🛠️ Step 1 – Inserting the public key into the access Gate
⚠️ This configuration applies to the entire account, allowing external SSH to all linked environments.
Access the Account Configuration screen:
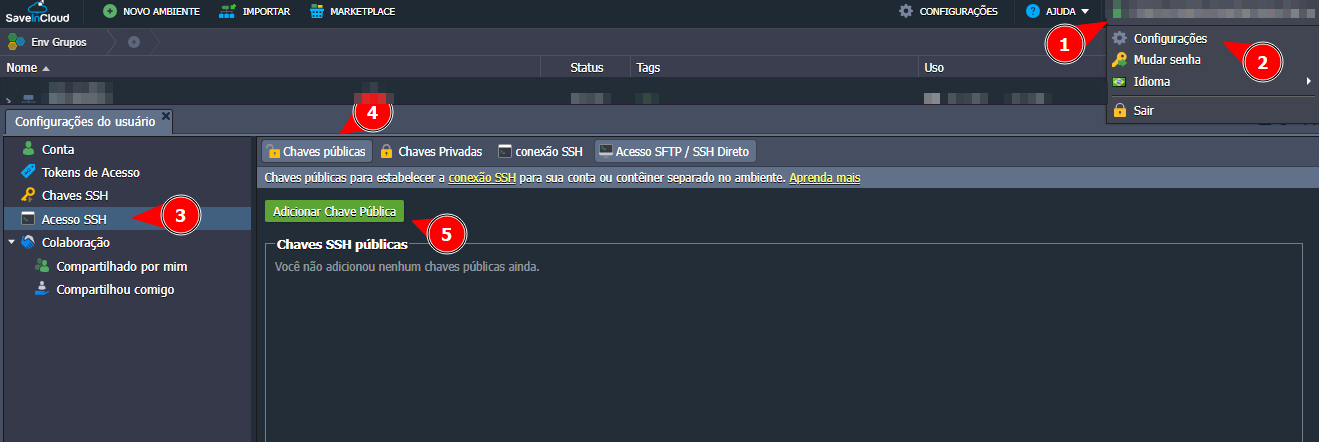
Copy the content of the public key generated earlier and paste it into the key addition field:
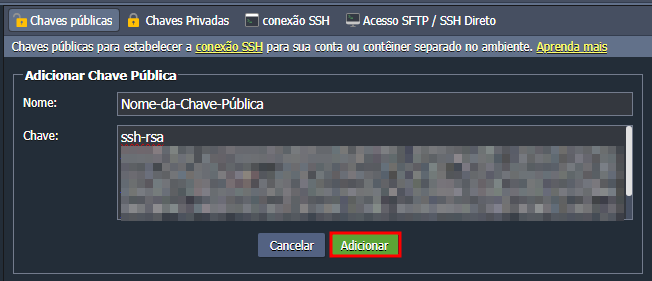
Finish by clicking Add. The key is now registered.
🖥️ Part 3 – Access via PuTTY
📋 Step 1 – Obtaining access credentials
On the platform, select the node you want to access and copy the data:
- User
- Host
- Port
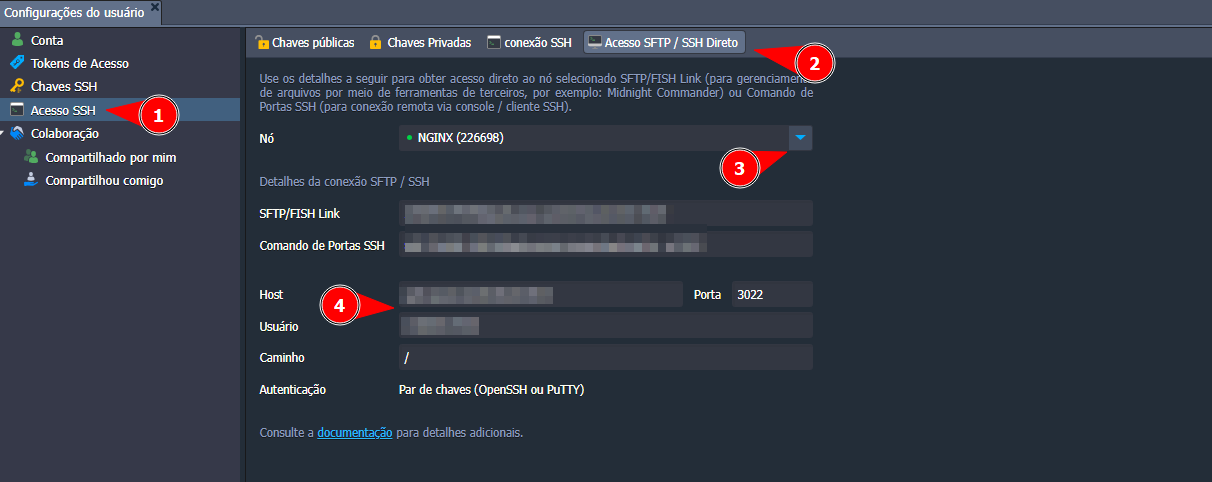
🛠️ Step 2 – Configuring PuTTY
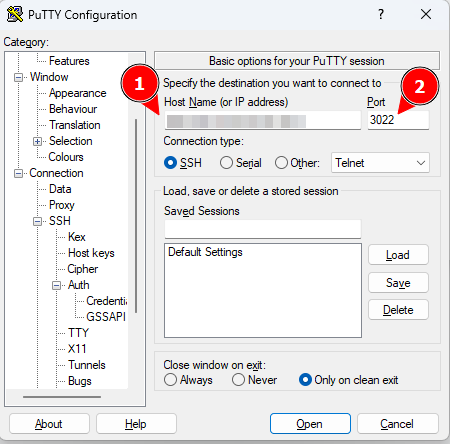
Open PuTTY and enter the obtained Host (IP) and Port:
Now go to Connection > SSH > Auth and select the private key file:
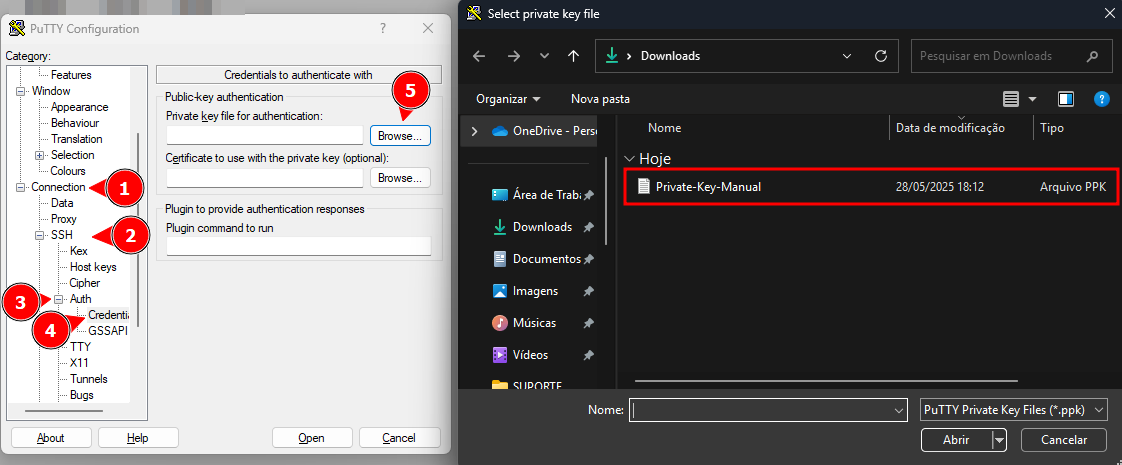
With everything configured, click Open. When prompted, enter the user copied from the platform.
💾 Step 3 – Saving the session for future use (optional)
To speed up future accesses:
- Return to PuTTY's initial screen.
- Enter a name in the "Saved Sessions" field (e.g.,
acesso-saveincloud). - Click Save.
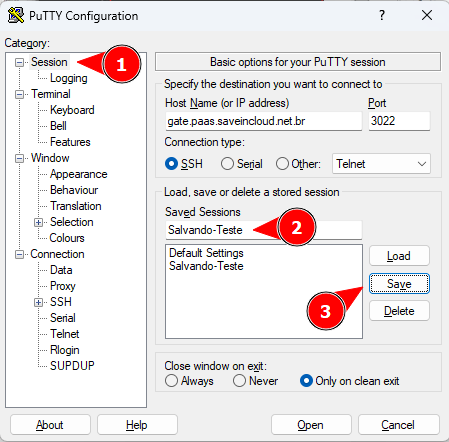
On the next access, just click the saved name, then Load, and finally Open.
🧠 Extra Tip – Simplified access with the last 5 digits of the user
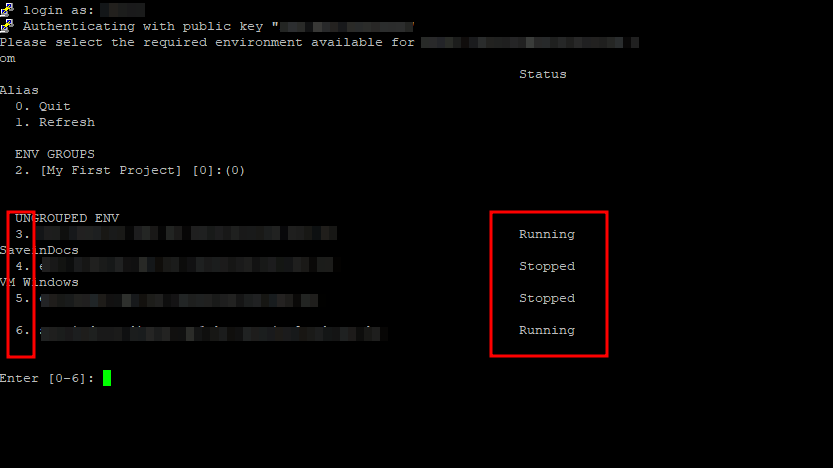
You can use only the last 5 digits of the user to access an environment selection screen. For example:
If the user is 12345-67890, use only 67890.
The selection screen will appear as below, allowing you to choose the environment (from 0 to 6):
🛠️ Troubleshooting
❌ 1. Error: “No supported authentication methods available”
Cause: Private key not selected or incorrect in PuTTY.
Solution:
- Go to PuTTY > Connection > SSH > Auth;
- Select the private key generated in PuTTYgen with extension
.ppk; - Verify if the key matches the one added in the platform Gate.
❌ 2. Error: “Server refused our key”
Cause: The public key was not added correctly on the SaveinCloud platform.
Solution:
- Reopen PuTTYgen and copy the content of the “Public key for pasting...” box;
- Paste it again into the public keys panel on the platform and save;
- Make sure you are accessing with the same user listed on the platform.
❌ 3. Error: Timeout when trying to connect
Possible cause:
- Incorrect port;
- Firewall blocking outgoing traffic from your network.
Solution:
- Check the SSH port indicated on the SaveinCloud panel;
- Try accessing from another network (e.g., 4G) to check if it is a local block.
❌ 4. “Access denied” even with the correct key
Common cause: Incorrect user entered in the terminal.
Solution:
- Check the exact name of the SSH user on the platform panel (case sensitive);
- Make sure to use it exactly as displayed.