🌐 Virtual Networks
📘 Introduction
Virtual Networks allow you to isolate, organize, and control communication between virtual machines in SaveInCloud's Nuvion. With them, you can create private subnets, configure DHCP, define DNS servers, and establish a secure and scalable architecture.
This guide presents the step-by-step process to create a virtual network with IPv4 in the SaveInCloud panel.
🚀 Step 1 -- Accessing the Networks area
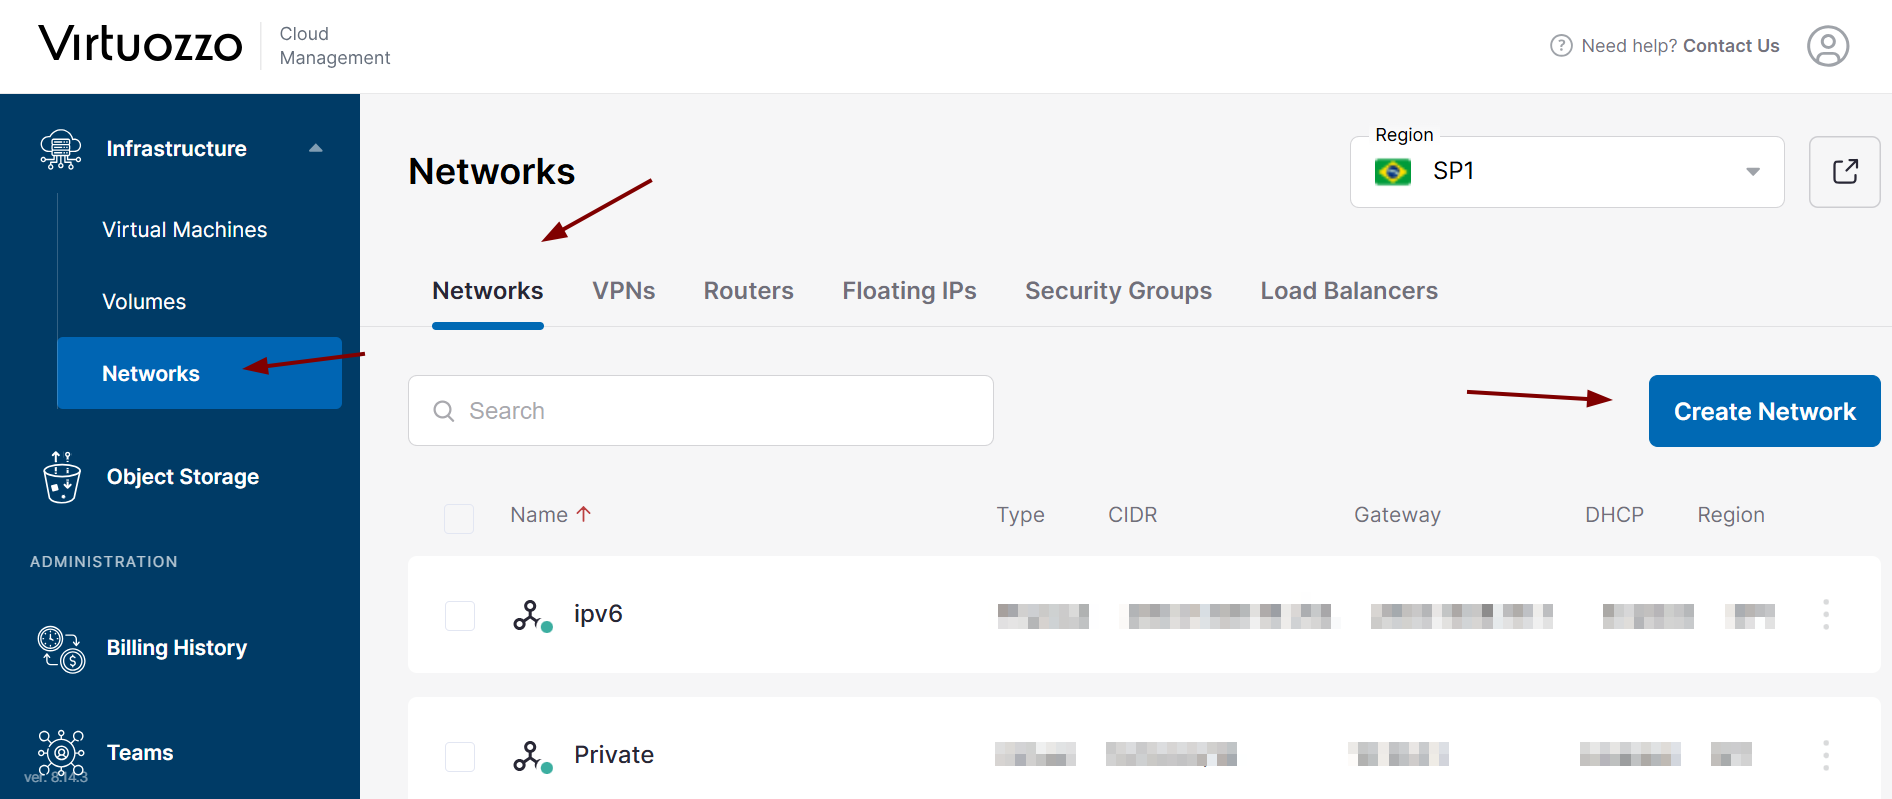
- In the SaveInCloud panel, access the side menu.
- Click on Infrastructure.
- Then, select Networks.
In this section, you can view all existing networks and create new virtual networks.
➕ Step 2 -- Creating a new network
- Click the Create Network button.
- The creation wizard will open.
At this stage, you can configure:
- Network type
- Name
- IP management
🏷️ Step 3 -- Initial network configuration
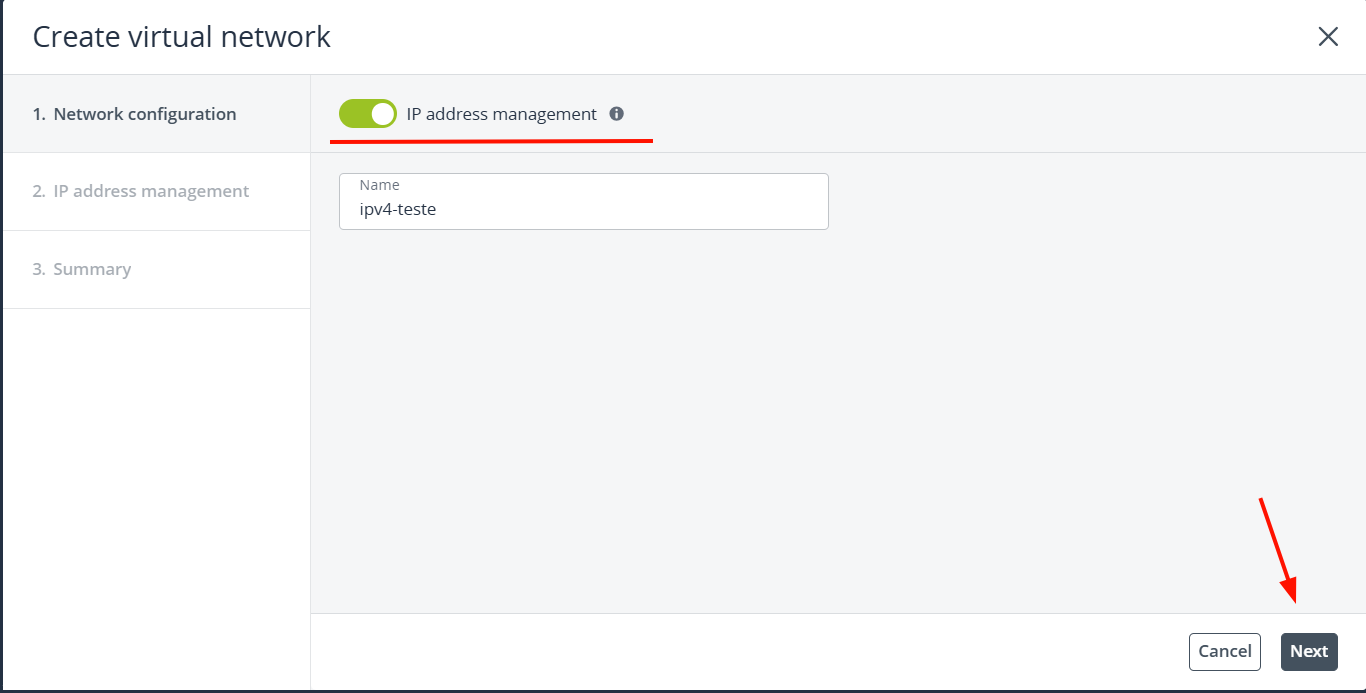
- Set the network name.
- Enable the IP address management option.
- Click Next.
This option allows managing subnets, DHCP, and DNS directly through the panel.
🌍 Step 4 -- Creating the IPv4 Subnet
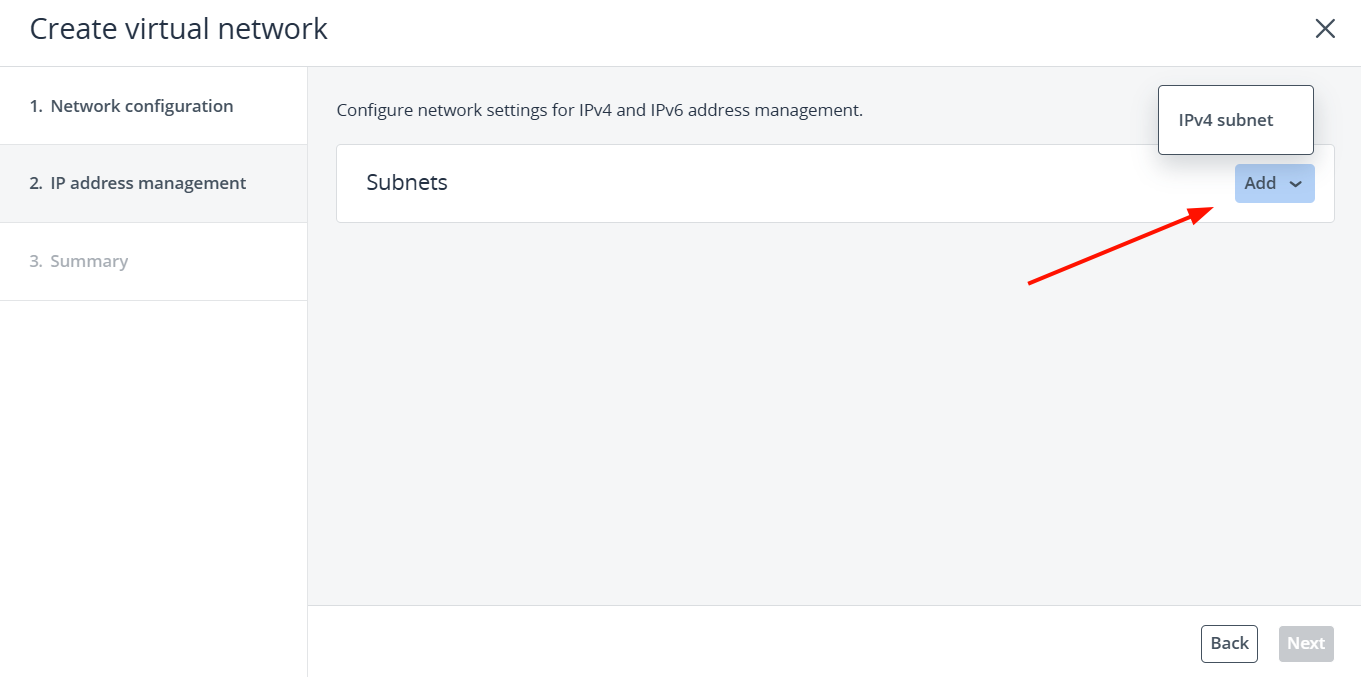
- Click Add in the Subnets section.
- Select the option to add an IPv4 subnet.
🔢 Step 5 -- Configuring the CIDR
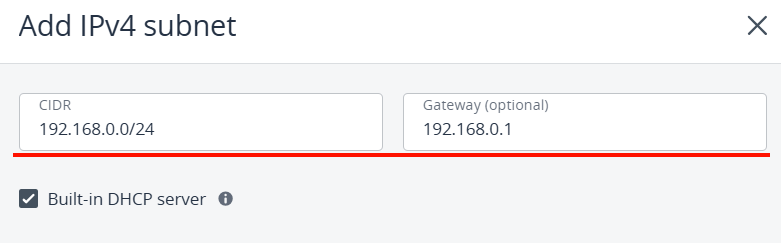
Enter the IP block in CIDR format.
Example:
192.168.0.0/24
This block defines the range of IPs available on the network.
You can also configure:
- Gateway (optional)
- Integrated DHCP
DHCP allows IPs to be automatically assigned to virtual machines.
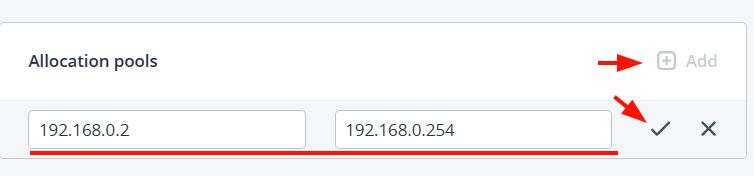
📦 Step 6 -- Allocation Pools
If necessary, you can manually define an IP range that will be distributed by DHCP.
This is useful when you want to reserve certain IPs for specific services.
🌐 Step 7 -- DNS Configuration
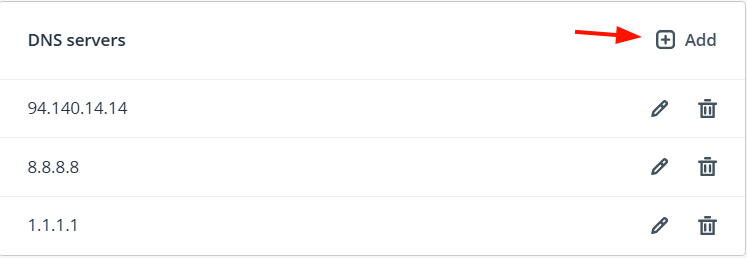
- Click Add in the DNS section.
- Enter the desired server.
Example:
1.1.1.1
You can add multiple DNS servers.
✅ Step 8 -- Review and create the network
- Click Add.
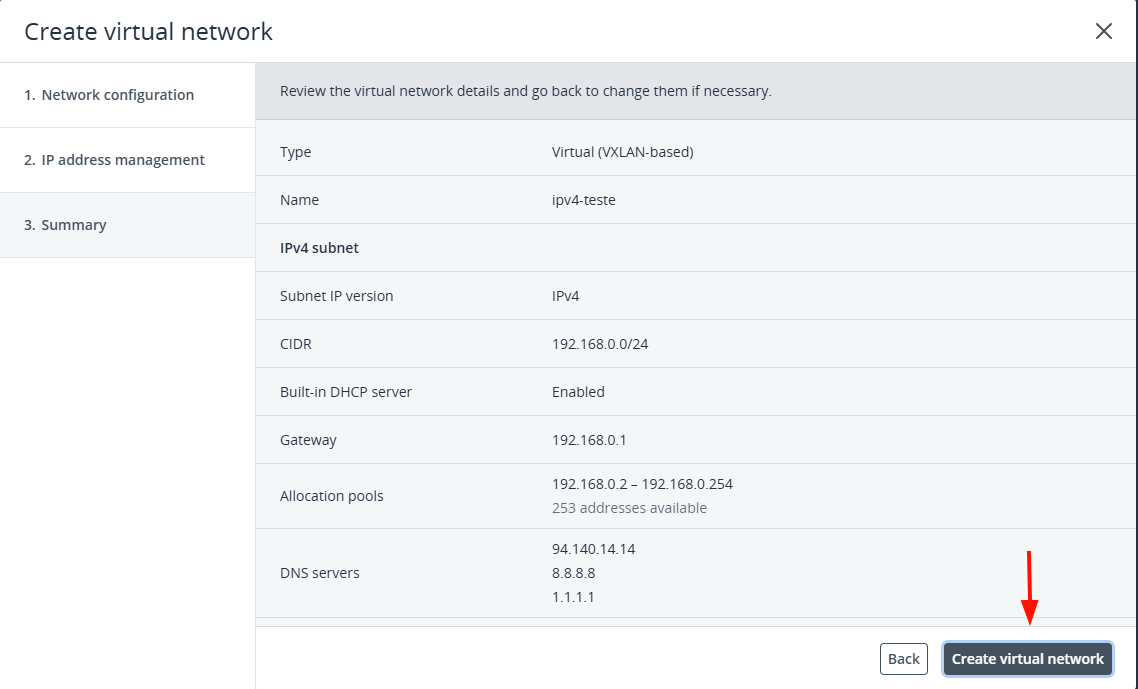
- Review the information.
- Click Create virtual network.
The following will be displayed:
- Network name
- Type (Virtual VXLAN)
- CIDR
- DHCP
🎉 Step 9 -- Network successfully created
The virtual network will be displayed in the list and will be ready to:
- Connect virtual machines
- Configure routers
- Associate Floating IP
- Create security rules

🧠 Best practices
✔ Plan IP blocks before creation
✔ Avoid conflicts with local networks
✔ Separate networks by environment (production, staging, and development)
✔ Use reliable DNS
✔ Monitor IP usage
🆘 Support
If you have questions or need assistance, contact SaveInCloud technical support through the available channels.