🚀 Como criar uma VM no Nuvion
Este guia apresenta o passo a passo completo para criação de uma máquina virtual (VM) na plataforma Nuvion, com explicações detalhadas para cada parâmetro.
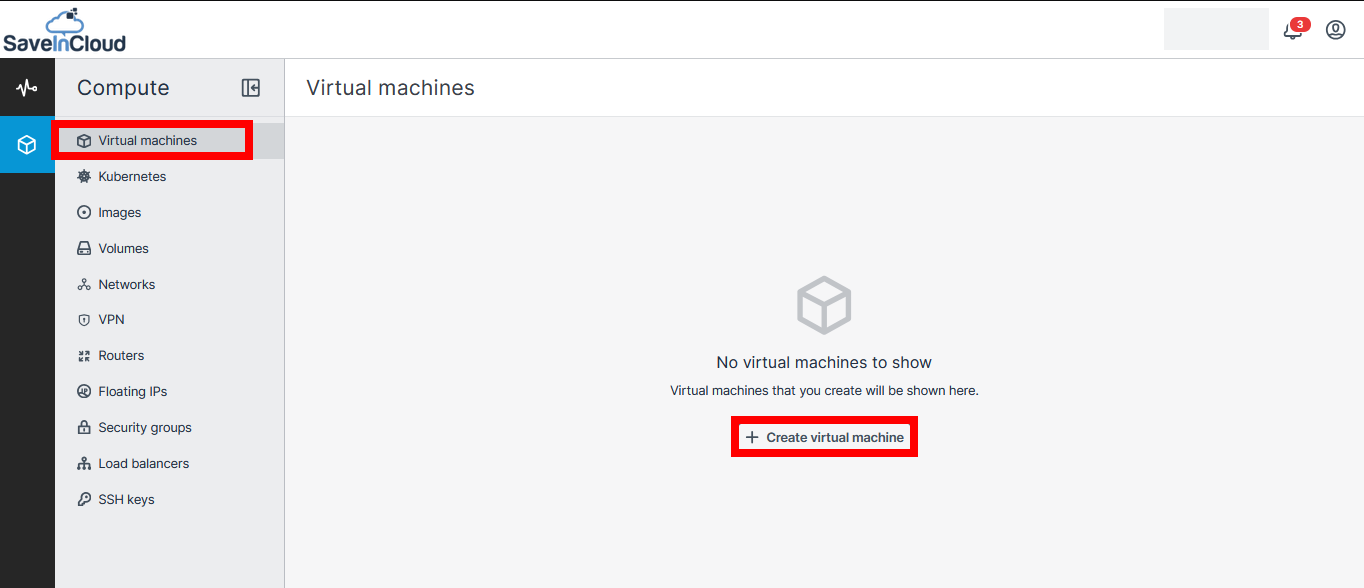
📌 1. Acessar a criação de VM
No painel principal:
Virtual Machines > Create Virtual Machine
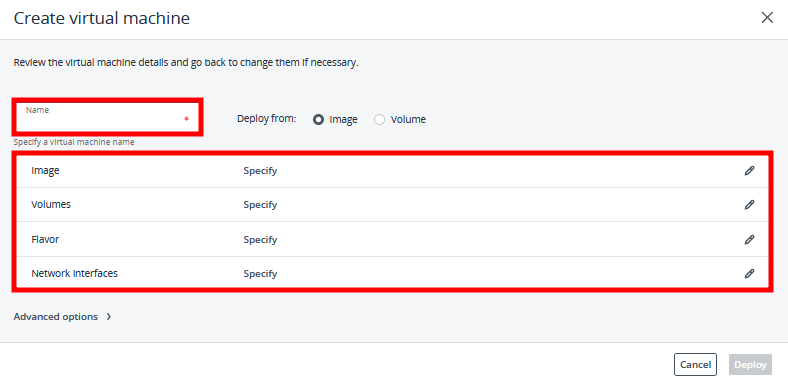
⚙️ Parâmetros de configuração
Antes de criar a VM, configure:
- 📝 Name: Nome único da VM (identificação no painel)
- 💿 Image: Sistema operacional base da VM
- 📦 Volumes: Disco(s) persistente(s)
- ⚡ Flavor: Define CPU e memória RAM
- 🌐 Network Interfaces: Configuração de rede
💡 Esses parâmetros determinam performance, armazenamento e conectividade da VM.
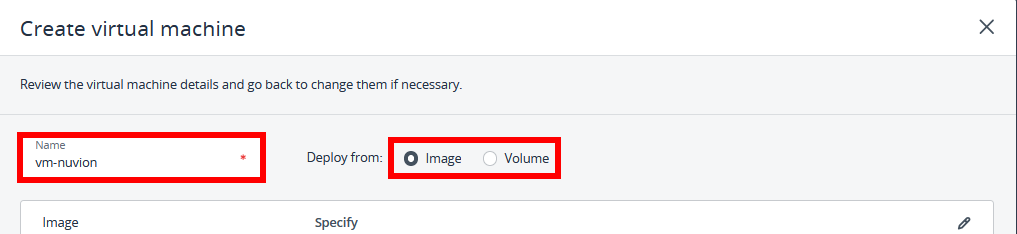
🏷️ 2. Nome da VM
Defina um nome claro e padronizado.
Exemplo: web-prod-01, db-hml-02
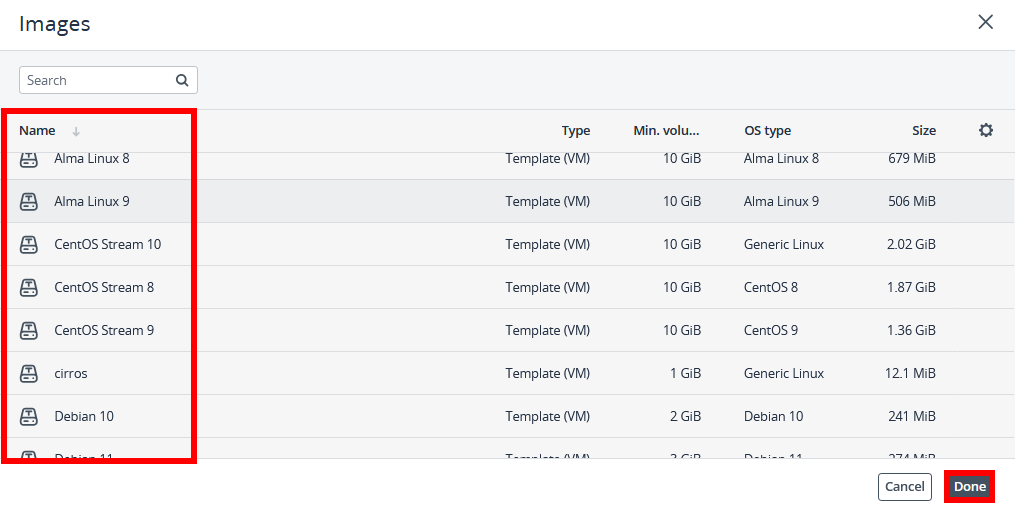
💽 3. Selecionar imagem
Escolha o sistema operacional.
ℹ️ Formatos suportados:
- qcow2 → otimizado para virtualização
- iso → instalação manual
- raw → formato bruto
- img → compatível genérico
⚡ 4. Flavor (Recursos)
Define capacidade computacional:
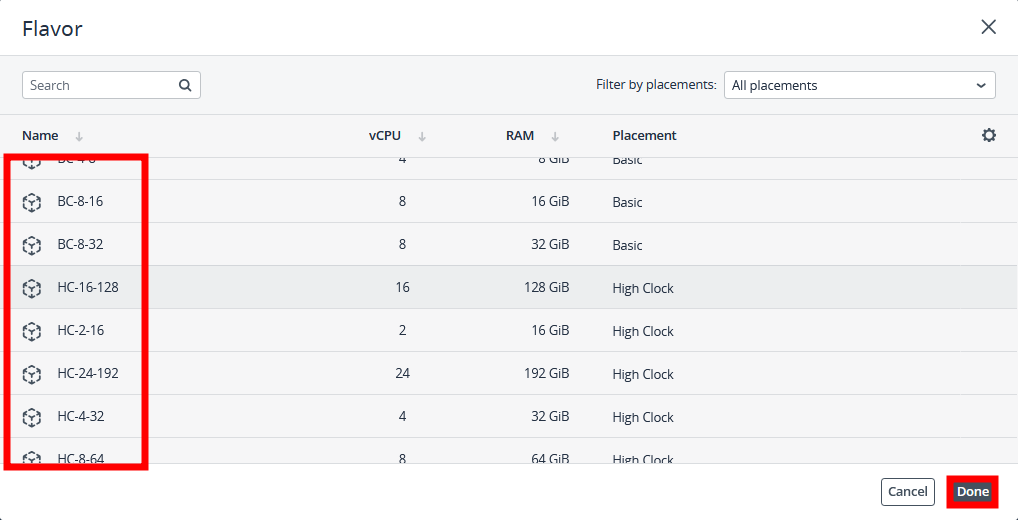
- BC (basic) → instâncias que possuem uma carga de trabalho menor
- HC (high clock) → instâncias que precisam de mais recursos para suportar seu workload
💡 Escolha conforme carga de trabalho (web, banco, processamento).
🌐 5. Rede
Adicione interface de rede:
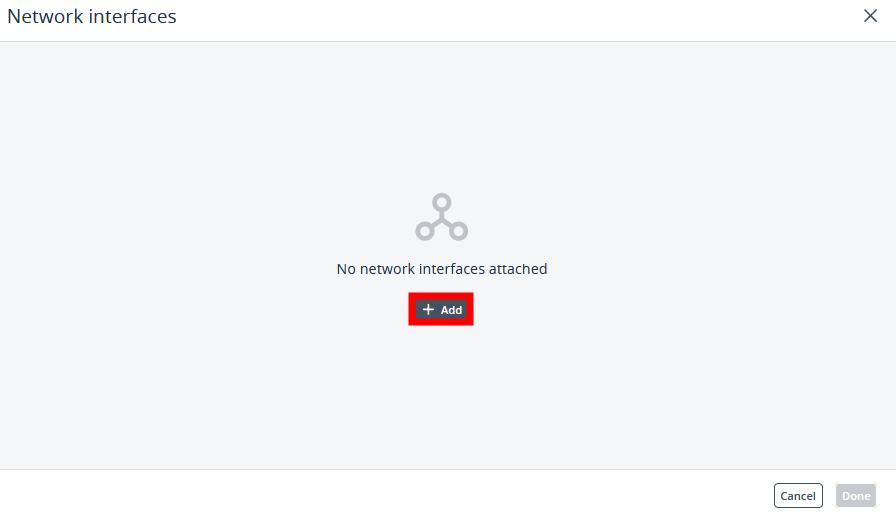
Selecione a rede desejada:
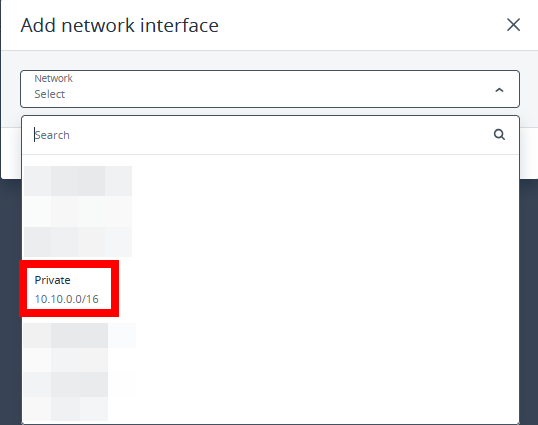
🔧 Opções:
- Atribuir IP de forma automática (DHCP)
- Adicionar IP secundário
- Definir um grupo de segurança desejado (firewall)
- Spoofing protection
💡 Spoofing protection evita falsificação de IP/MAC e pode apenas ser configurado caso não exista um grupo de segurança selecionado.
📌 Para criar outras interfaces primárias (eth1, eth2, etc), basta repetir o processo de adicionar um endereço IP.
🔐 6. SSH Key
Utilize um par de chaves assimétrico para acesso seguro sem senha ao adicionar a chave pública no momento da criação.
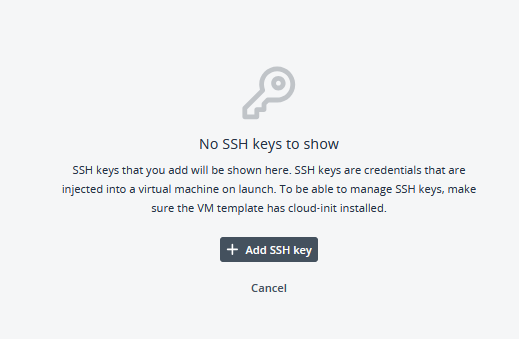
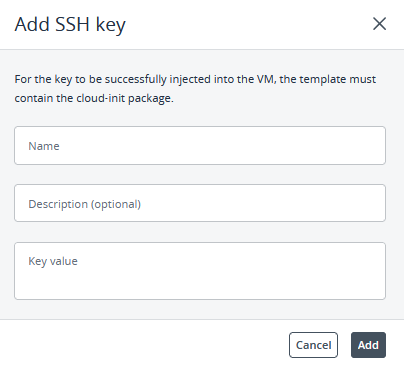
- Em Key value, insira o conteúdo da sua chave pública.
💡 Recomendado o uso de chaves SSH para acesso externo em vez de senha, evitando acessos não autorizados por meio de ataque de força bruta
🧩 7. Customization Script
Automatiza configurações iniciais via cloud-init ou shell script.
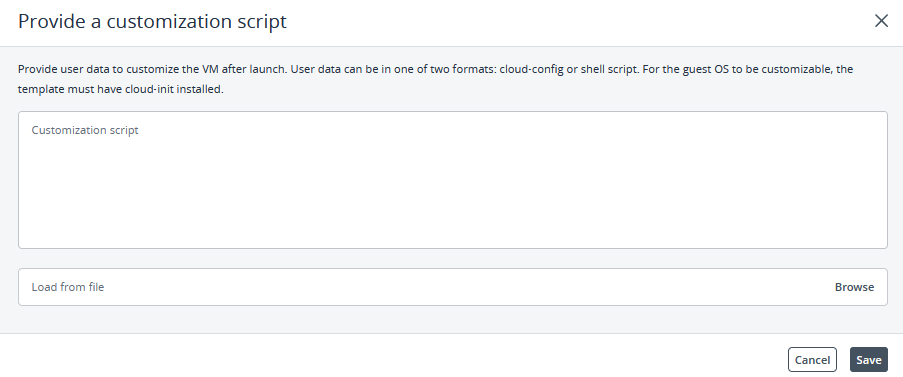
Para utilizar esta função, o sistema operacional convidado deve ter o cloud-init instalado.
💡 Exemplo:
#cloud-config
user: <usuario>
password: <password>
chpasswd: { expire: False }
ssh_pwauth: True
🖥️ 8. Boot Parameters
🔹 UEFI (Unified Extensible Firmware Interface)
UEFI é um substituto moderno do BIOS tradicional.
✔ Inicialização mais rápida
✔ Suporte a discos maiores
✔ Melhor compatibilidade com sistemas modernos
✔ Recursos de segurança (Secure Boot)
🔹 vTPM (Virtual Trusted Platform Module)
O vTPM é um módulo de segurança virtual.
✔ Armazena chaves criptográficas
✔ Permite uso de criptografia (ex: BitLocker)
✔ Aumenta segurança do sistema operacional
✔ Requisito para alguns sistemas (ex: Windows 11)
⚠️ Importante:
- vTPM requer UEFI habilitado
- Não pode ser desabilitado facilmente após criação
🔧 9. Advanced Options

🔹 Hot Plug (CPU/RAM)
Permite alterar recursos com a VM ligada:
✔ Escalar CPU/RAM sem downtime
✔ Ideal para workloads variáveis
🚀 10. Deploy
Revise e clique em:
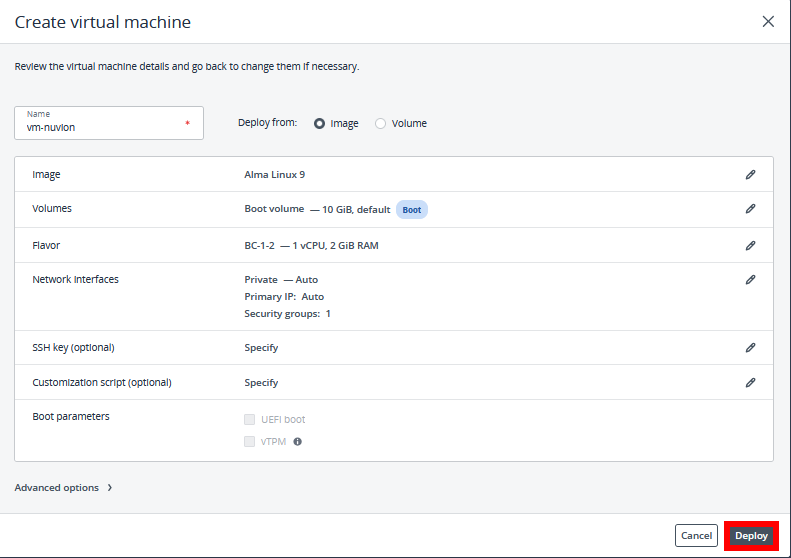
✅ Conclusão
Após o deploy:

✔ VM disponível em minutos
✔ Acesso via SSH ou console
✔ Recursos podem ser ajustados posteriormente
💡 Boas práticas:
- Use nomes padronizados
- Configure SSH ao invés de senha
- Escolha flavor adequado
- Utilize security groups corretamente
🧠 Dúvidas?
Entre em contato com o suporte técnico e envie sua dúvida que estaremos à disposição para te ajudar!