Creating and Restoring Snapshots in Nuvion
Overview
Snapshots allow you to create a restore point of a volume at a specific moment.
With them, it is possible to quickly recover the previous state of a system or use this copy to create new volumes and new virtual machines.
In Nuvion, snapshots can be used to:
- Restore a volume to a previous state
- Create a new volume from a snapshot
- Launch a new virtual machine based on a volume created from a snapshot
Snapshots record the state of a volume at a specific moment, allowing data restoration or reuse of the content in new infrastructure resources.
Creating a Snapshot
To create a snapshot of a volume, follow the steps below.
1. Access the volumes area
In the platform panel, go to:
Volumes
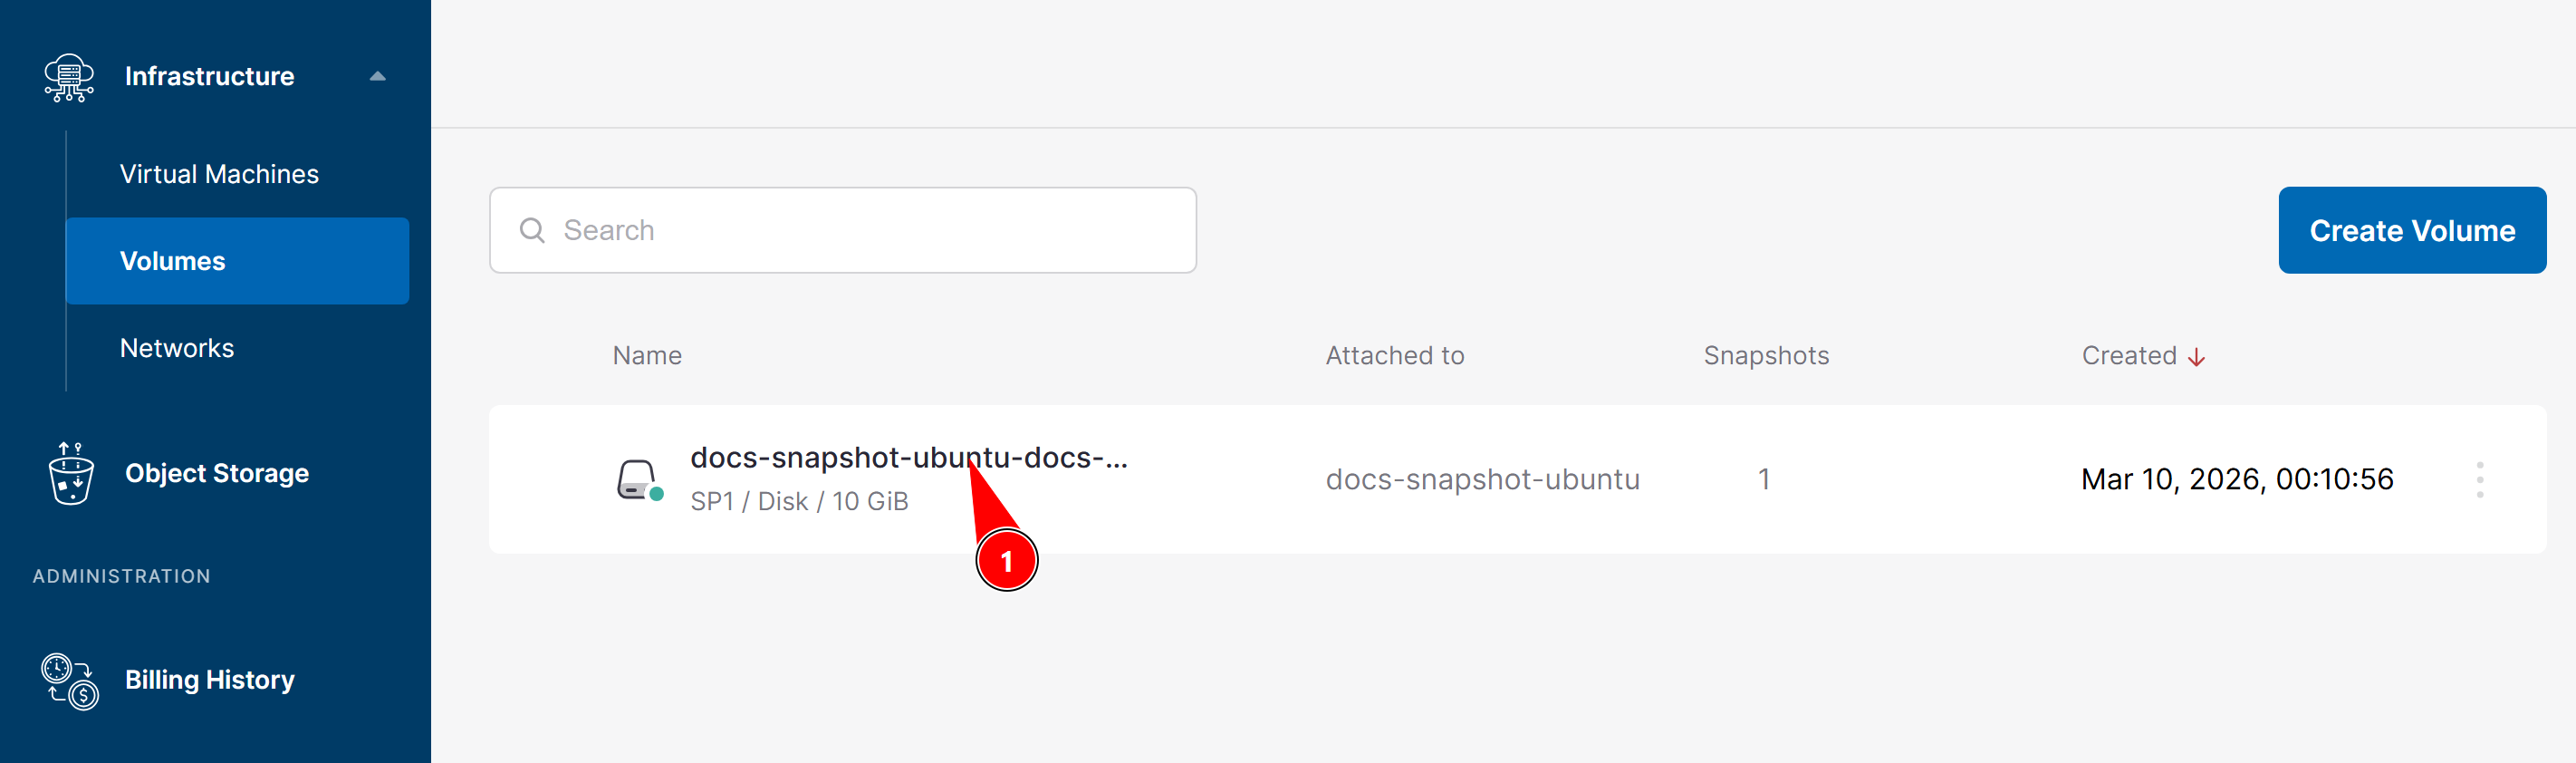
Find the volume from which you want to create the snapshot.
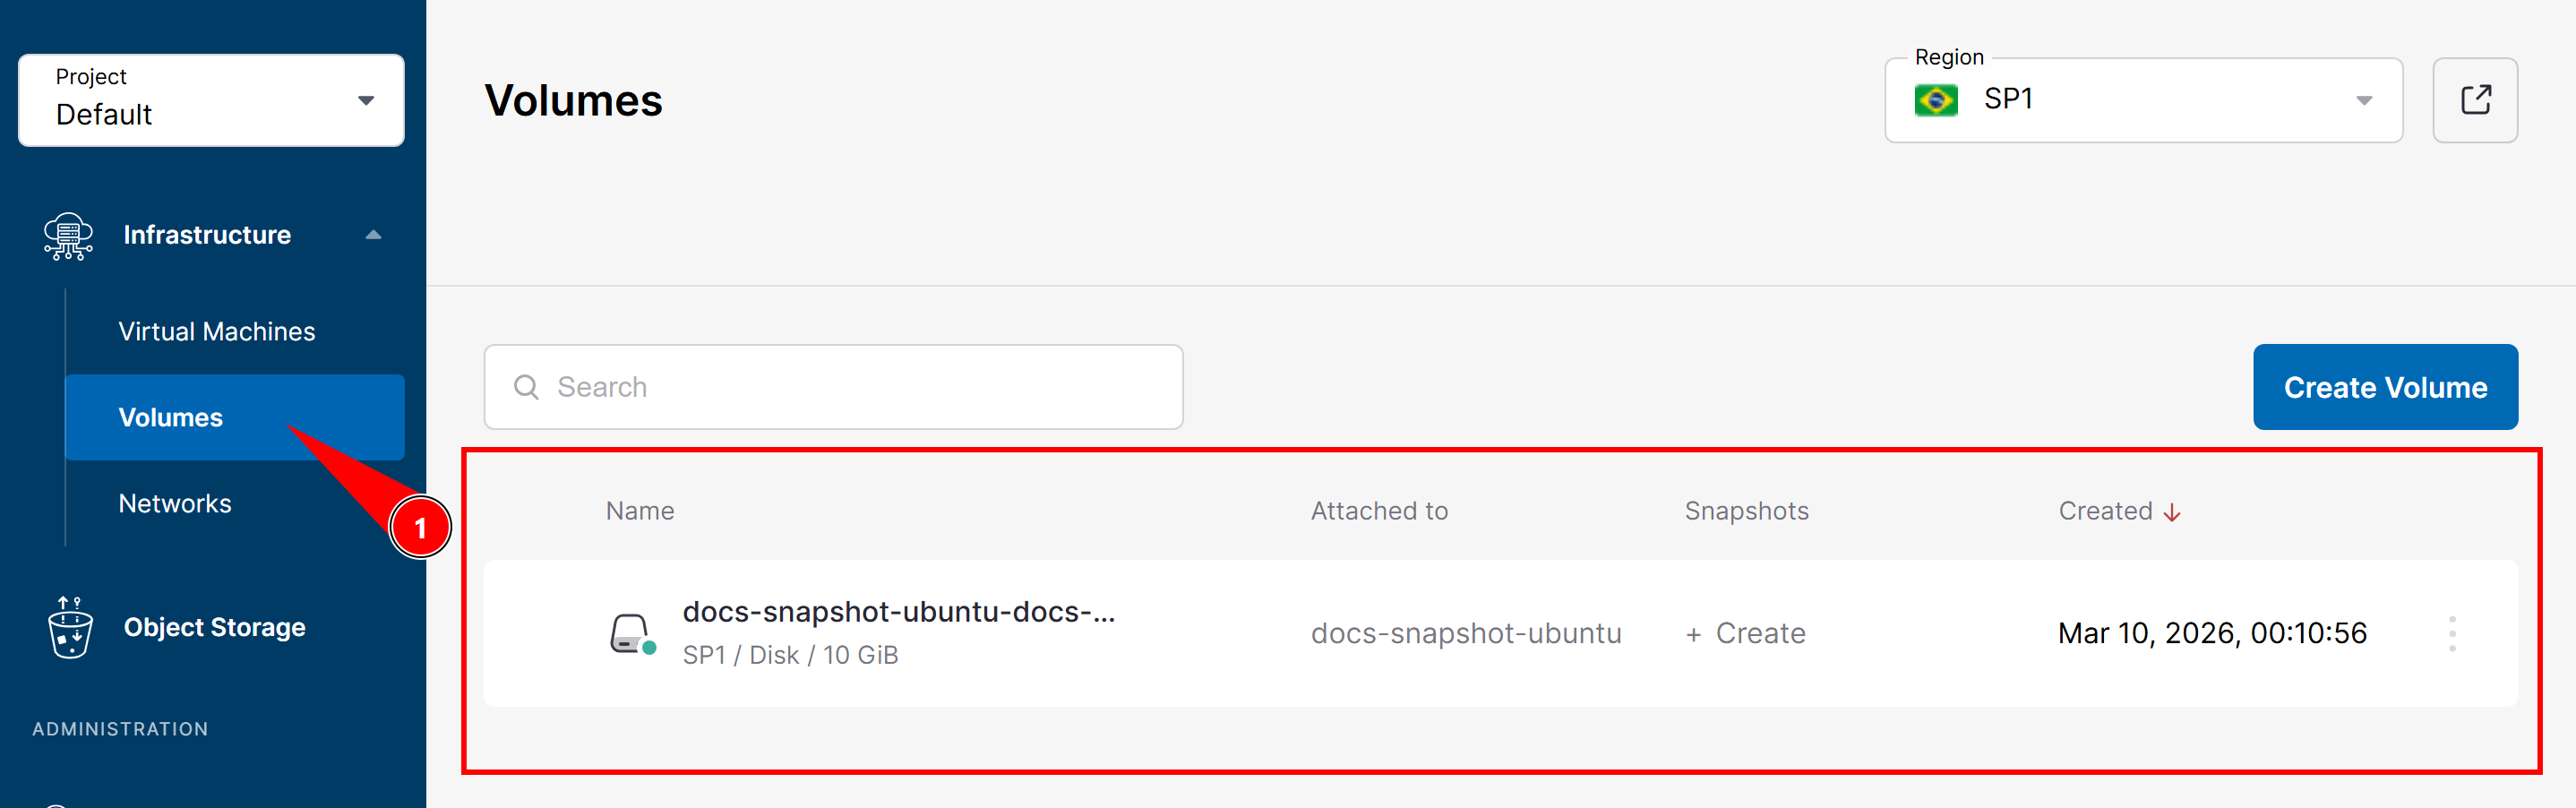
2. Select the desired volume
In the volume list, click on the three dots of the volume you want to protect with a snapshot.
This volume can be:
- A boot (operating system) volume
- A data volume
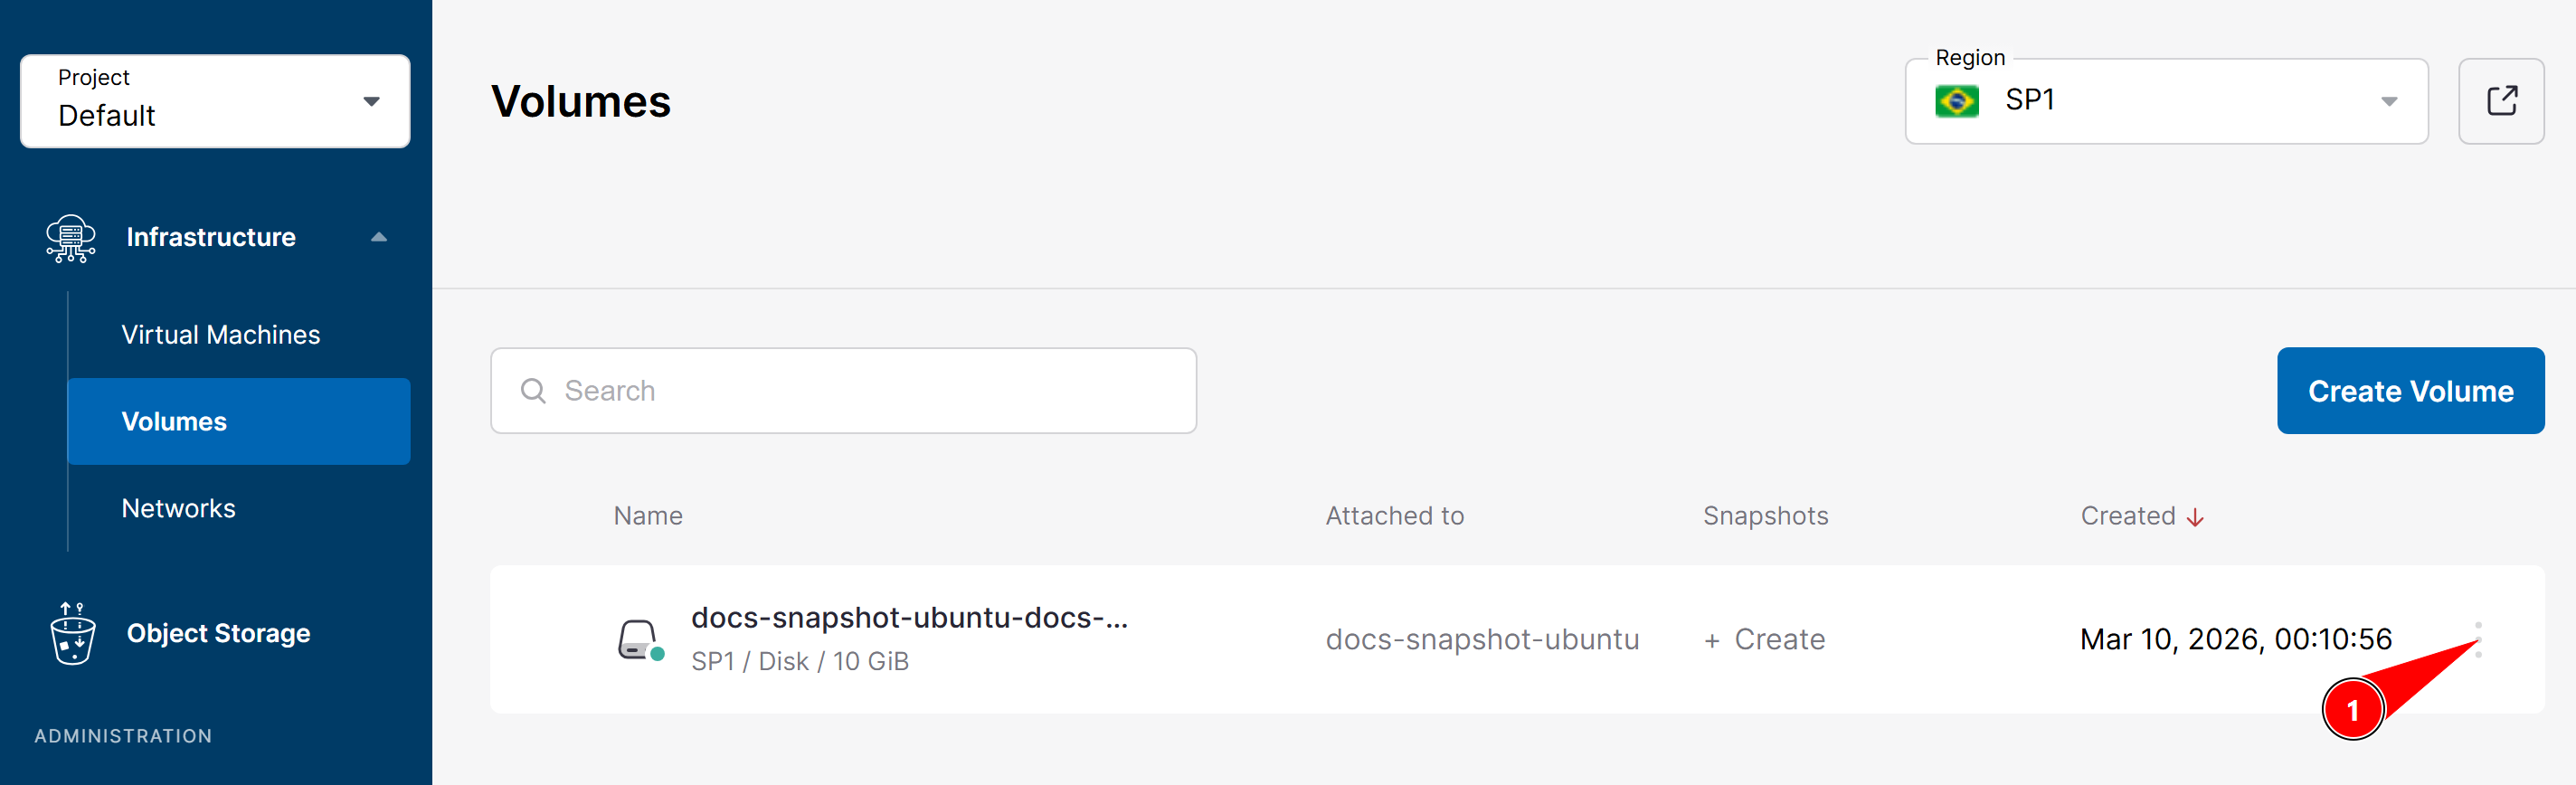
3. Create the snapshot
With the volume selected, click the button:
Create snapshot
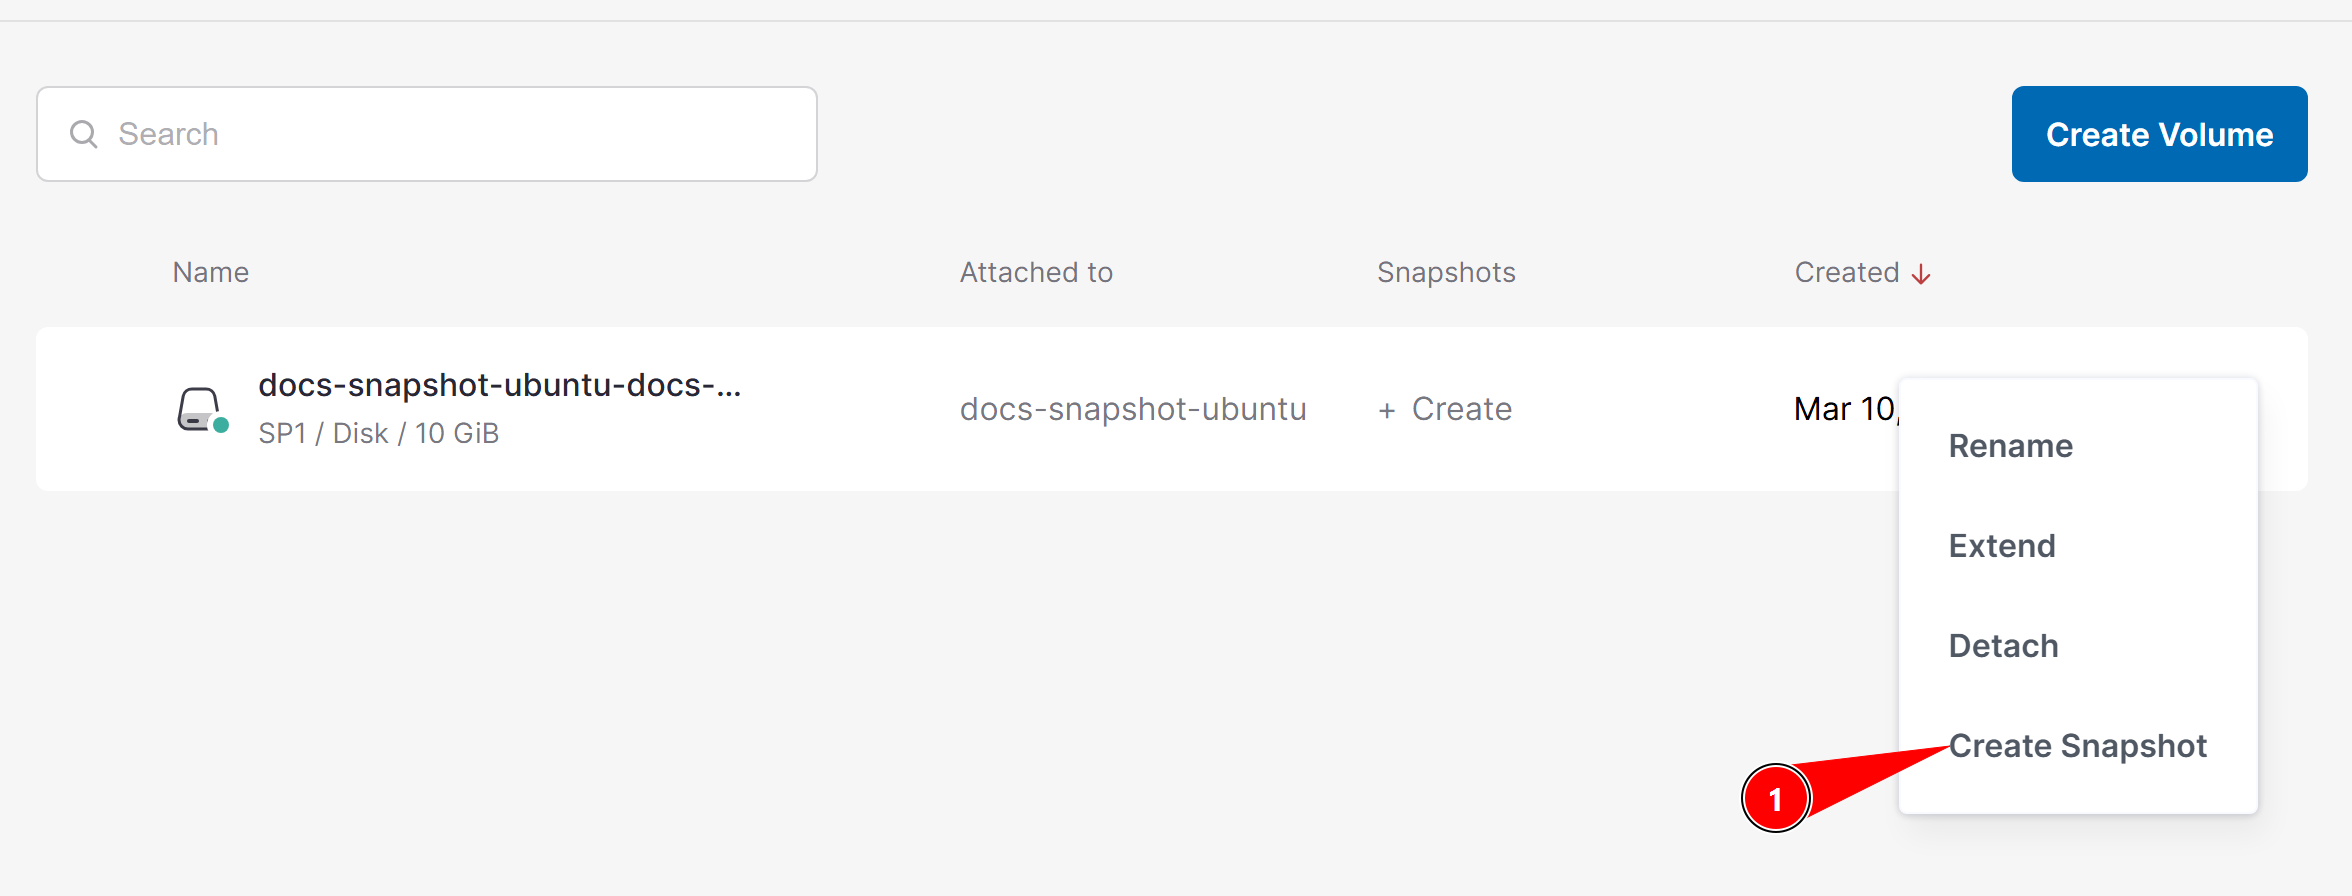
Choose a name for the snapshot and confirm the operation.
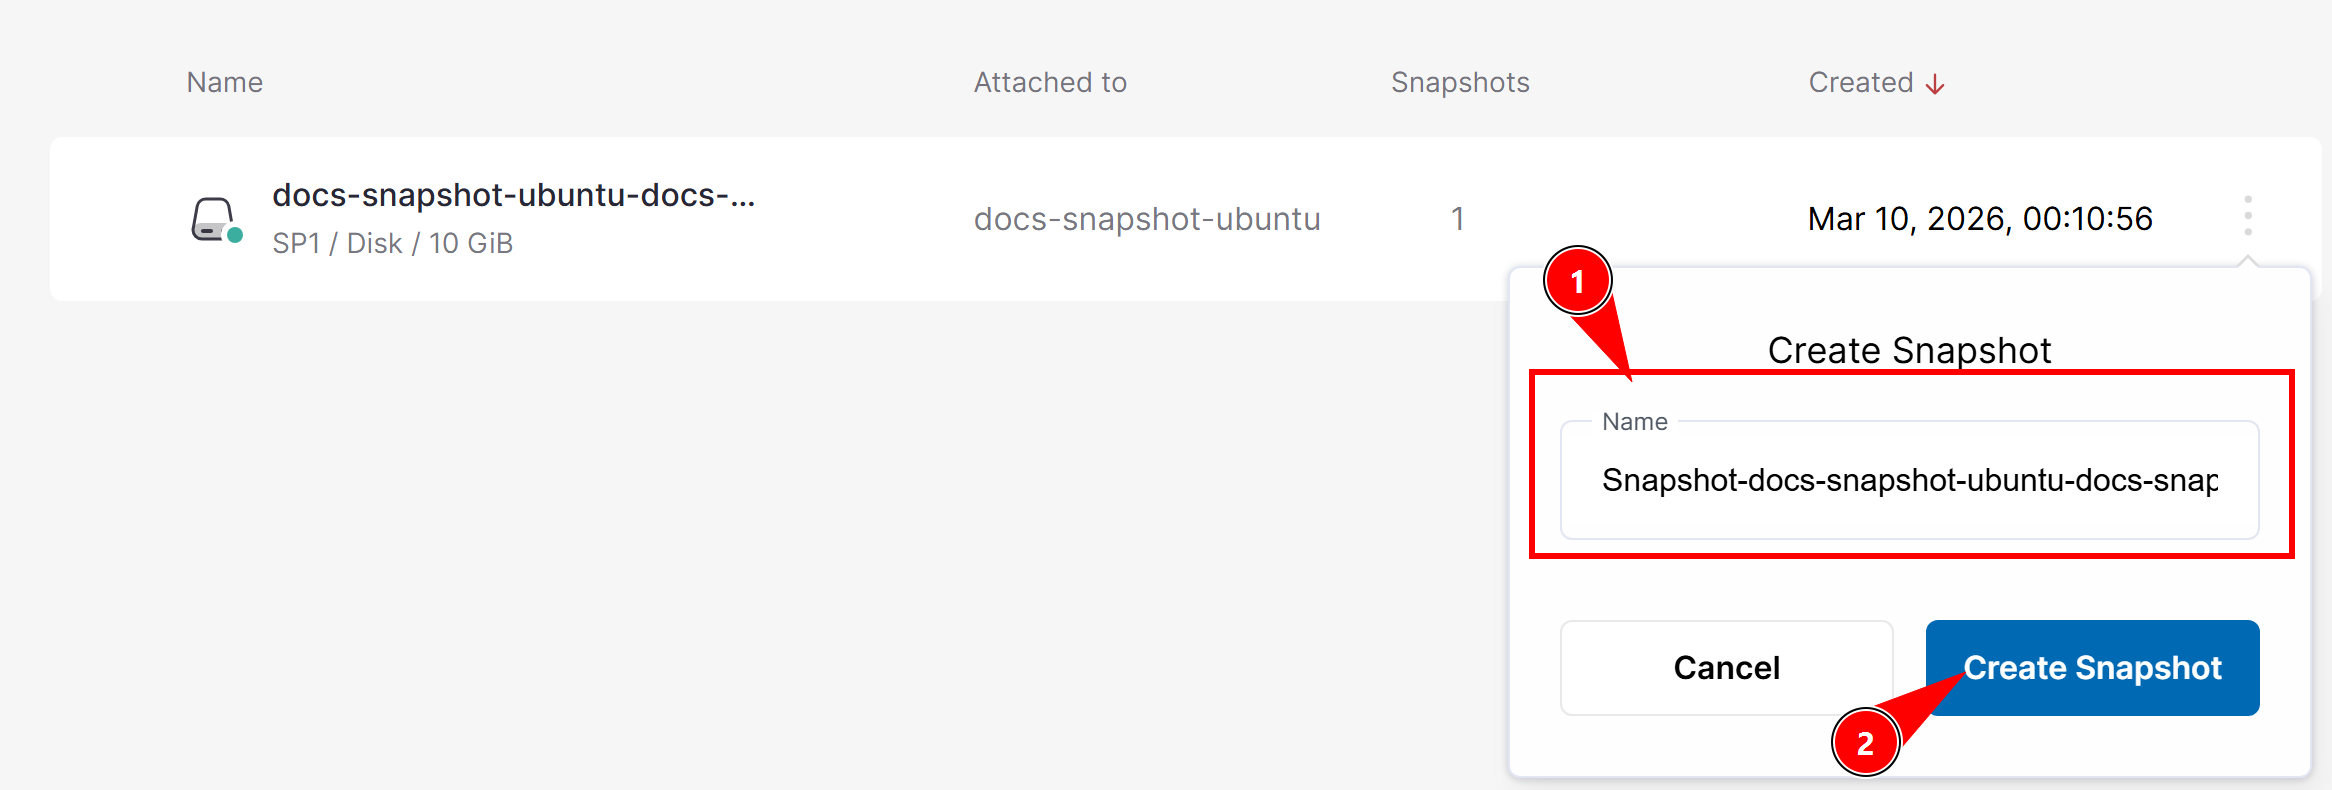
The platform will create a copy of the current state of the volume.
4. View the created snapshots
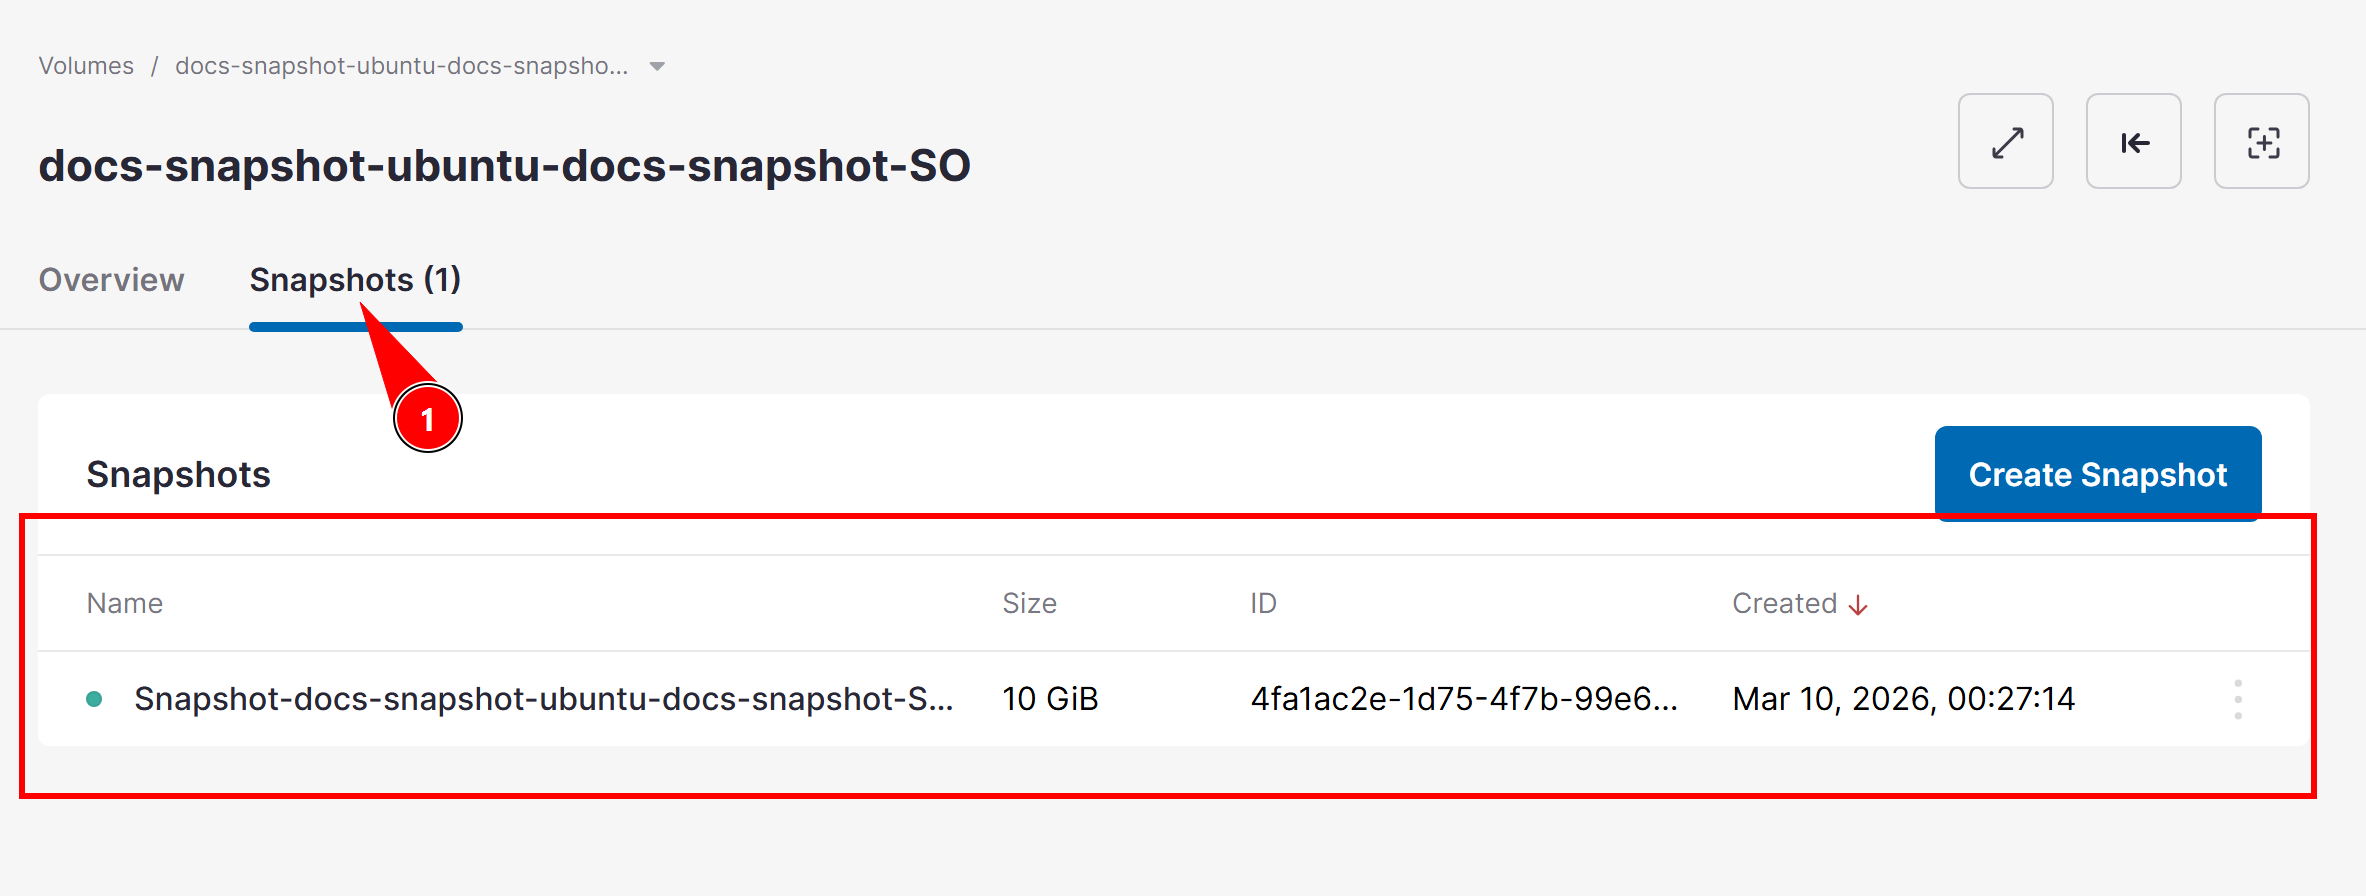
To view the created snapshots, click on the corresponding volume.
The snapshots will be available in the tab:
Snapshots
Each snapshot represents a specific point in time of the volume.
Restoring a Snapshot
There are two main ways to use a snapshot:
- Restore the original volume to a previous state
- Create a new volume from the snapshot
Restore Snapshot on the Same Machine
This option returns the volume exactly to the state it was in at the moment the snapshot was created.
1. Locate the snapshot
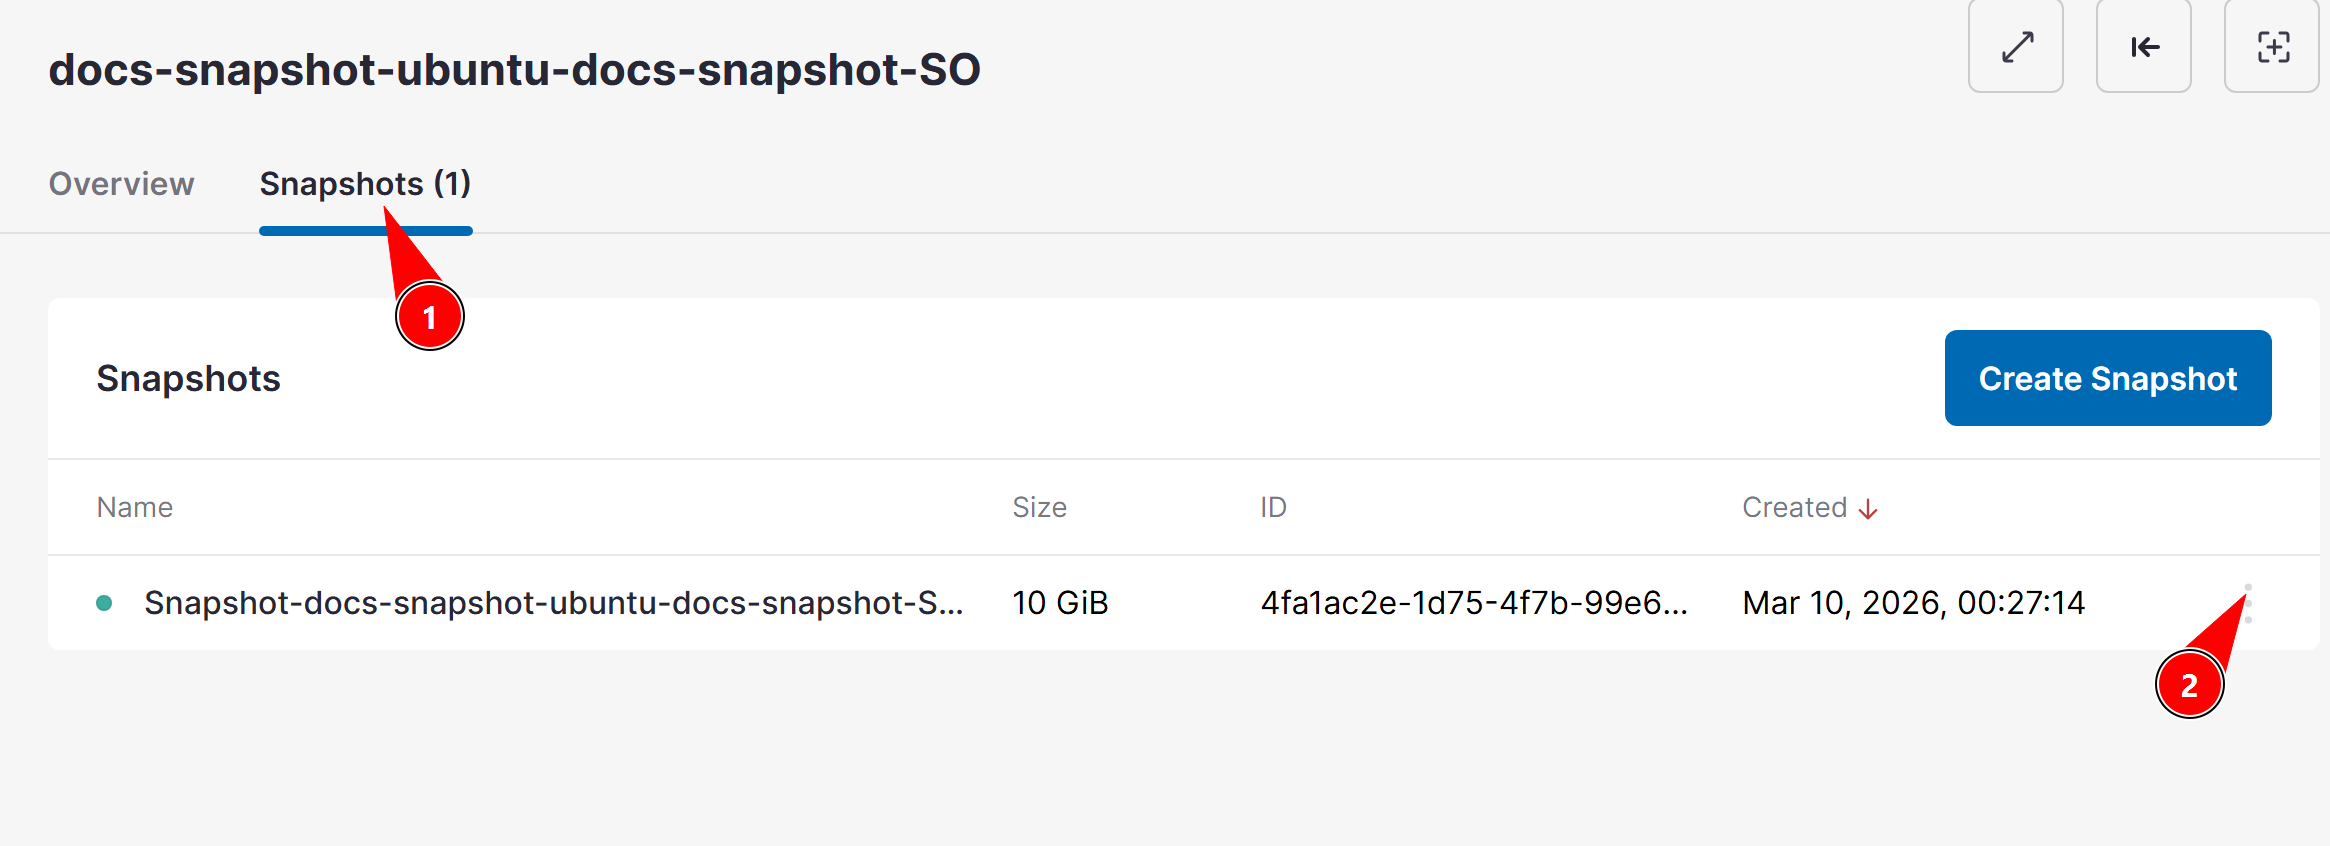
In the Snapshots tab, find the snapshot you want to restore.
Click on the options menu (three dots).
2. Select the restore option
Click on:
Revert to snapshot
or
Restore snapshot
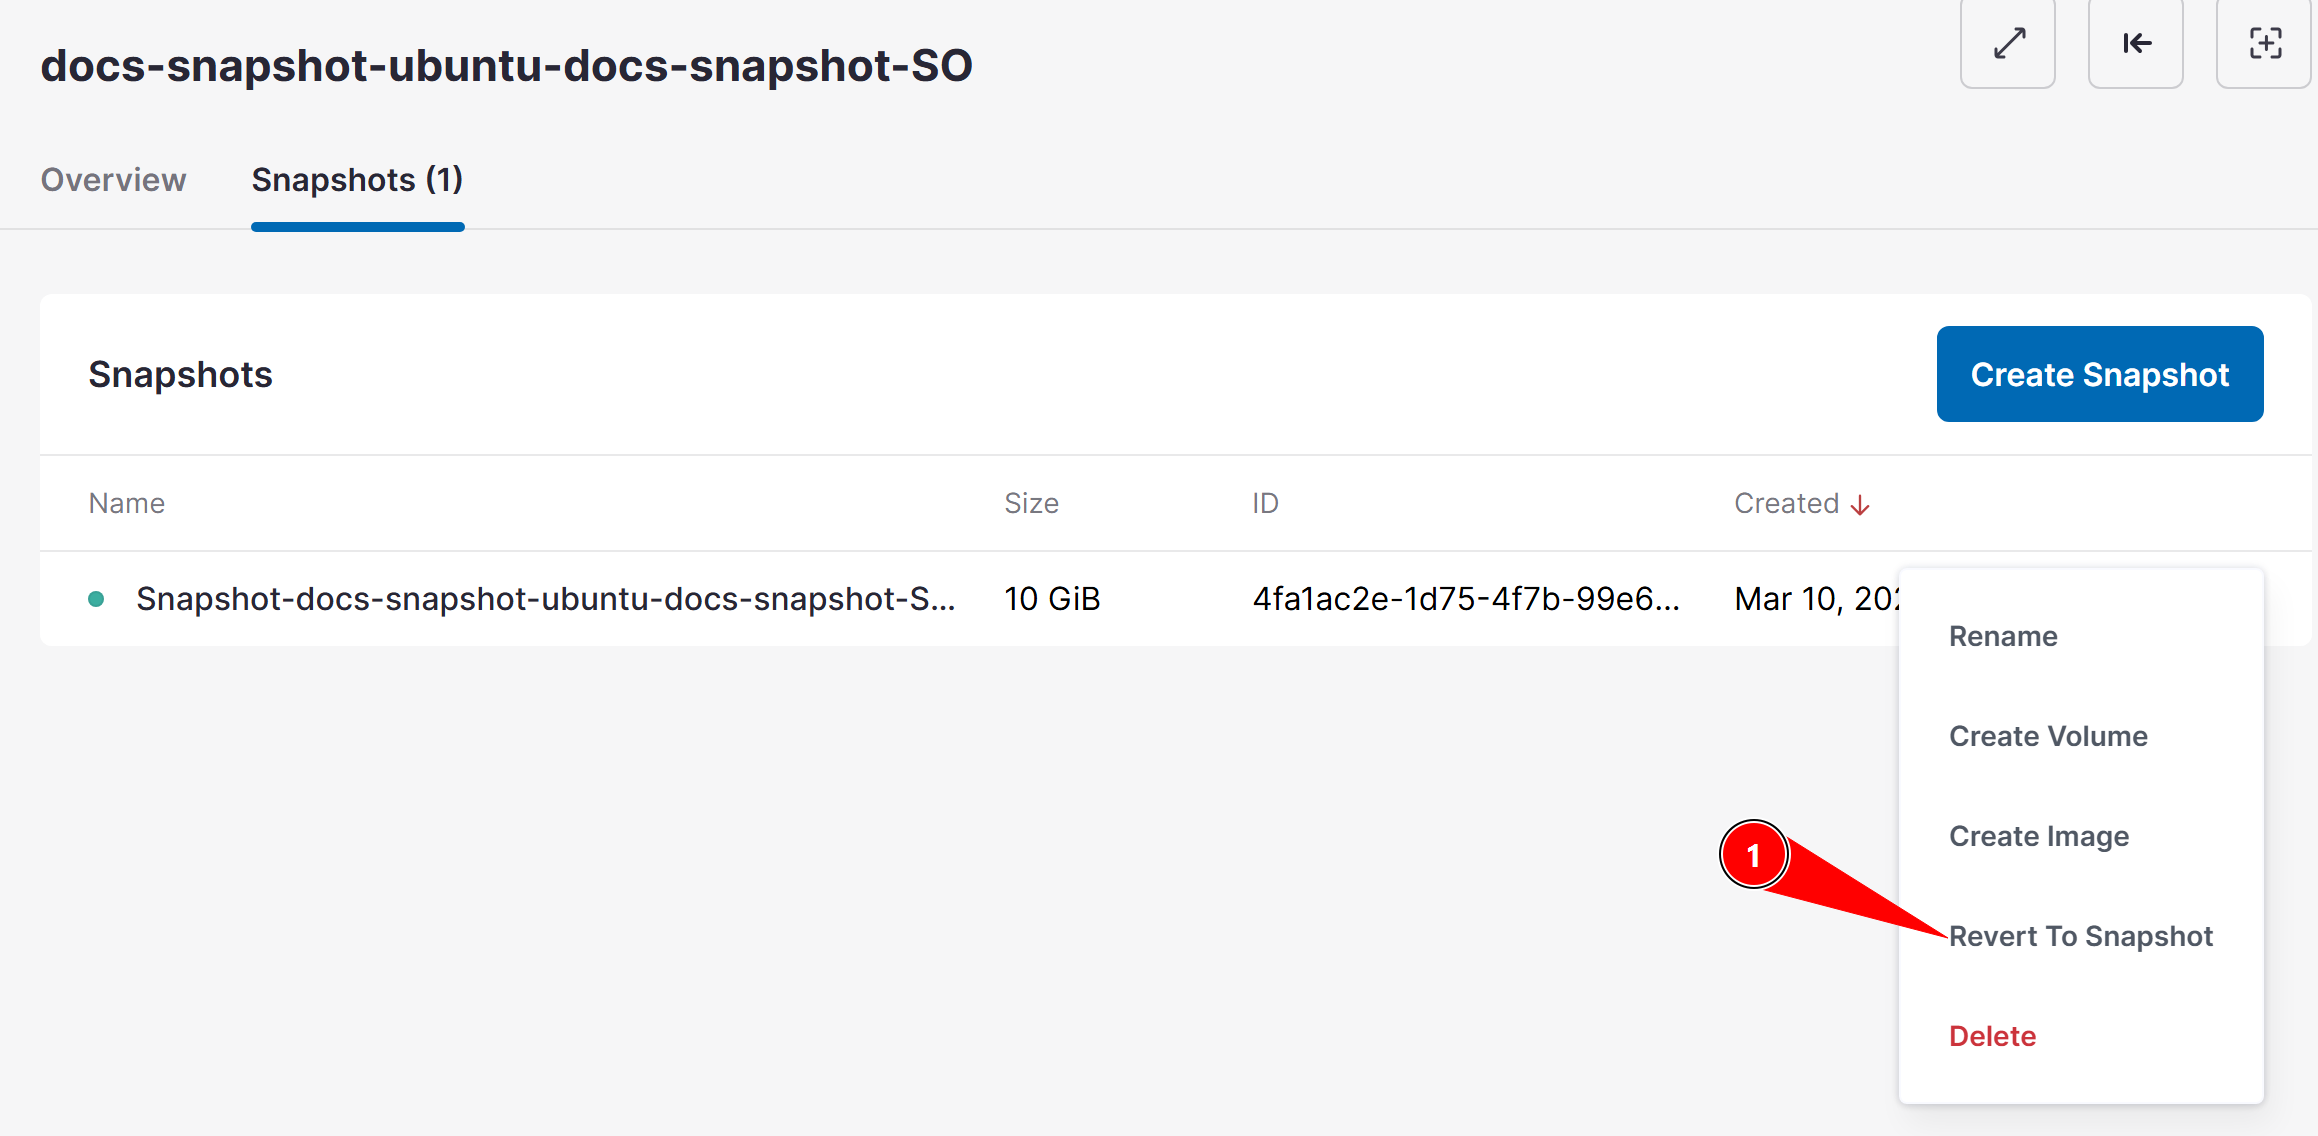
The virtual machine must be turned off to perform the snapshot restoration process.
3. Confirm the operation
The platform will display a confirmation informing that:
⚠️ All snapshots created after the selected snapshot will be automatically deleted.
This happens because the volume will be restored exactly to the state of that point in time.
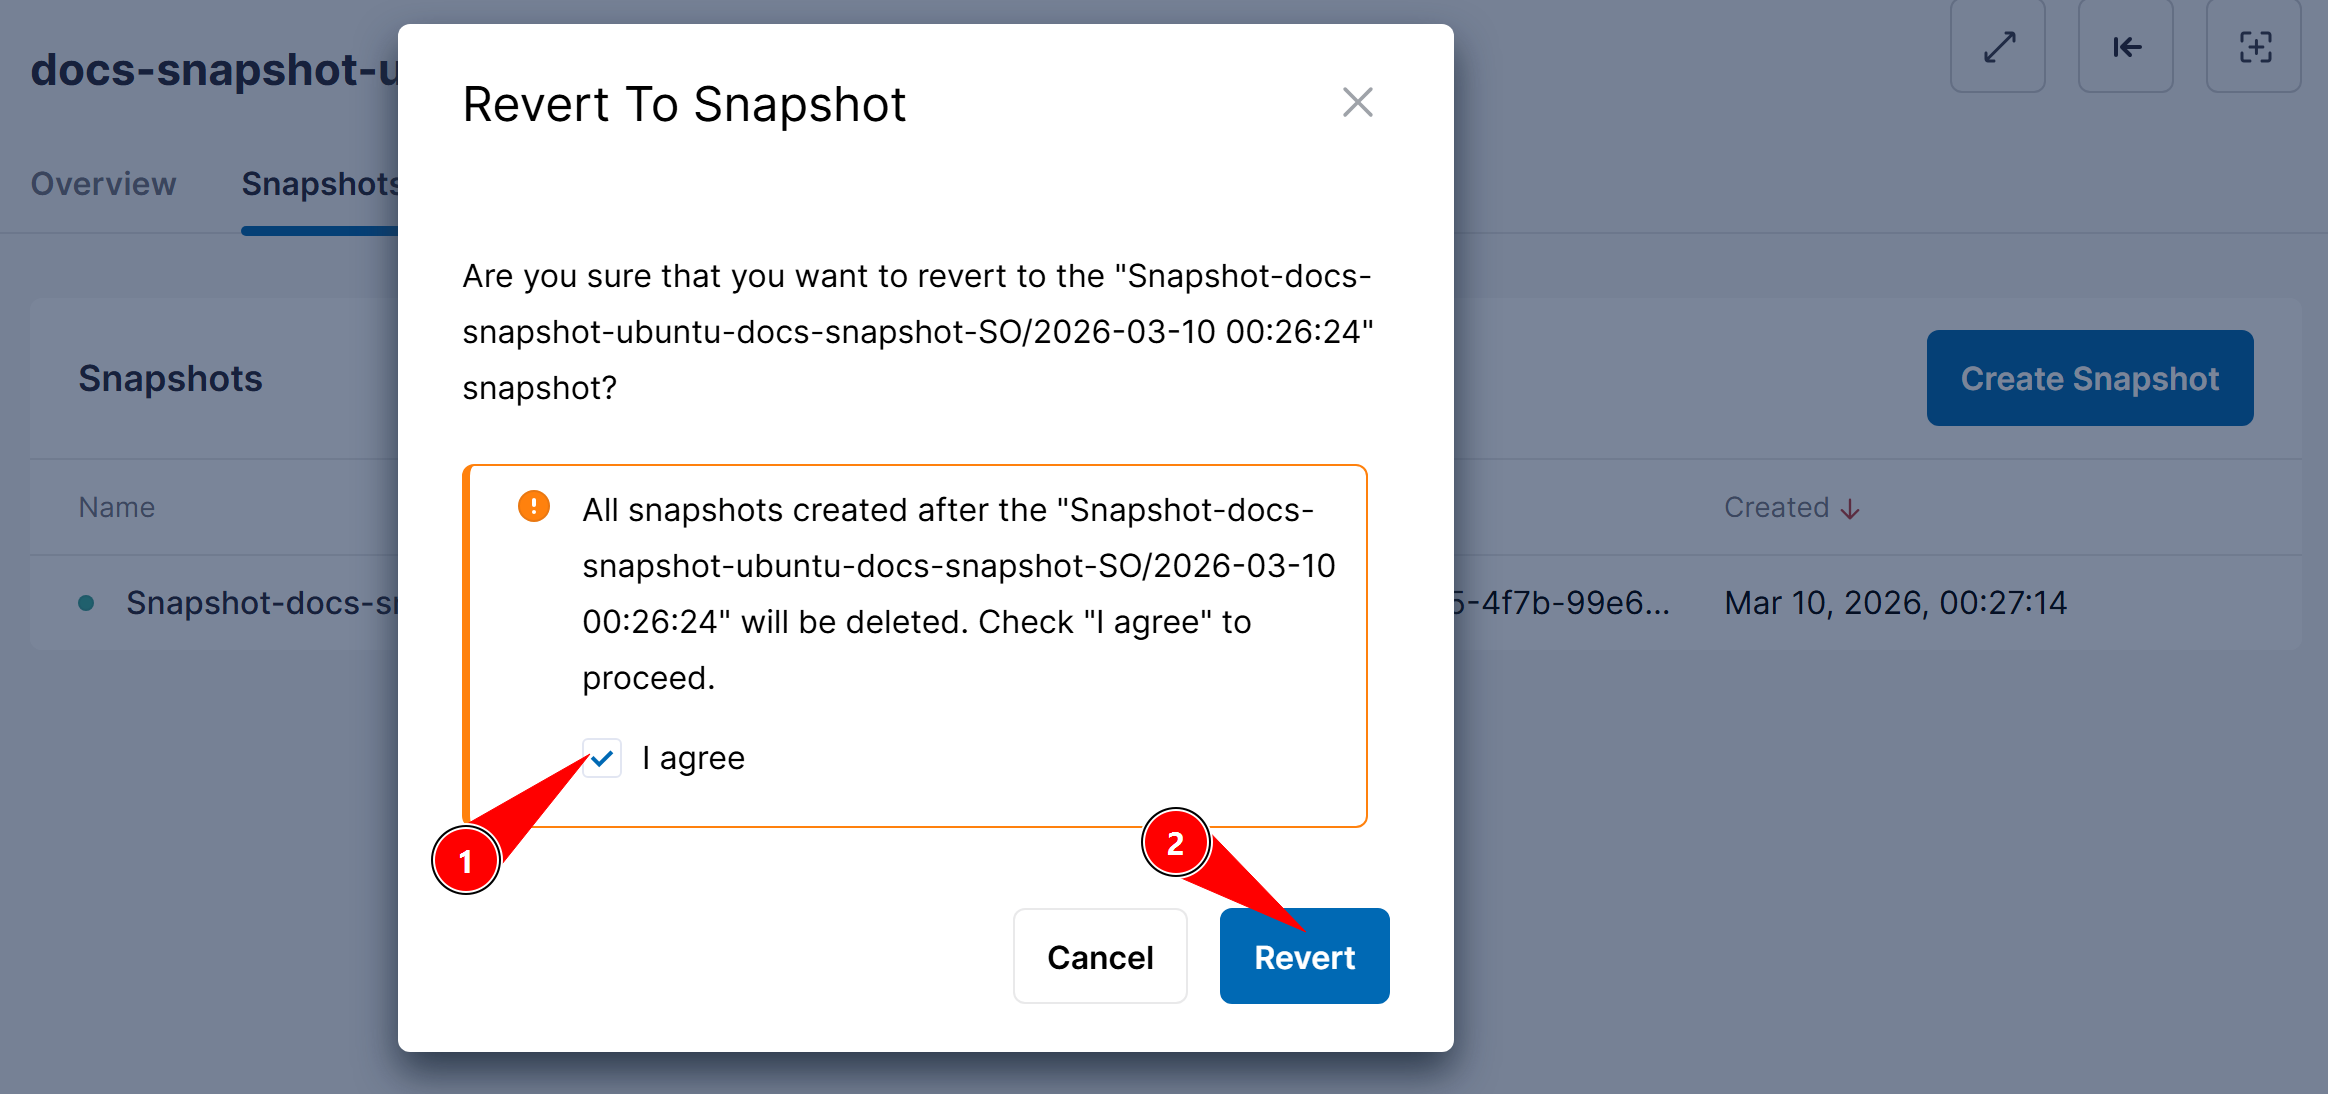
After confirming, the volume will be reverted to the state of the chosen snapshot.
Restore Snapshot on a Different Machine
Another possibility is to use the snapshot as a base to create a new volume.
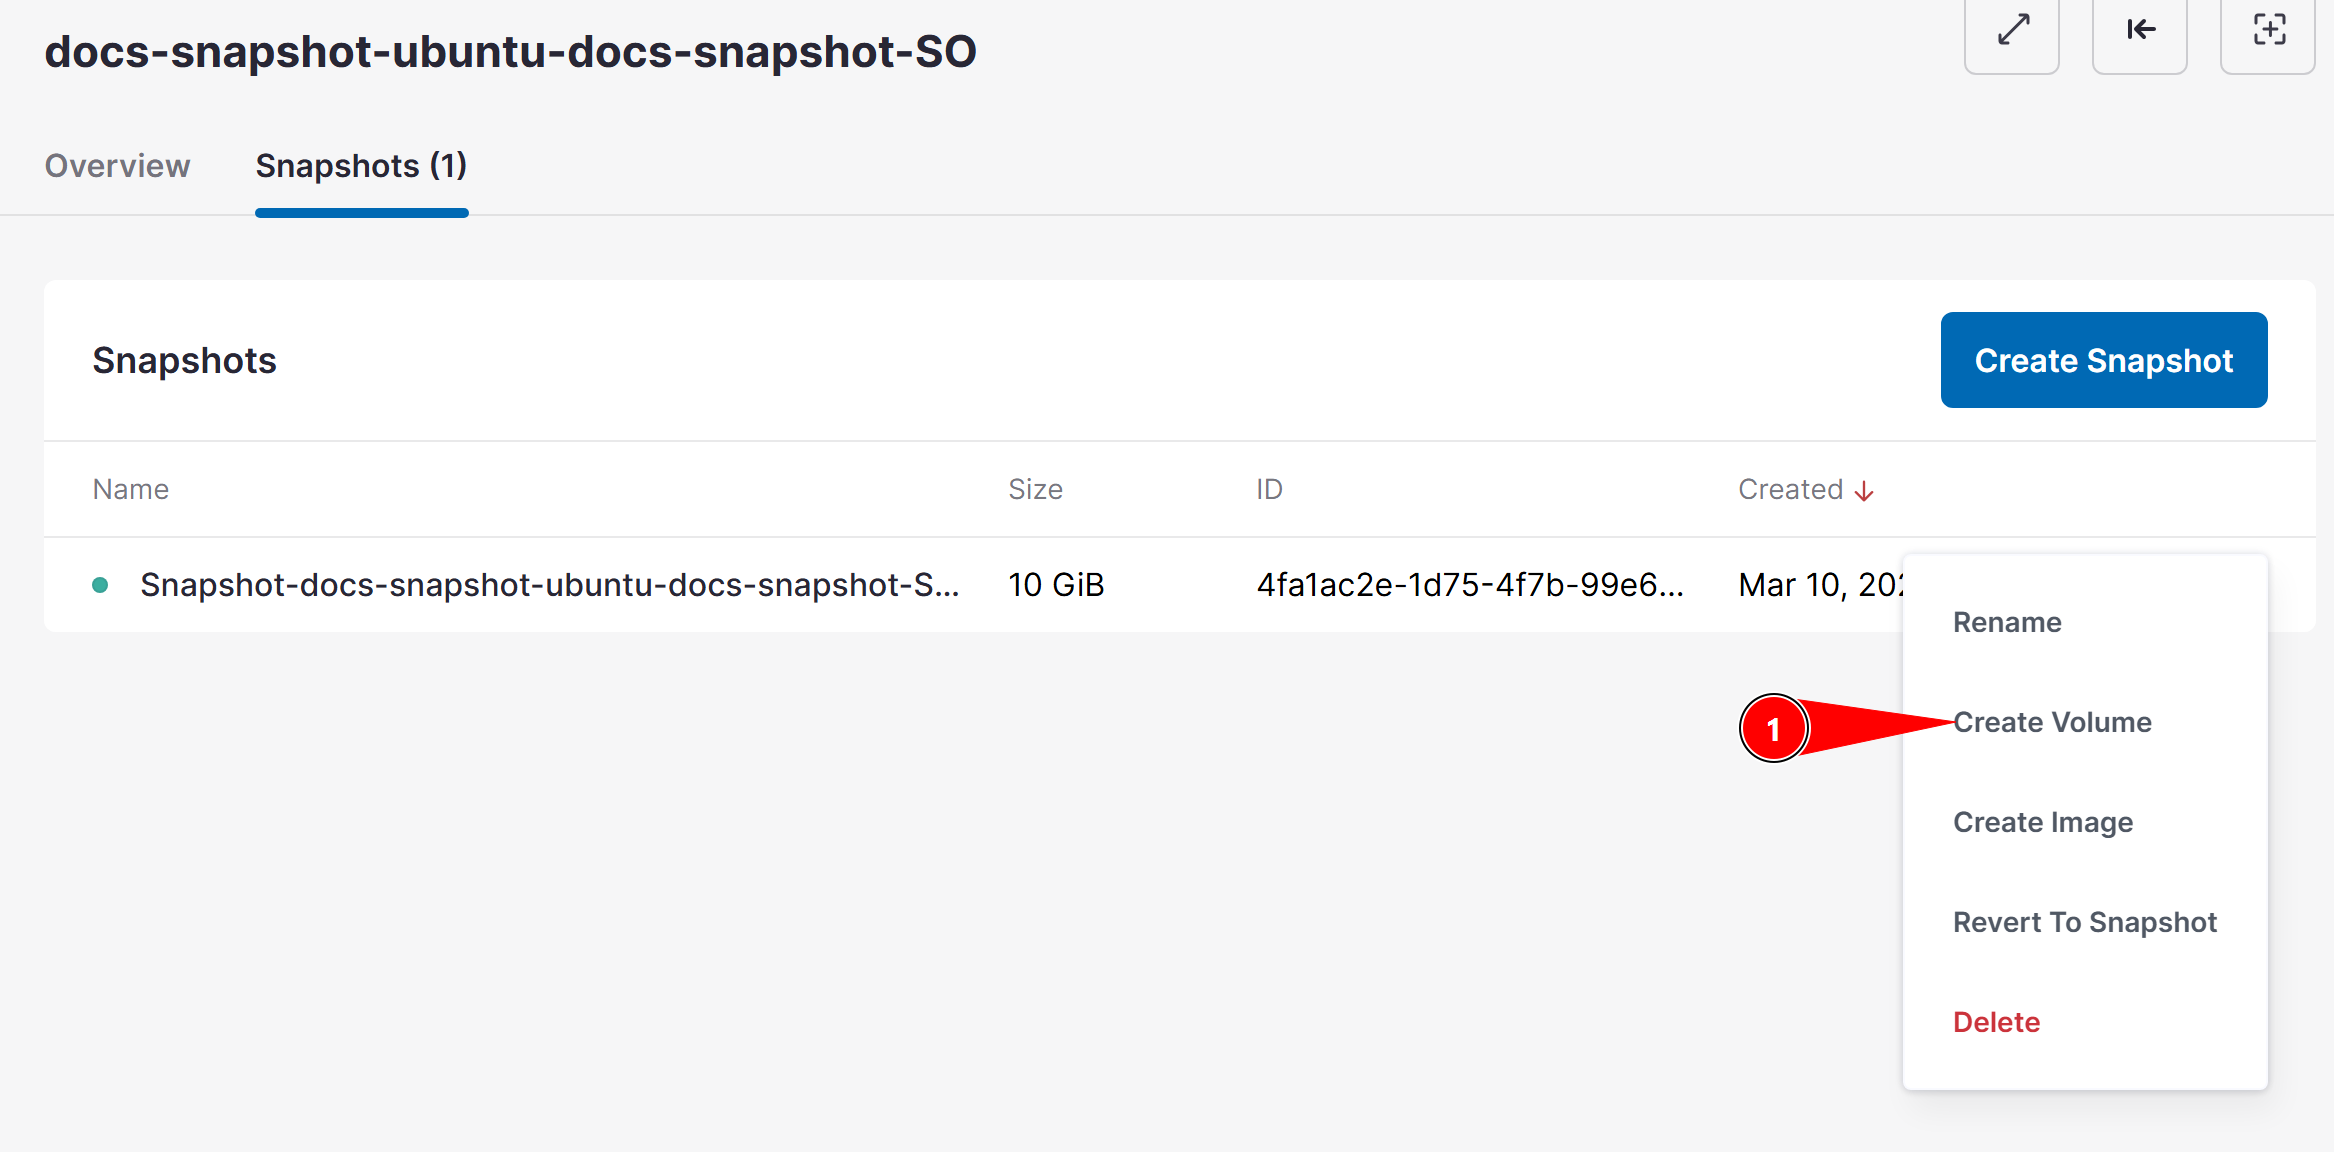
1. Open the snapshot menu
In the Snapshots tab, click on the options menu (three dots).
Select:
Create volume
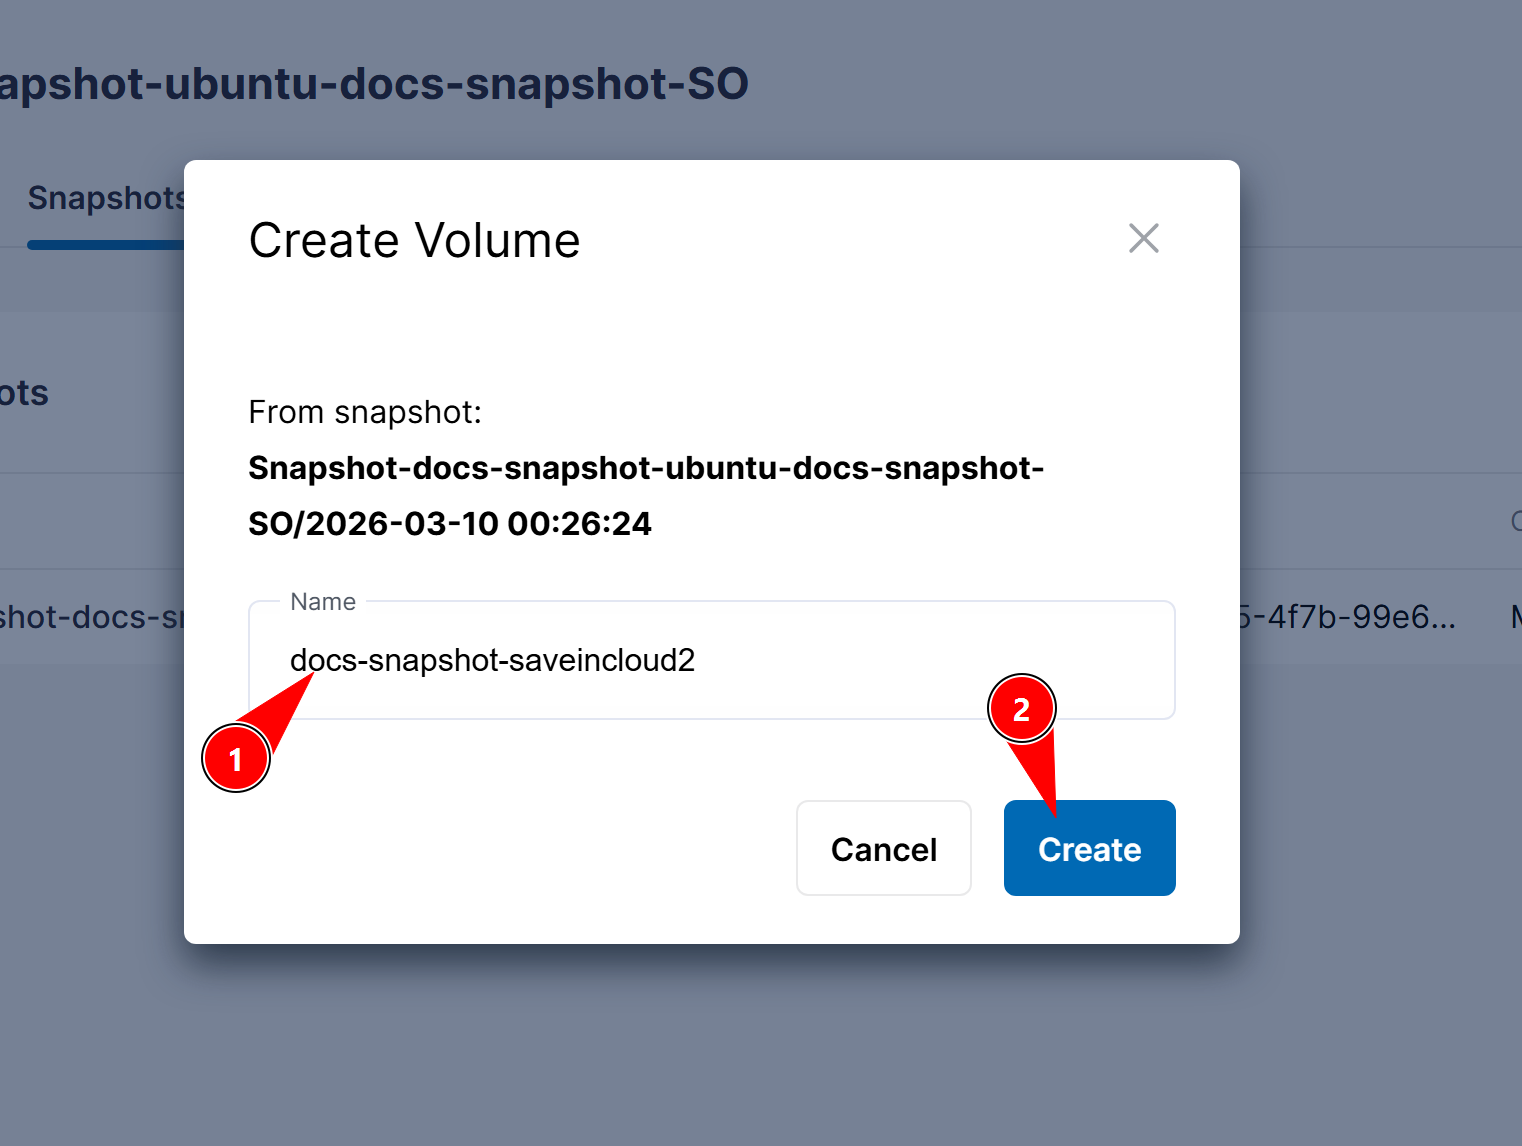
2. Define a name
Enter the desired name for this new volume.
Then click Create.
Create a New Virtual Machine Using the Volume
After creating a volume from a snapshot, it can be used to launch a new virtual machine.
This procedure only works when the snapshot was created from a boot volume.
If the snapshot was created from a data volume, it cannot start a virtual machine. In this case, the volume can only be attached to an existing VM.
1. Create a new virtual machine
In the panel, go to:
Virtual Machines
Click on Create virtual machine.
2. Select the deploy source
In the VM source option, select:
Volume
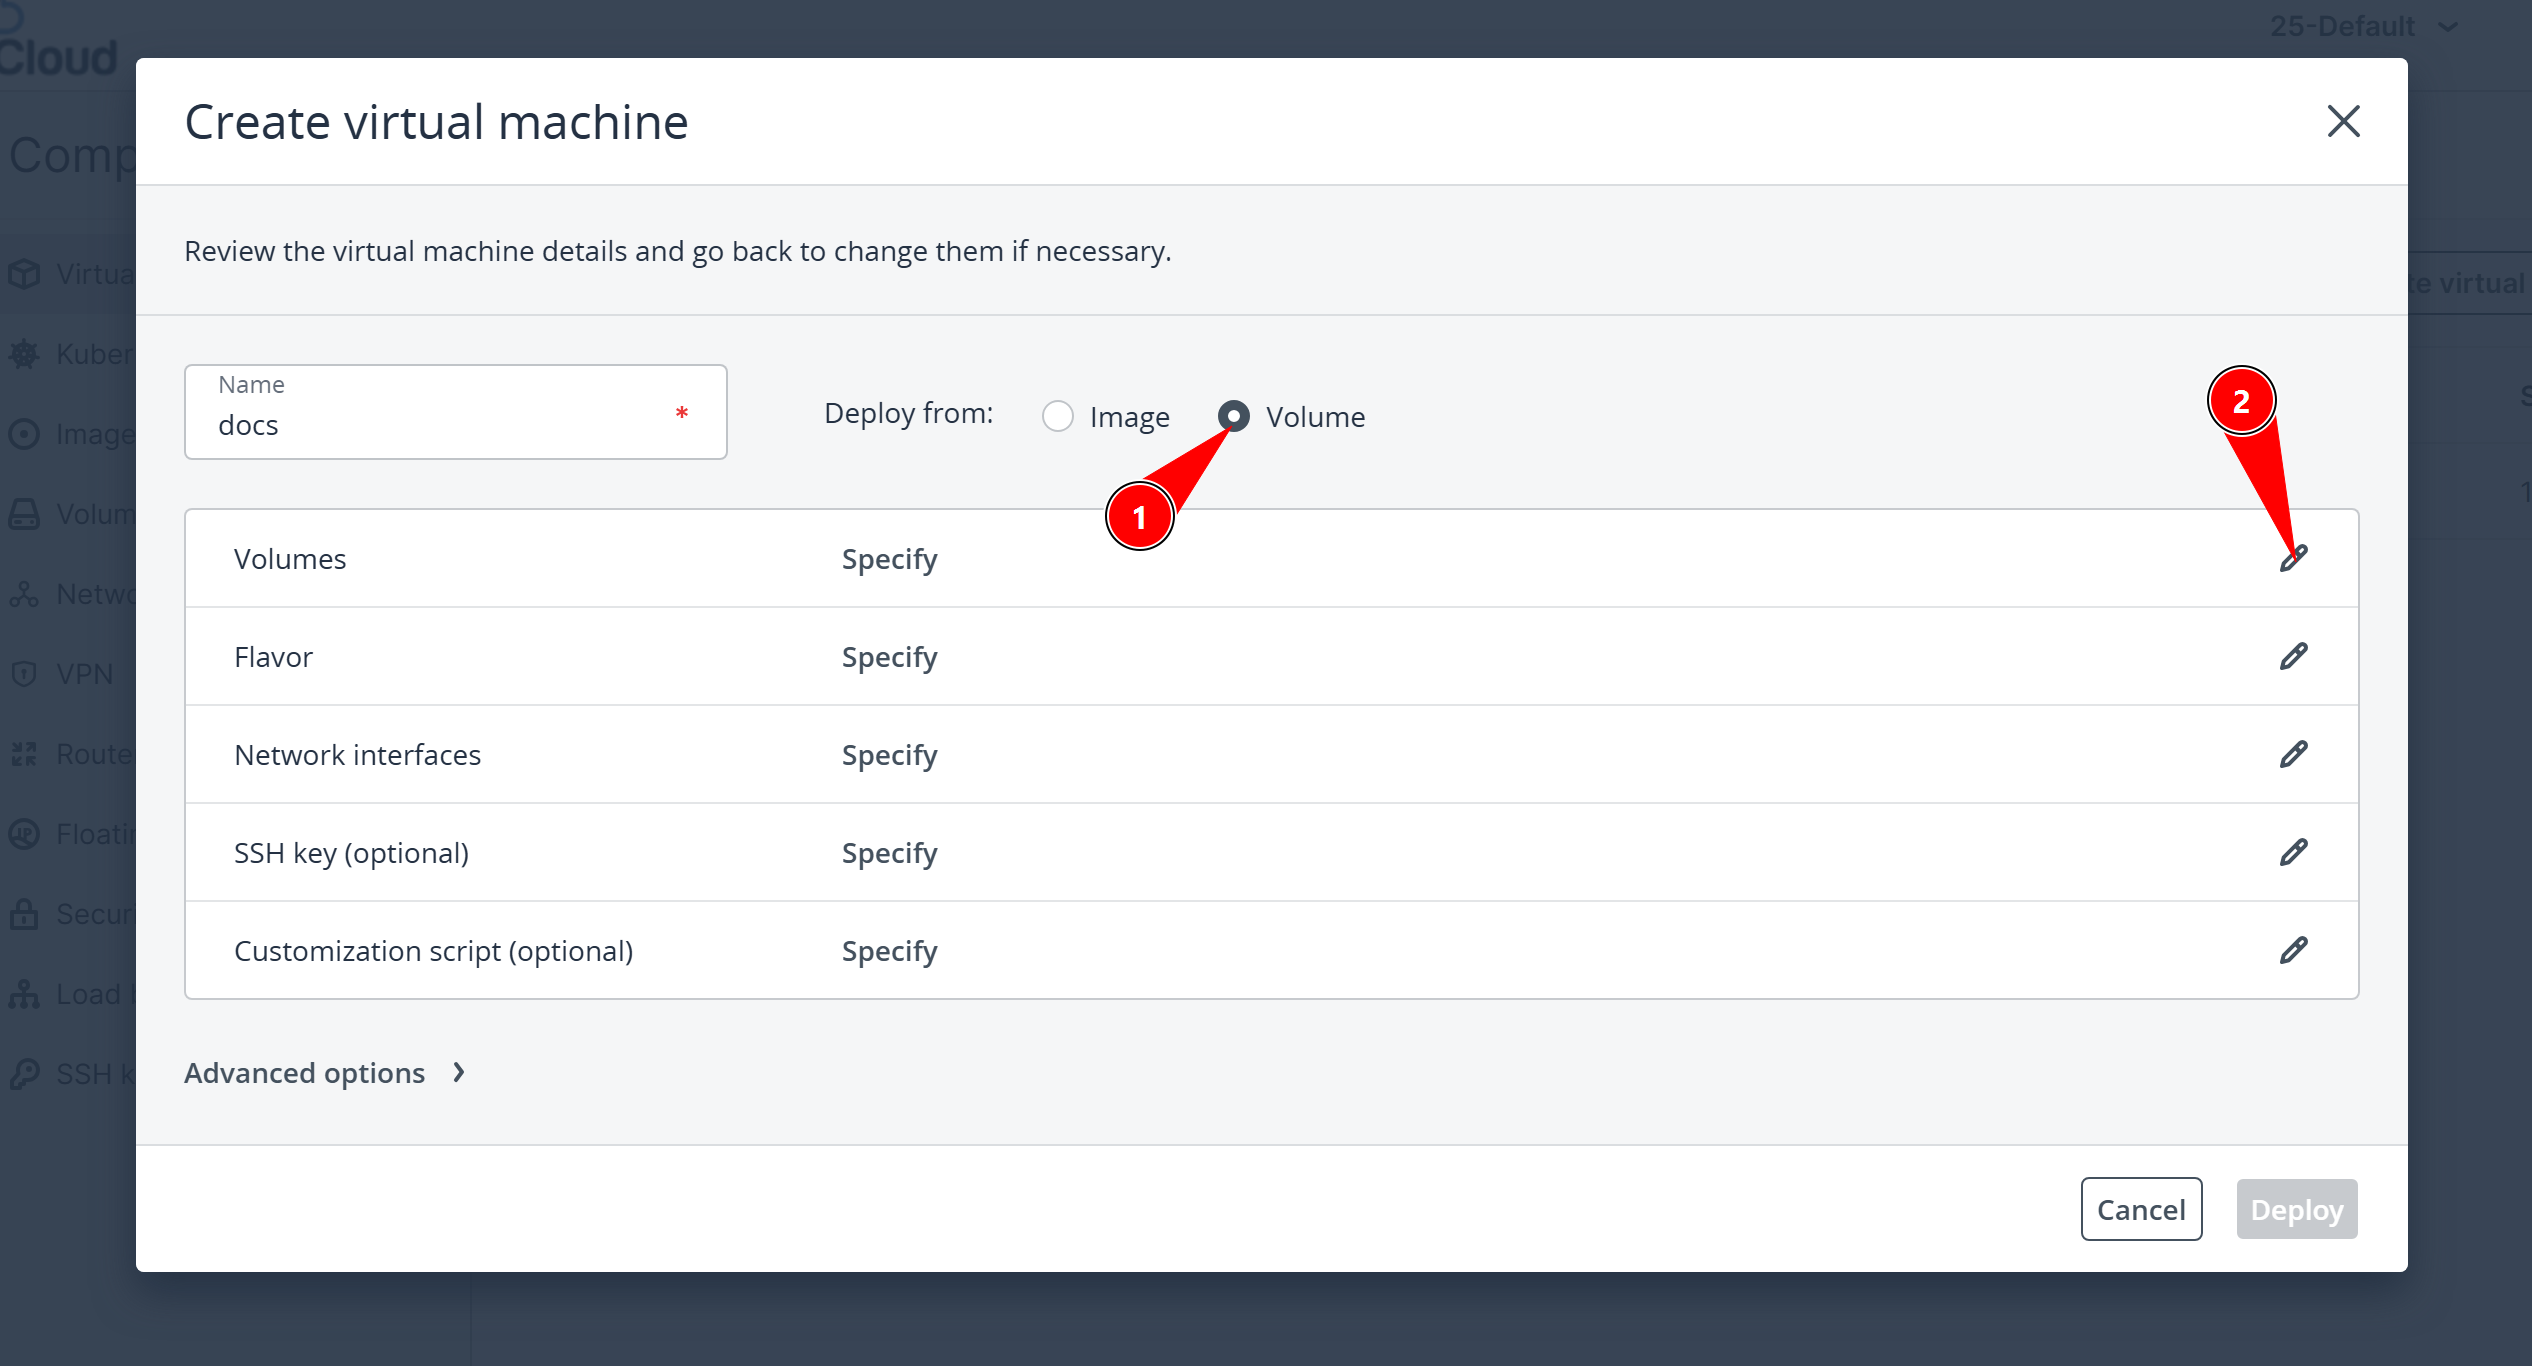
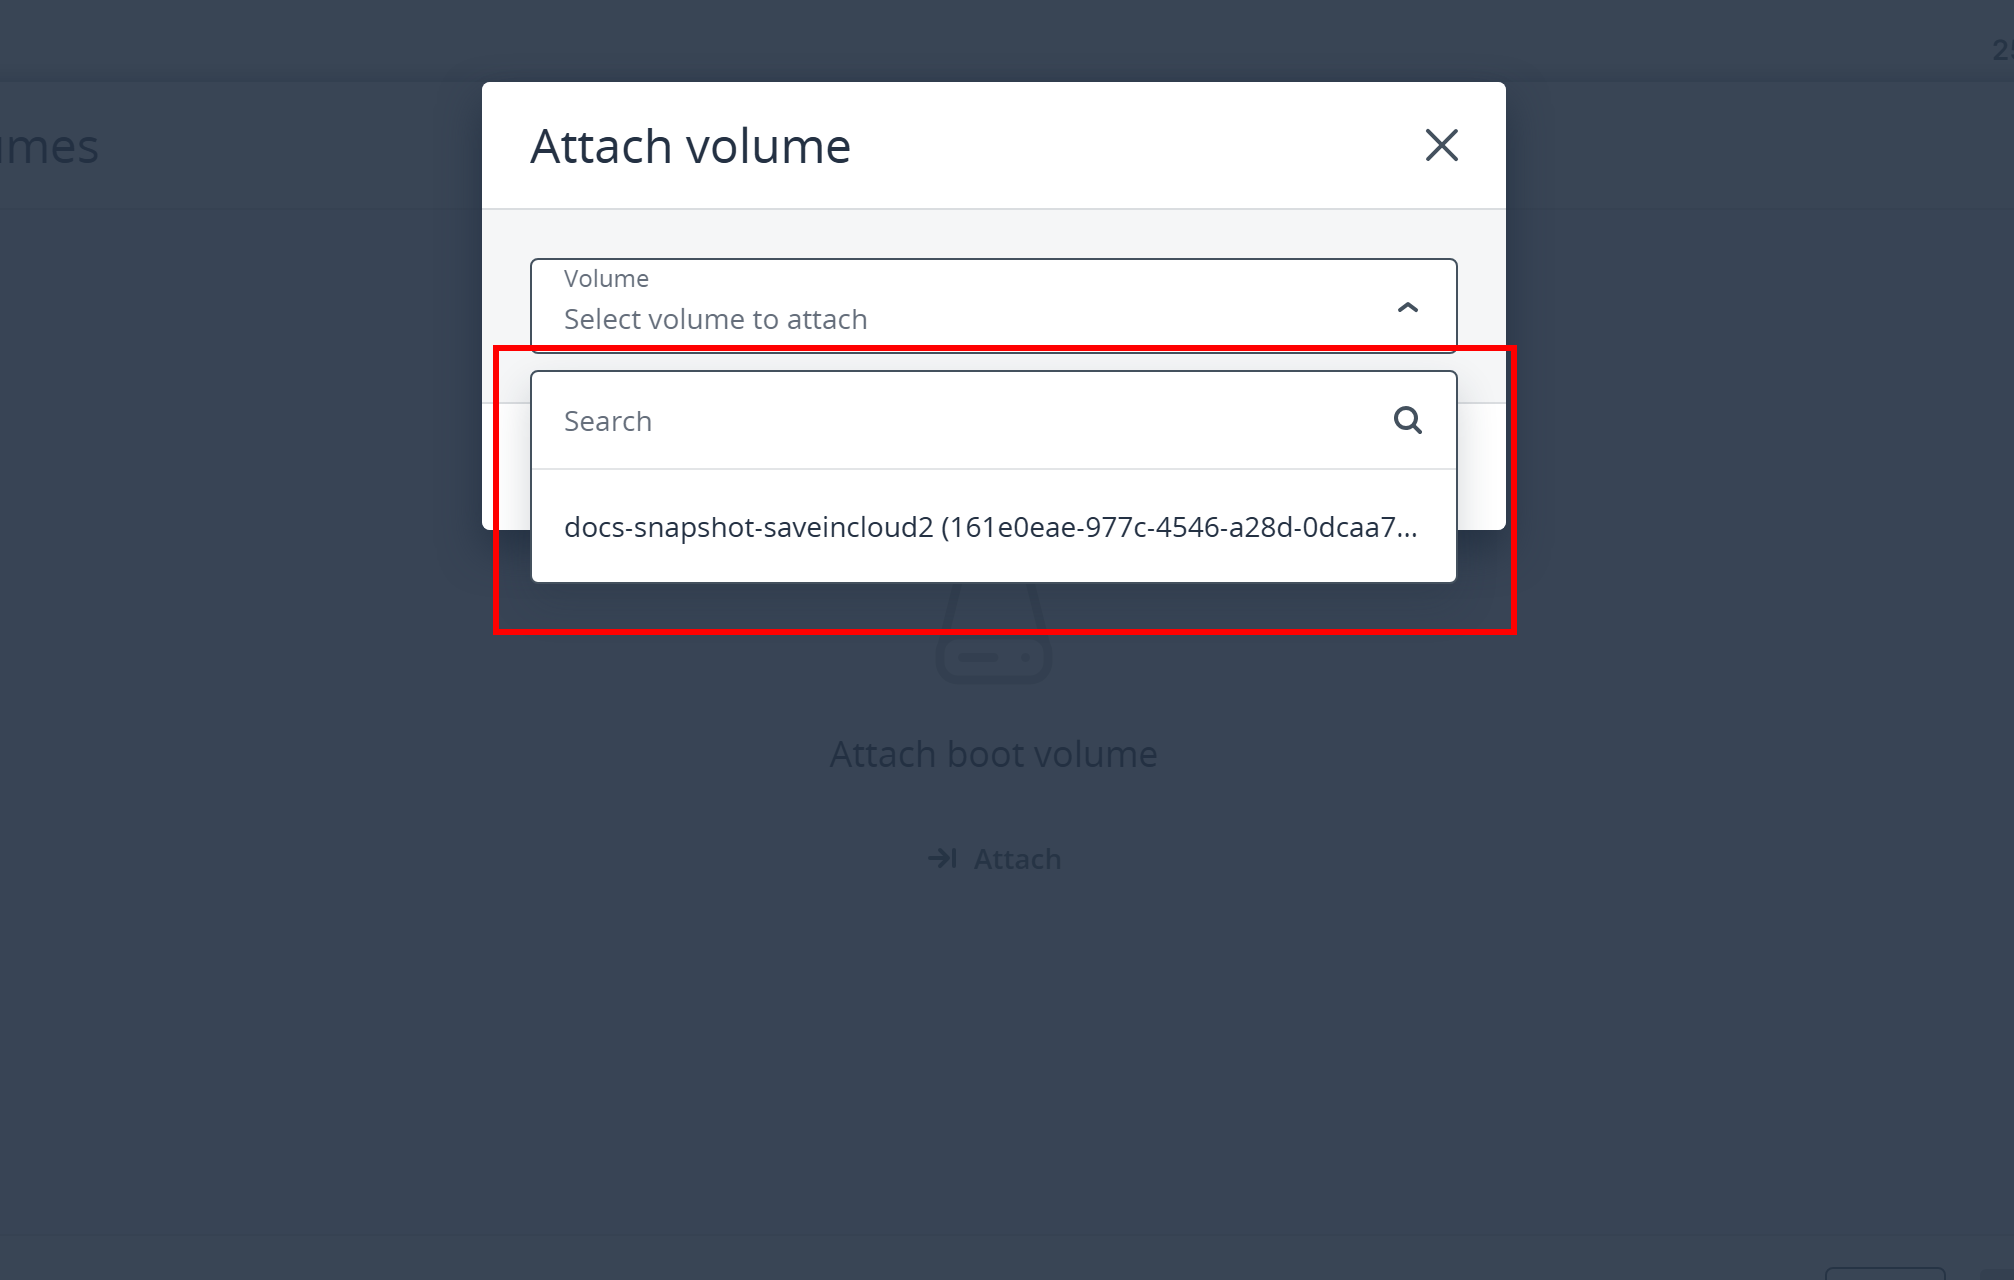
3. Choose the created volume
Select the volume that was created from the snapshot.
The new virtual machine will be created using the existing content in that volume.
Best Practices
- Create snapshots before important system updates
- Use snapshots for testing and quick rollback
- Remove old snapshots that are no longer needed
- Use complementary backups for long-term protection
Snapshots are excellent for quick recovery and testing, but do not replace a complete backup strategy.
Important Notice
When restoring a snapshot, all snapshots created after it will be automatically deleted.
Always verify that the selected snapshot exactly matches the point you want to restore before confirming the operation.