📦 Understand the difference between the Stopped and Shelved states
When shutting down a virtual machine on the Nuvion platform, you can choose between two distinct states: Stopped and Shelved. Although the VM stops running in both cases, the behavior of the computing resources, the billing impact, and the time required to bring it back into operation are different.
This document explains each of these states so you can choose the most suitable option according to your usage needs and how long the machine will remain powered off.
⏸️ Stopped VM
A VM in the Stopped state is powered off but remains bound to the compute node/host where it was provisioned. This means that vCPU and RAM resources stay reserved for it on the host, even while they are not being used.
Since these resources remain allocated and unavailable to other workloads, a stopped VM continues to be billed for vCPU and RAM.
✅ Advantages
- Almost immediate recovery — you simply power the VM on; the recovery time corresponds only to the operating system boot.
- Guaranteed resources — since the host already holds the reservation, there is no risk of capacity being unavailable when you power the machine back on.
- Stays on the same node — the VM resumes operation on exactly the same host it was already running on.
⚠️ Limitations
- vCPU and RAM billing continues, as the resources remain reserved on the compute node.
- No cost savings in long shutdown scenarios.
📦 Shelved VM
A VM in the Shelved state is unbound from the compute node/host, and the vCPU and RAM resources that were reserved are released back to the cluster.
Even while shelved, the VM remains bootable and retains its entire configuration, including the IP addresses associated with it.
Since the computing resources are no longer reserved, a shelved VM does not generate vCPU and RAM charges while it remains in this state.
✅ Advantages
- No vCPU and RAM charges for the entire period the VM remains shelved.
- Configuration preserved — the machine keeps its original settings.
- IP addresses retained — there is no need to reconfigure addressing when restoring the VM.
- Resources released back to the cluster, making them available to other workloads.
⚠️ Limitations
- Longer recovery time — when restoring the VM, the platform must allocate it again on a node with enough resources.
- No guarantee of immediate resources — the restoration depends on the cluster capacity available at the time of the operation.
- Not recommended for environments that require instant recovery.
The Shelved state releases exclusively the vCPU and RAM resources.
Other resources associated with the virtual machine — such as disks/volumes, floating IPs, and snapshots — remain allocated and continue to be billed normally in both states, since they are precisely what preserves your data and the VM configuration.
📊 Comparison between the states
| Characteristic | ⏸️ Stopped | 📦 Shelved |
|---|---|---|
| Binding to the node/host | Maintained | Removed |
| vCPU and RAM reserved | Yes | No |
| vCPU and RAM billing | Yes | No |
| Disk / volume | Preserved and billed | Preserved and billed |
| IP addresses | Retained | Retained |
| VM configuration | Preserved | Preserved |
| Guaranteed resources on power on | Yes — the host keeps the reservation | Subject to cluster availability |
🎯 When to use each state
⏸️ Use Stopped when:
- The shutdown will be short — a few hours or up to a day.
- A quick maintenance or a service restart is required.
- The VM needs to resume operation immediately, with no waiting time.
- The workload is critical and the guaranteed resources justify keeping the cost.
📦 Use Shelved when:
- The shutdown will be long — days, weeks, or months.
- These are development or staging environments used only during specific periods.
- The project is paused, but the VM must be preserved for future use.
- The goal is to reduce costs.
The longer the expected shutdown period, the more advantageous the Shelved state becomes. For short shutdowns, where fast recovery is the priority, the Stopped state remains the best choice.
🛠️ How to shelve a virtual machine
Prerequisite: have a virtual machine created, as described in How to create a VM on Nuvion.
Shelving can be performed from two different panels, following the same operation flow. Choose the one you use on a daily basis.
🖥️ CMP panel
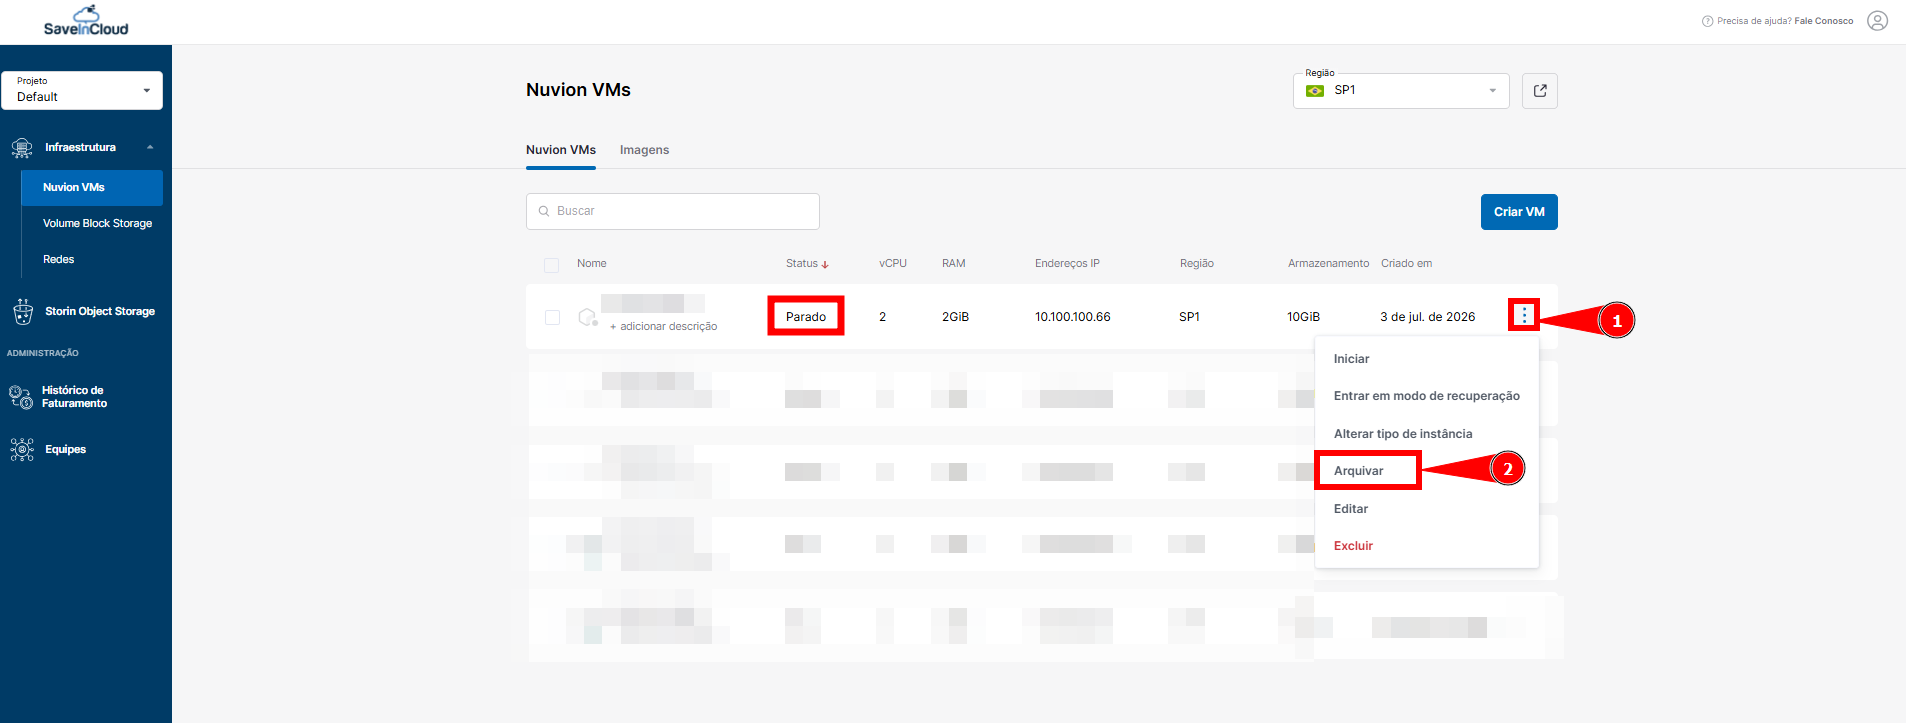
Option 1 — If the VM is stopped:
Click Shelve.
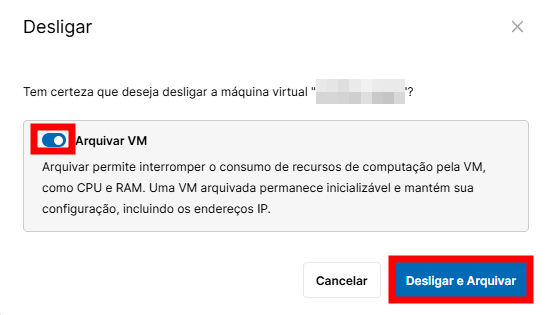
Option 2 — If the VM is running:
Click Shut down or Power off, and then select Shelve VM.
⚙️ Advanced panel
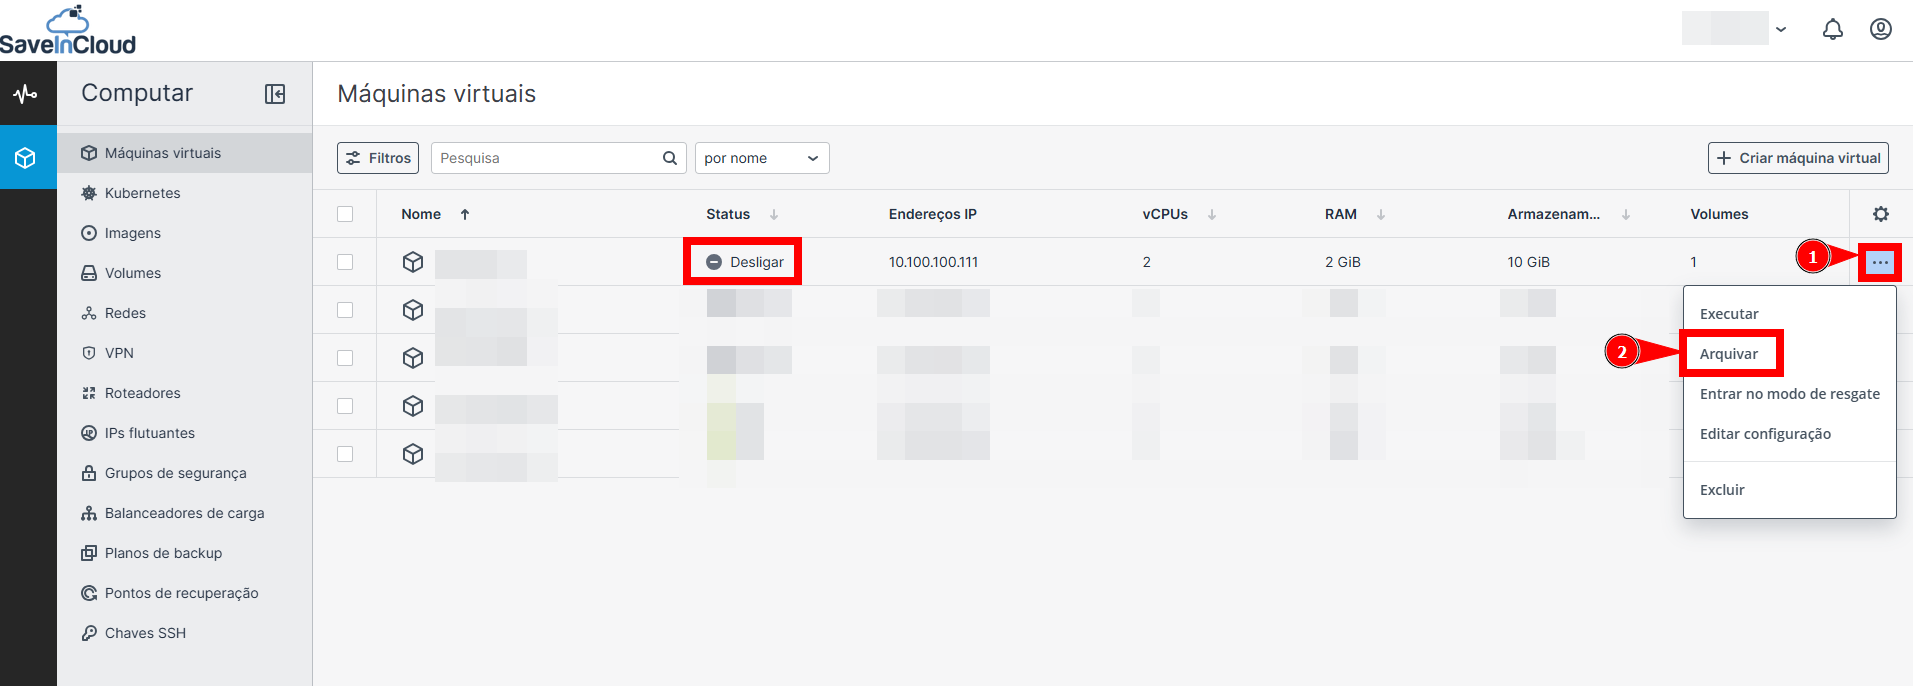
Option 1 — If the VM is stopped:
On the right pane, click Shelve.
Option 2 — If the VM is running:
Click Shut down and, in the confirmation window, select Shelve virtual machine.
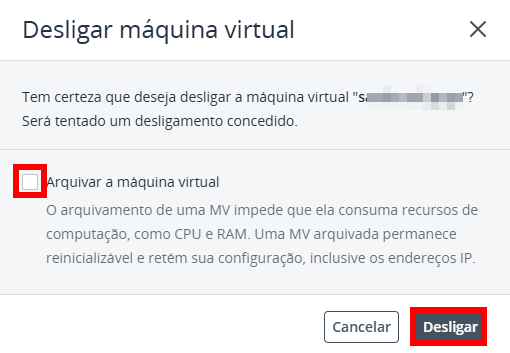
Only powered-off VMs can be shelved. Therefore, when shelving a running machine, the platform shuts it down before completing the operation.
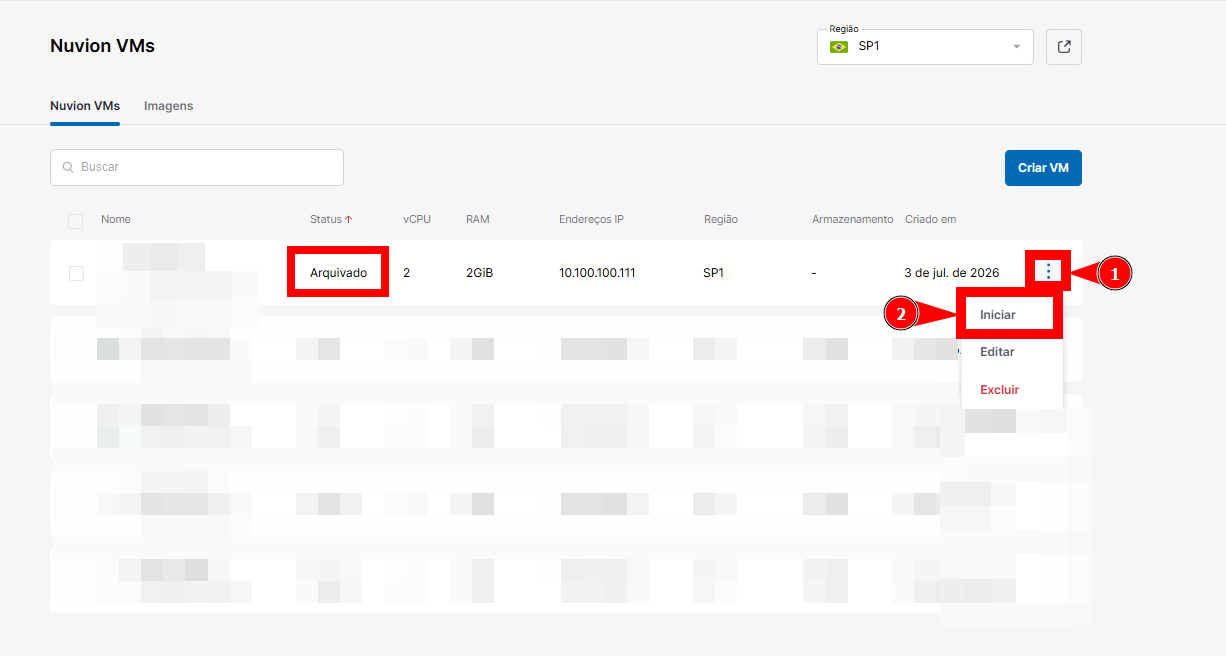
▶️ How to start a shelved virtual machine
Just like shelving, starting the VM can be done from both panels, following the same steps.
🖥️ CMP panel
On the right pane, click Start.
⚙️ Advanced panel
On the right pane, click Unshelve.
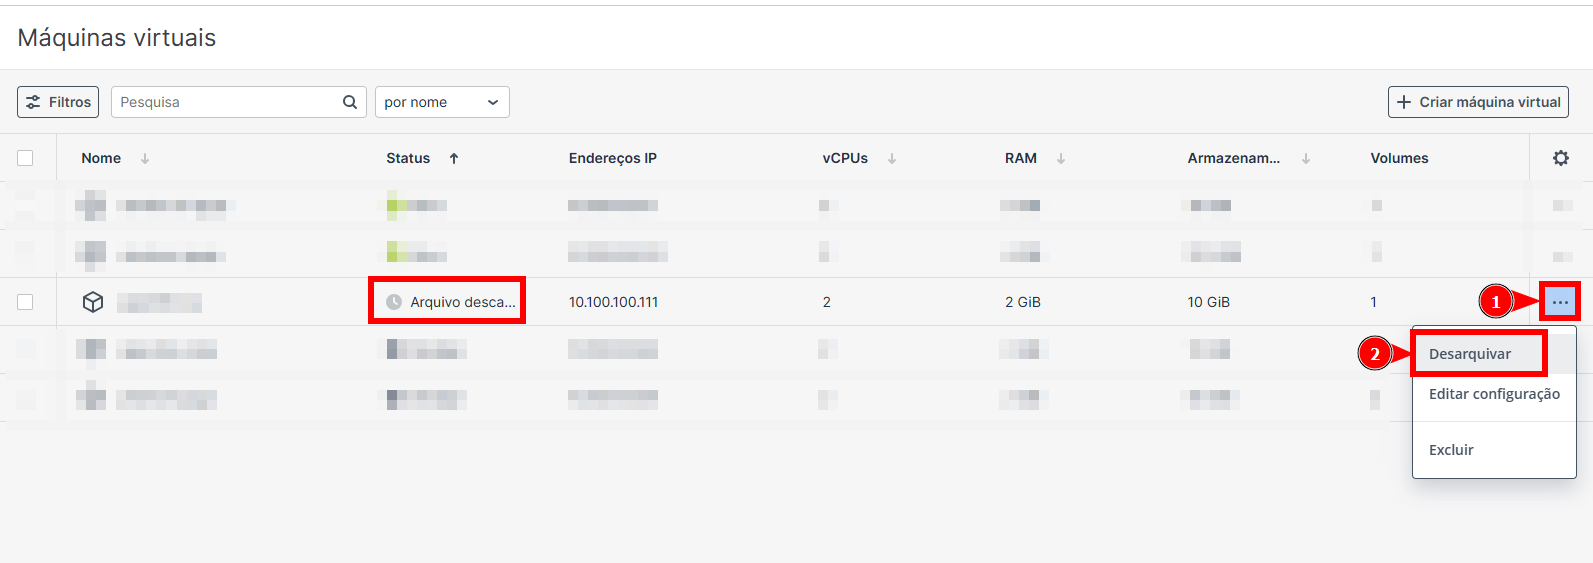
The platform will spawn the virtual machine on a node with enough resources to host it. The entire configuration and the IP addresses are kept exactly as they were before shelving.
🧠 Questions?
Contact our technical support and send us your question — we will be glad to help you!