Step-by-Step Guide: Creating Security Groups in Nuvion
Security Groups allow you to group firewall rules and apply them to multiple machines at the same time, making security management easier.
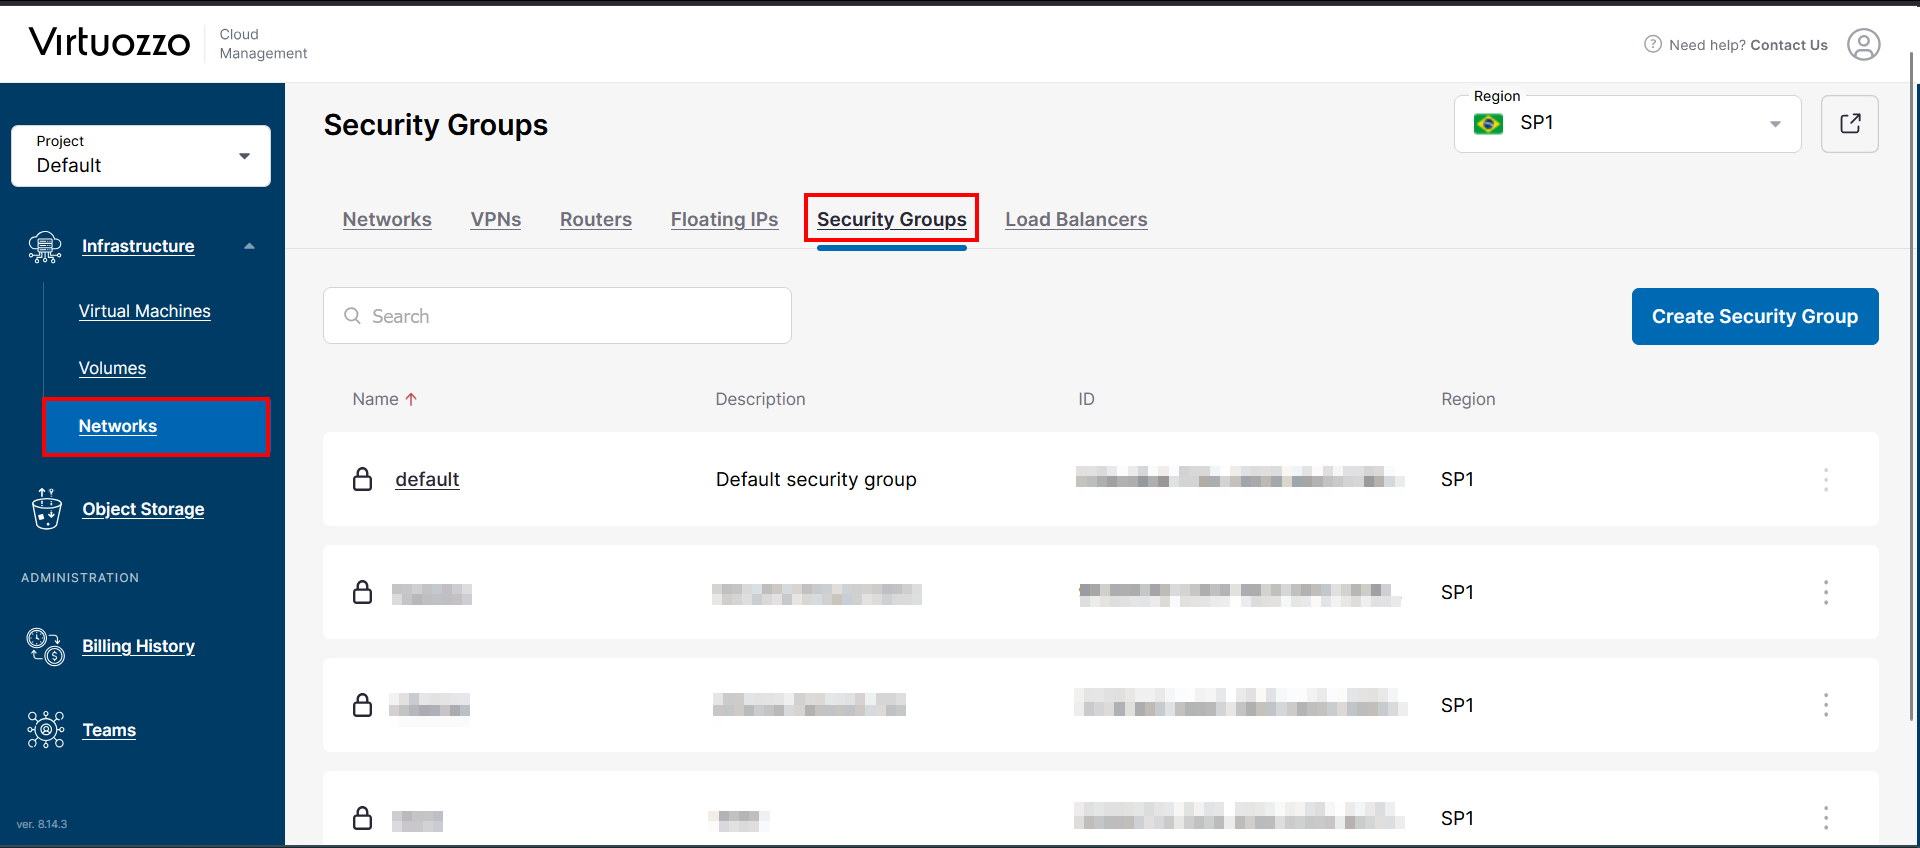
1. Accessing the Network Area
In the sidebar menu of your Self-Service panel:
- Navigate to the Network tab.
- Click on the Security Groups subsection.
2. Creating a New Group
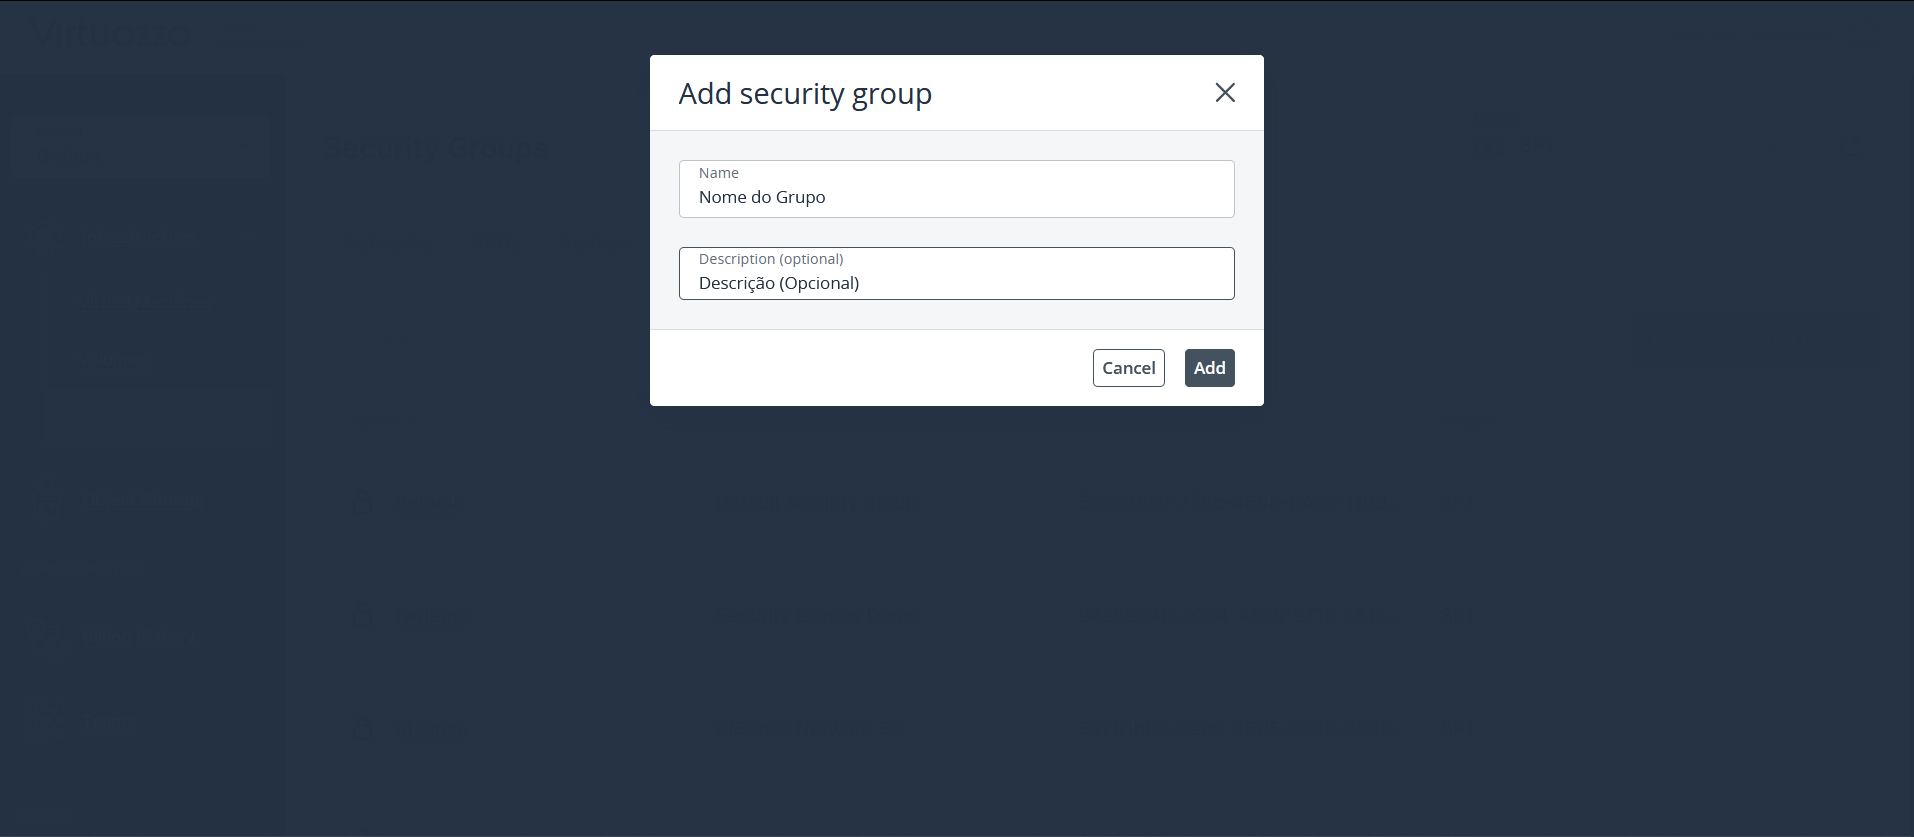
- Click the Create Security Group button in the upper right corner.
- Give it a descriptive name (e.g.,
web-server-prod). - Add a description for internal control.
- Confirm by clicking Add.
3. Managing Rules (Inbound/Outbound)
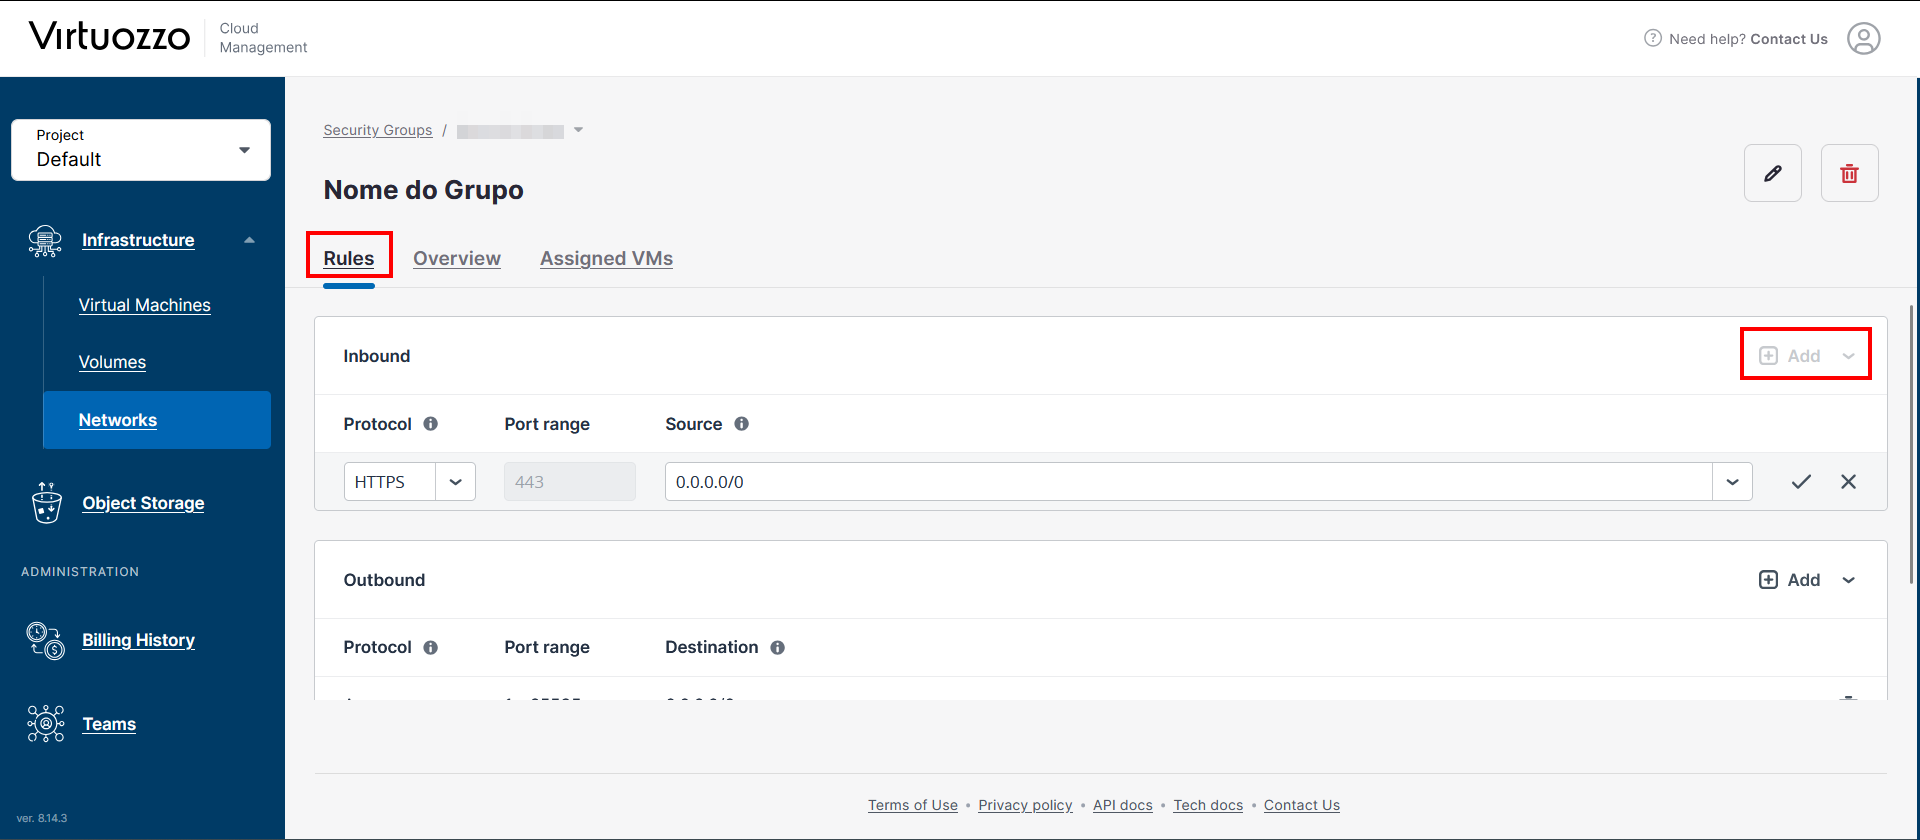
With the group created, you need to define what comes in and what goes out:
- Click on the Created Group.
- Click Rules in the menu above to open the rules panel.
- Protocol: Choose a template (HTTP, SSH, Custom TCP).
- Range: Set the desired port.
- Source: Choose the source to which the rule will apply. Select 0.0.0.0/0 to make access to the "Range" public.
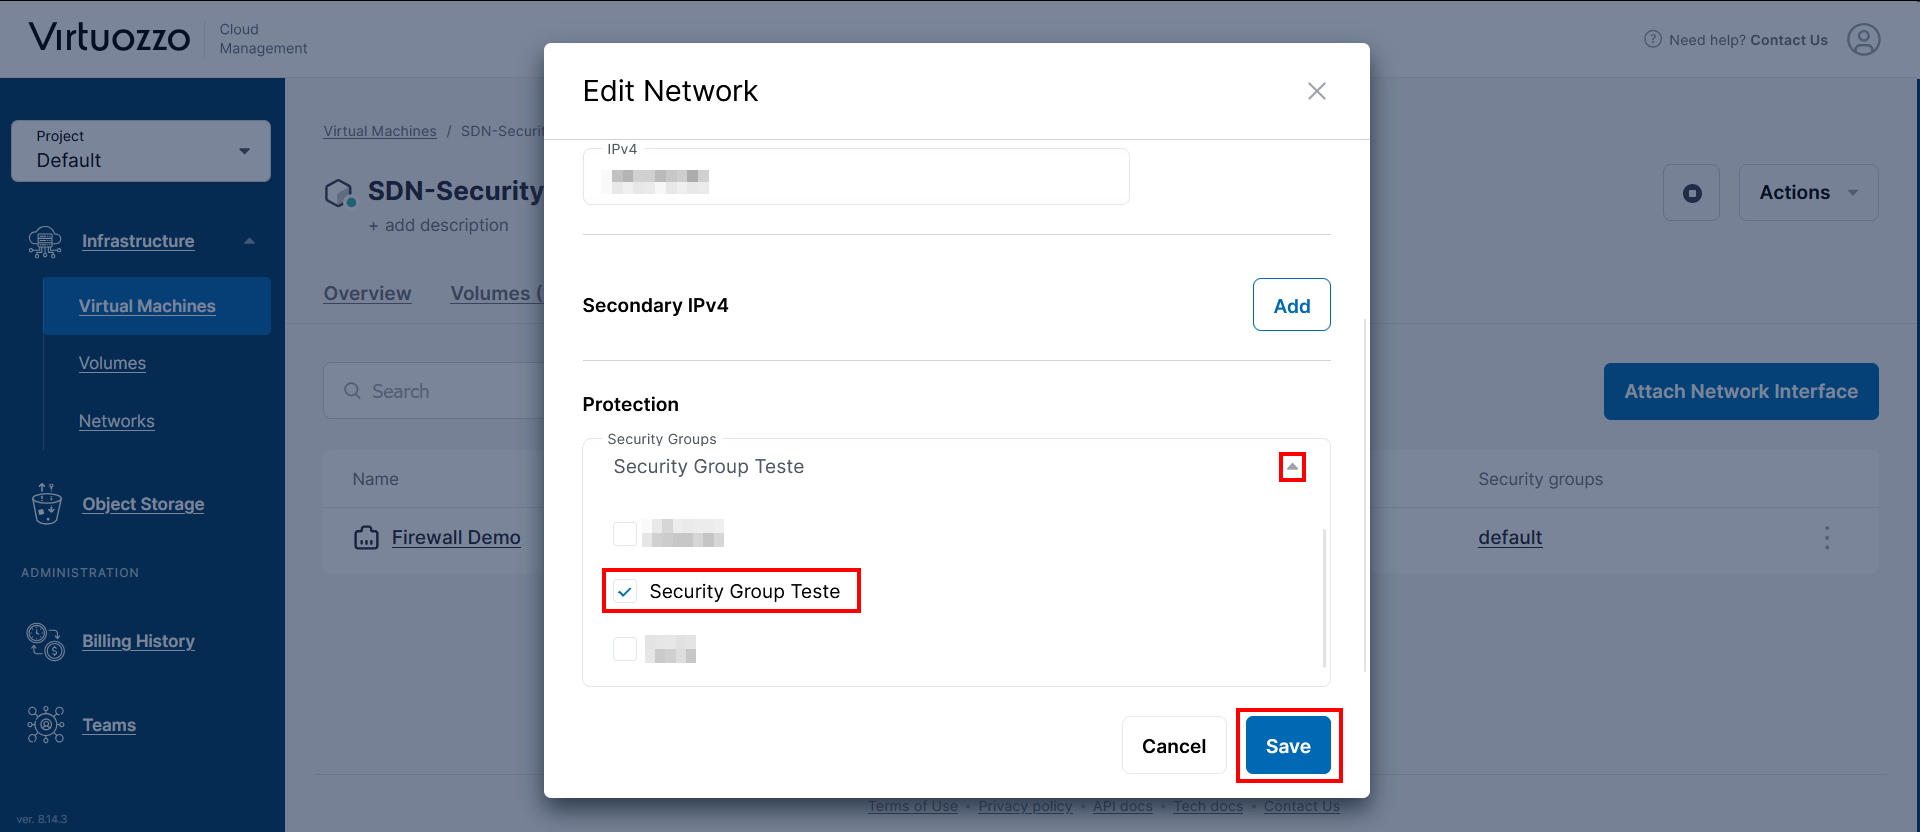
4. Associating with your VM
For the rules to work, the group must be linked to the VM's interface:
- Go to Infrastructure > Virtual Machines.
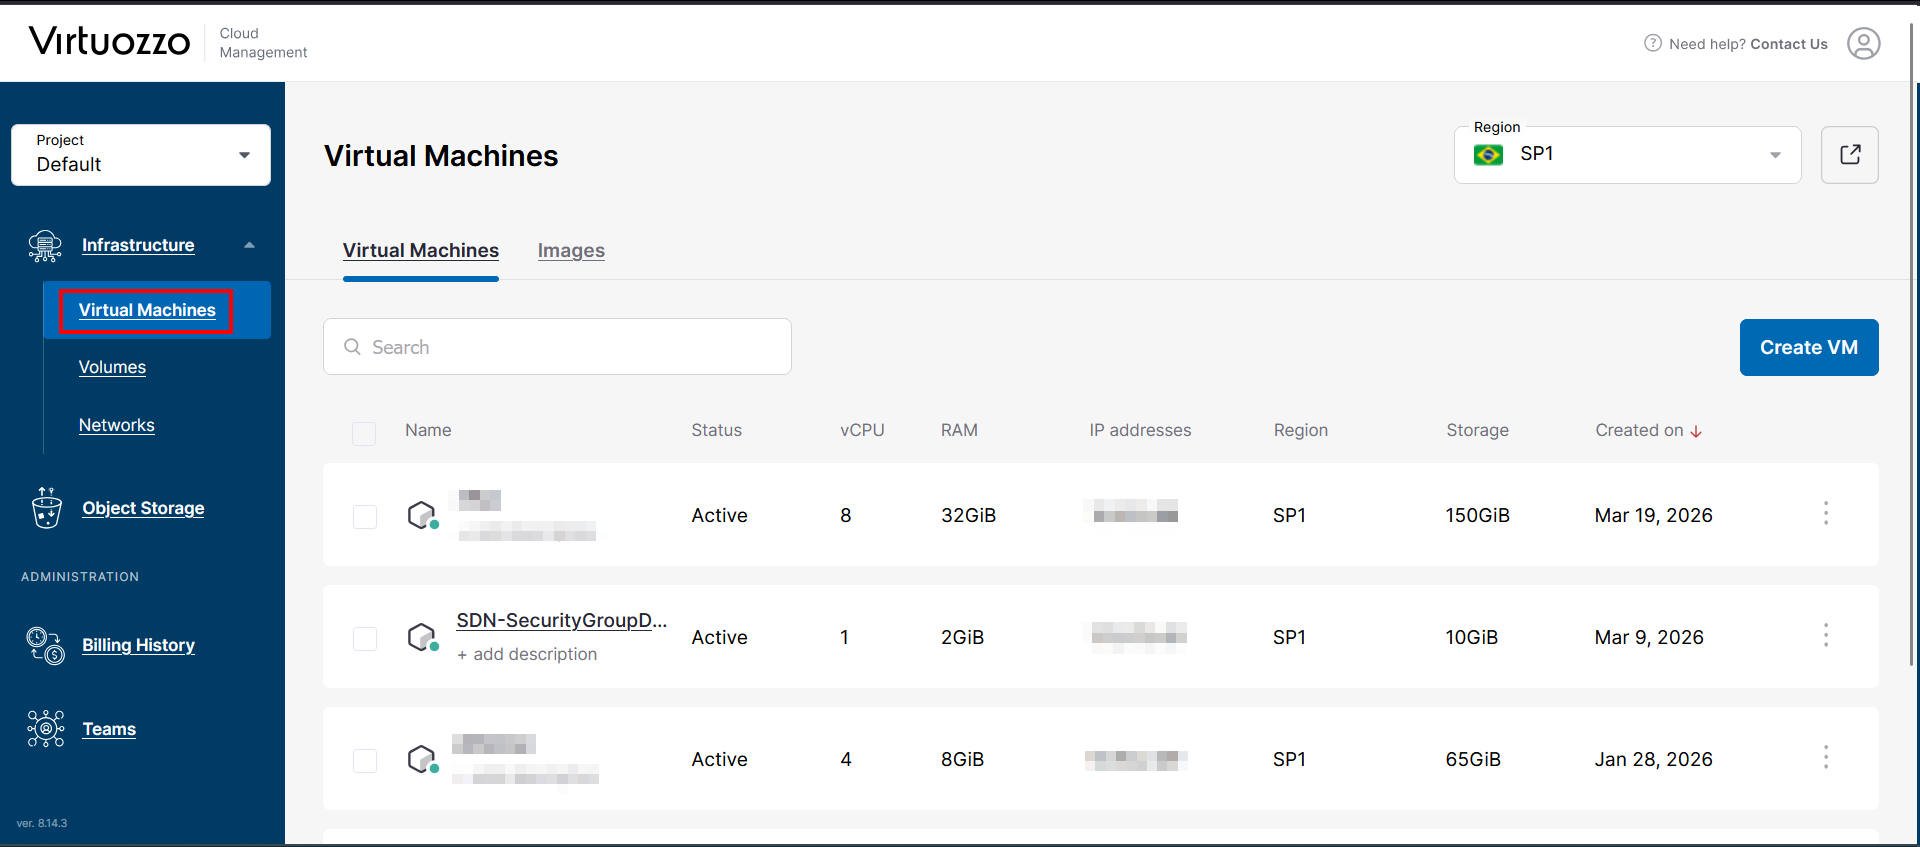
- Select the desired VM and go to the Network Interfaces tab.
- Select Edit on the desired interface.
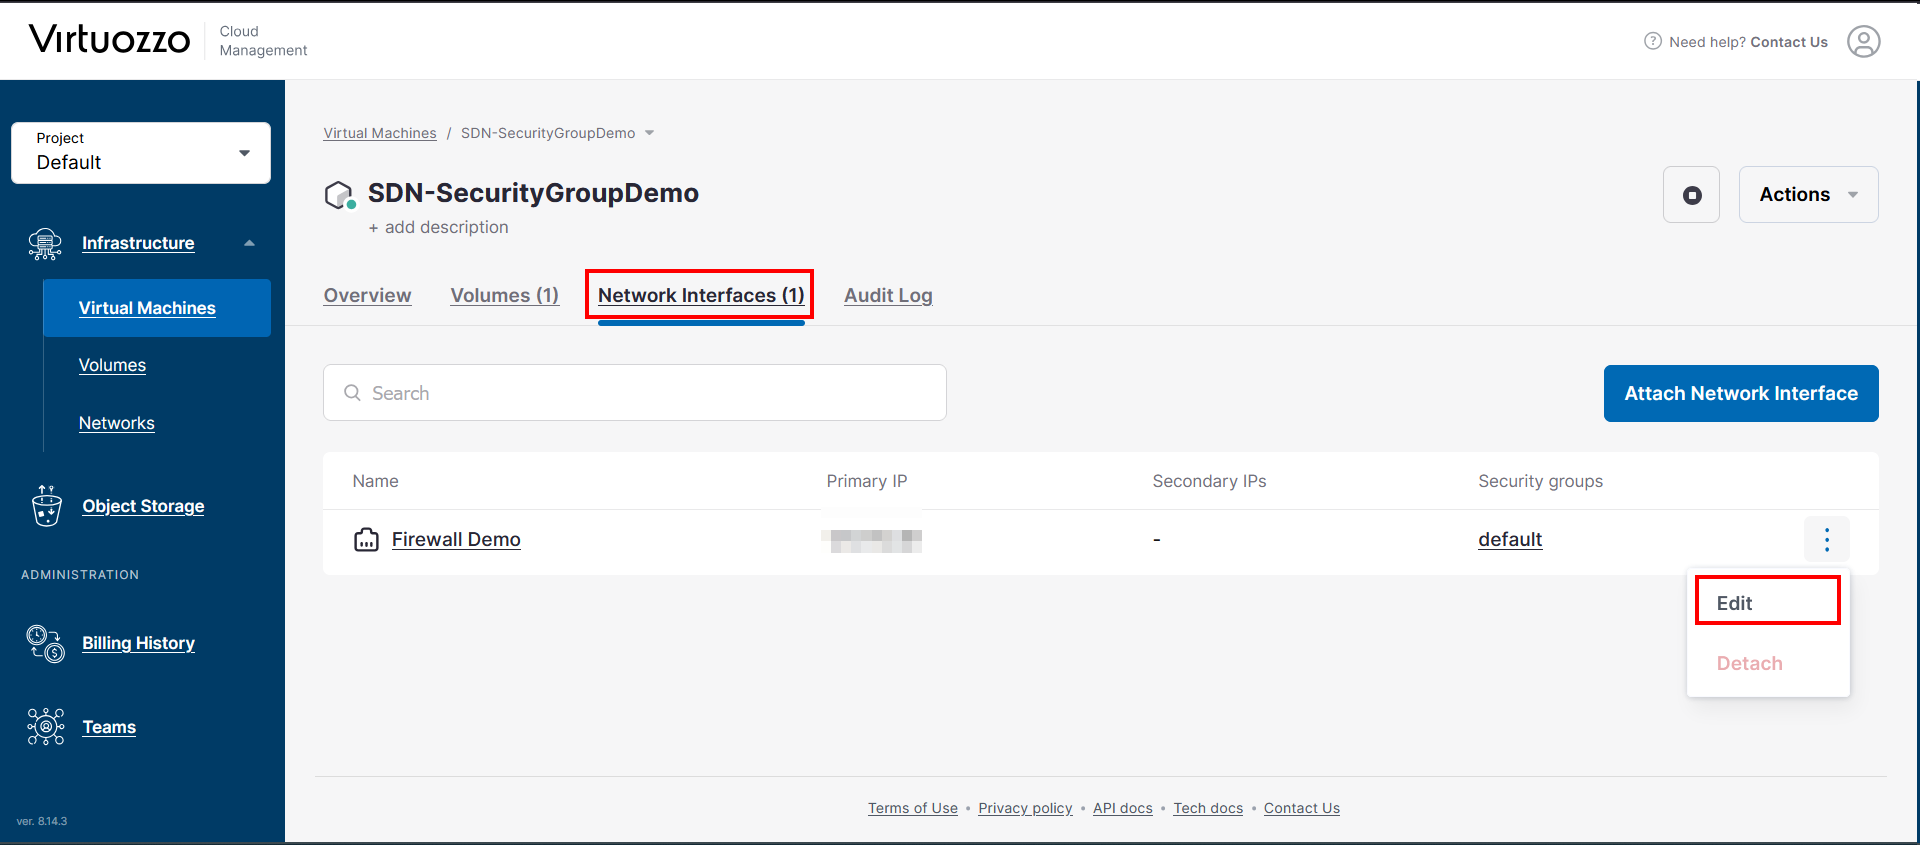
- Click Edit Security Groups and move the created group to the "Selected" column.