Creating and Managing Buckets in Storin
About Storin
Storin is Saveincloud's Object Storage solution,
compatible with the S3 API.
It allows storing and retrieving files (objects) in a scalable,
secure, and highly durable way, making it ideal for:
- Backups
- Static file storage
- Logs
- Application files
- Integration with S3-compatible tools
Storin uses the concept of buckets, which act as
containers where files (objects) are stored.
Quick Concepts
Before starting:
- Bucket → Logical container where files are stored\
- Object → File stored inside a bucket\
- Prefix → Logical "folder" structure inside the bucket\
- Endpoint → URL of the S3 service
- Access Key / Secret Key → Access credentials
Creating a Bucket
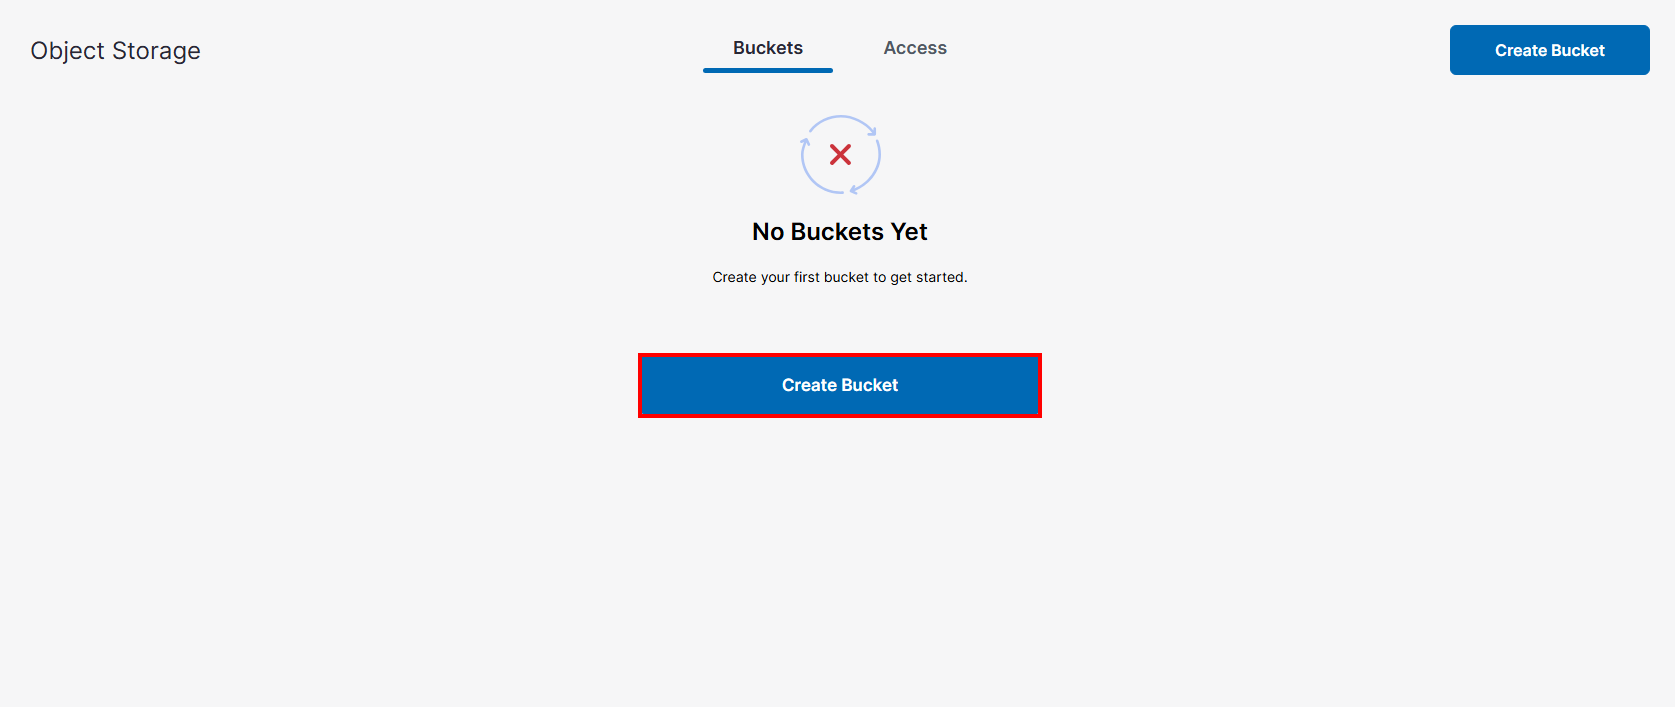
- Access the Storin panel.
-
Click on Create Bucket.
-
Select the Region and enter a name for the bucket.
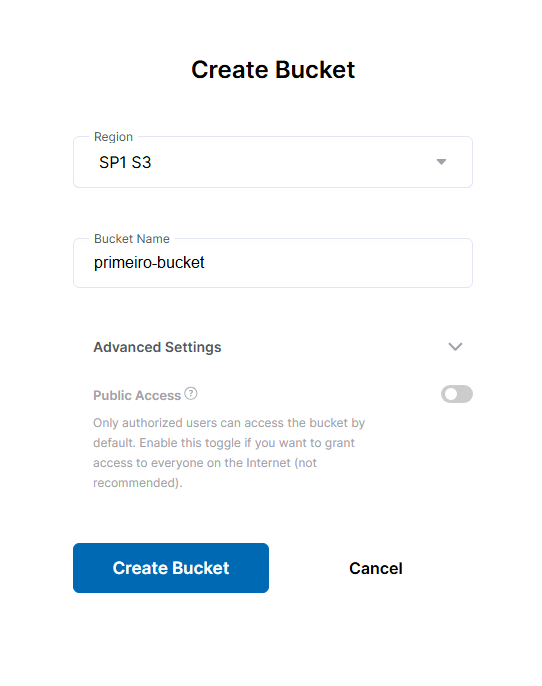
In Advanced Settings, there is the Public Access option.
When enabled, this option allows any user on the internet to access the bucket.
It is recommended to keep this option disabled, allowing access only through credentials and access policies.
- Click Create Bucket to finish the creation. It will open directly inside the created Bucket, which will be empty.
Recommended bucket naming rules
- Use only lowercase letters
- Numbers are allowed
- Hyphens are allowed (
-) - Do not use spaces
- Avoid special characters
Examples of valid names
backup-producaoarquivos-applogs-sistemaimagens-produto
Since Storin is compatible with S3, following these naming rules ensures compatibility with various tools.
Among them:
- AWS CLI
- S3cmd
- Rclone
These tools will be able to access and manage buckets normally using the S3 API.
Accessing a Bucket
On the home screen, all Buckets will be listed. Click on the bucket name to view its contents.
If it is a newly created bucket, it will be empty.
Uploading Files
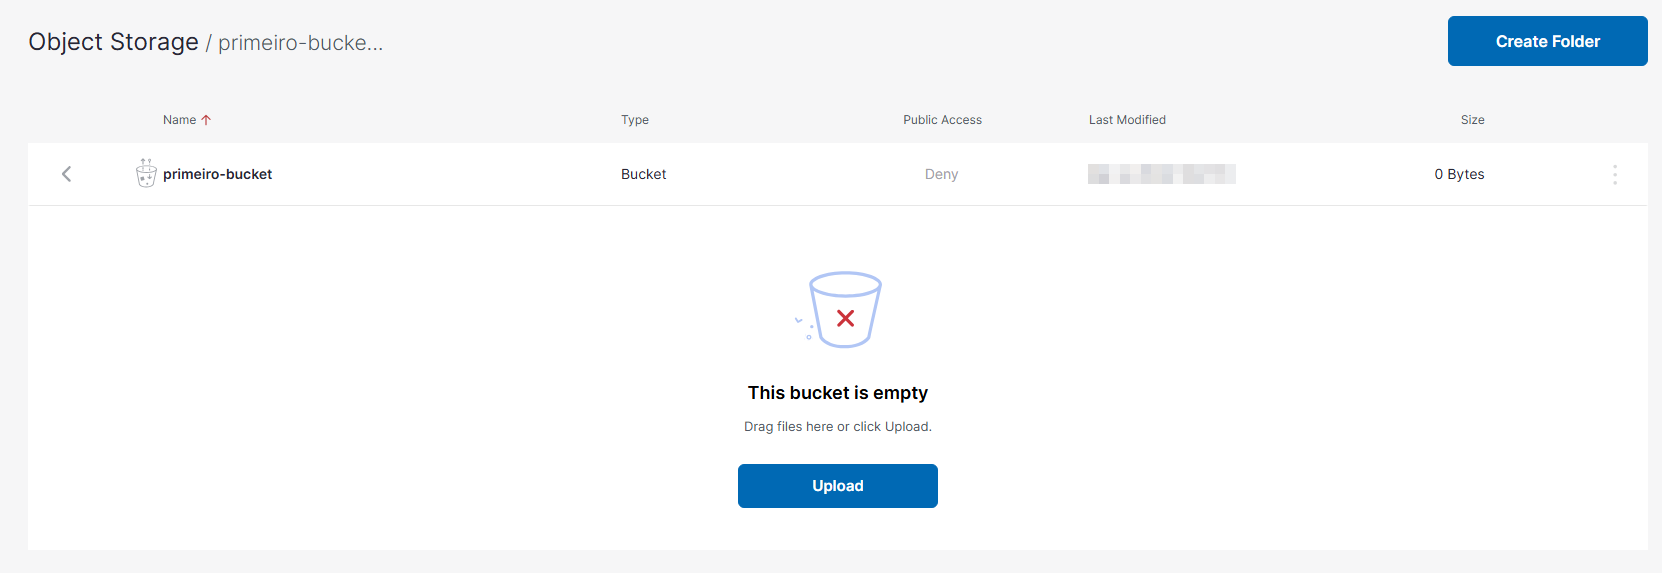
- Inside the bucket, click Upload (or Add Files).
- Select the desired file.
- Confirm the upload.
After uploading, the file will be listed as an object inside the bucket.
Creating "Folders" (Prefixes)
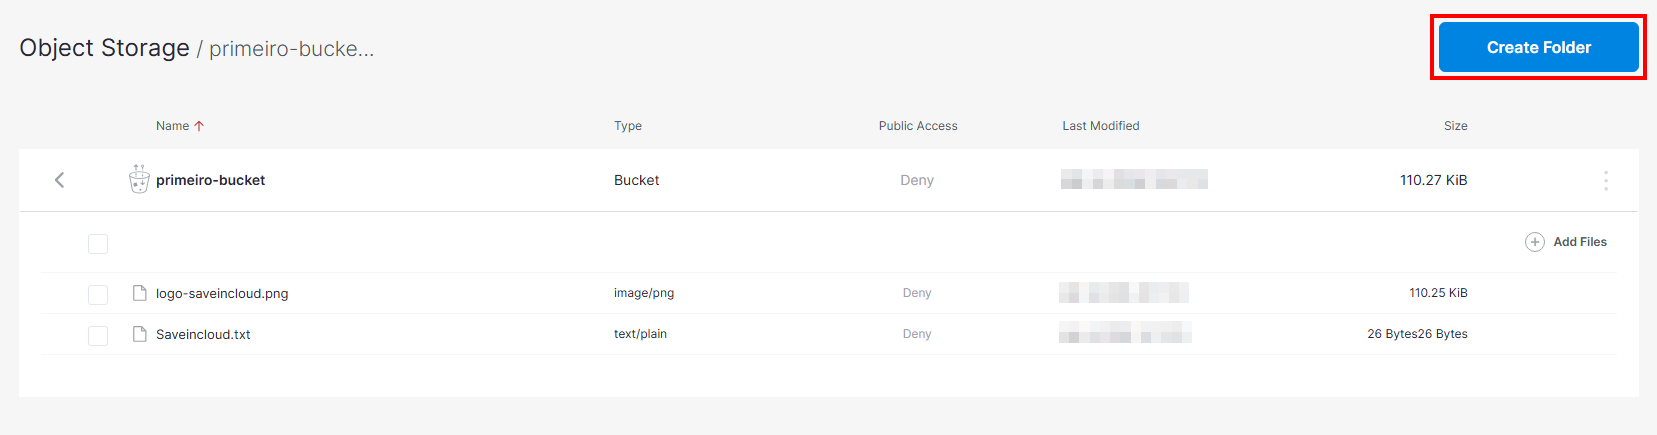
Object Storage does not have physical folders but uses prefixes
for organization.
To organize files, upload them with a structure like:
first-bucket/project1/logo.png clients/client1/document.pdf backups/2025-01-10/backup.sql
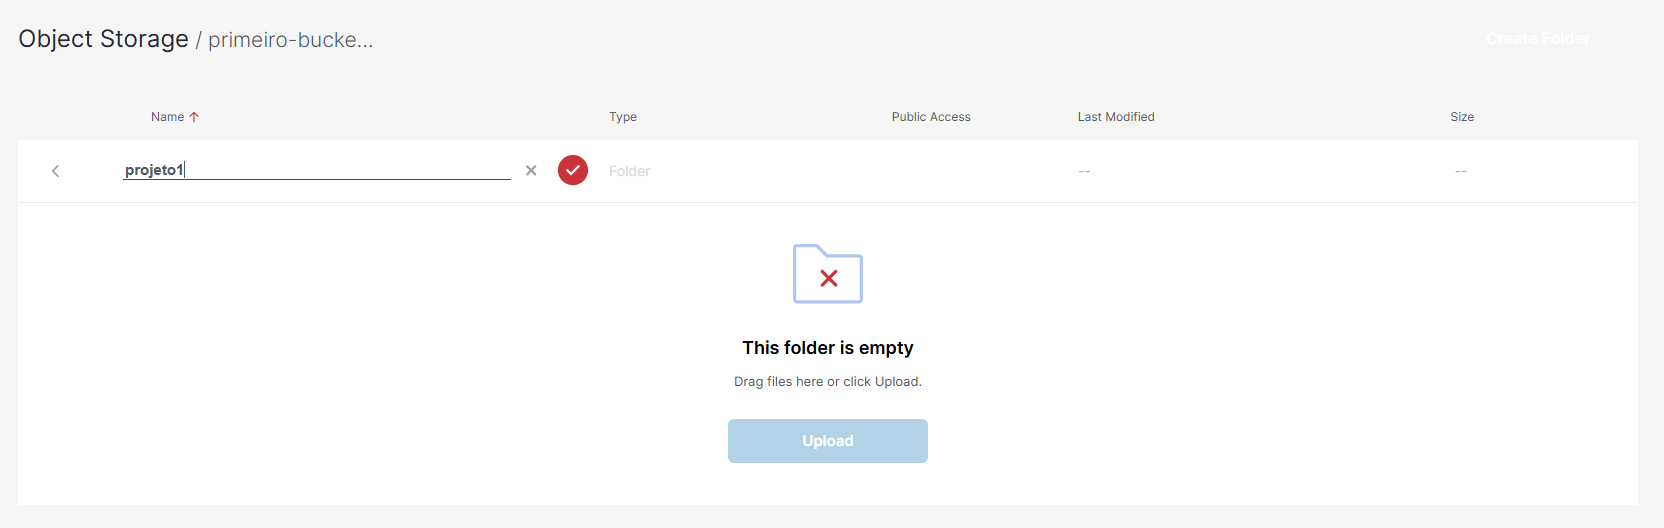
This will create a hierarchical view inside the bucket.
Downloading Files
- Select the desired object.
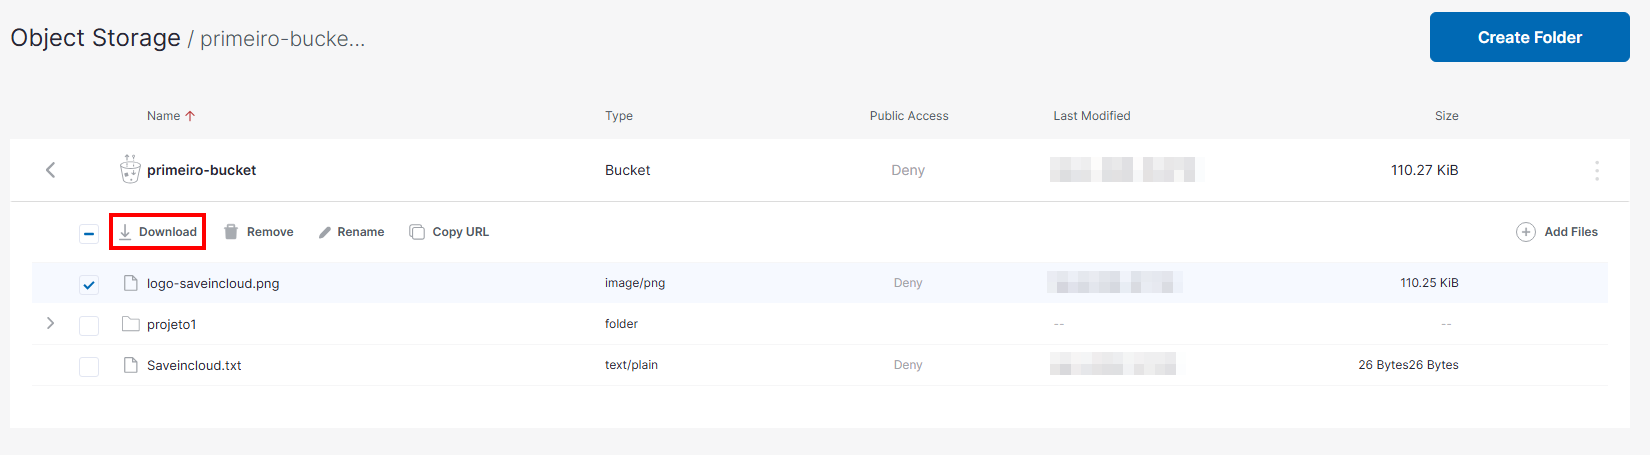
- Click Download.
The file will be downloaded to your local machine.
Removing Objects
To delete a file:
- Select the object (or hover over it).
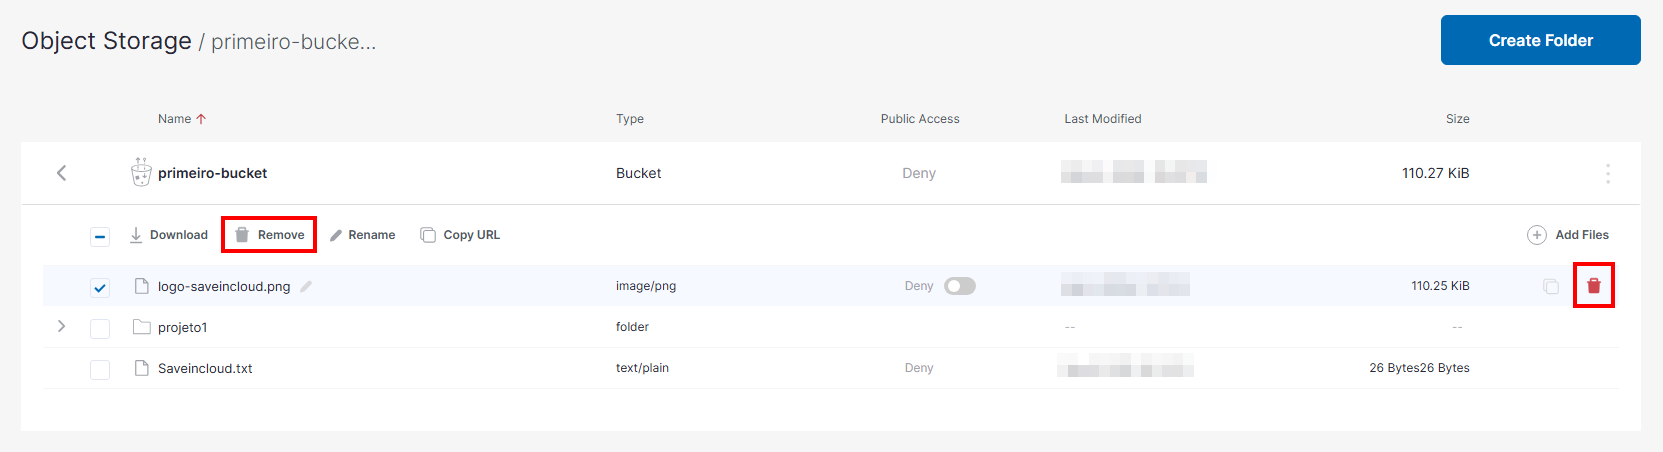
- Click Delete.
- Confirm the action.
⚠️ Attention: deletion is permanent unless versioning is enabled.
Deleting a Bucket
To remove a bucket:
- Make sure it is empty.
- Select the bucket, click the 3 dots, and select Remove.
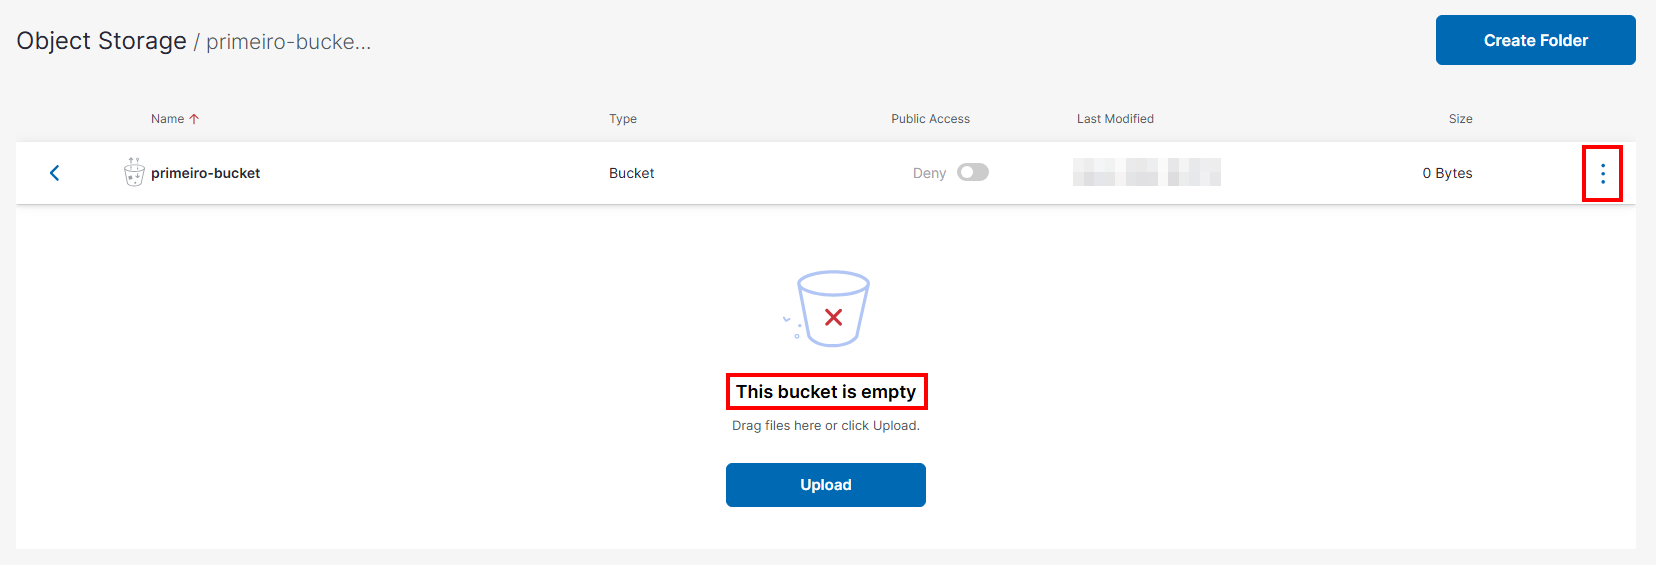
- To delete, it will ask you to type the name of the Bucket you want to delete to confirm.
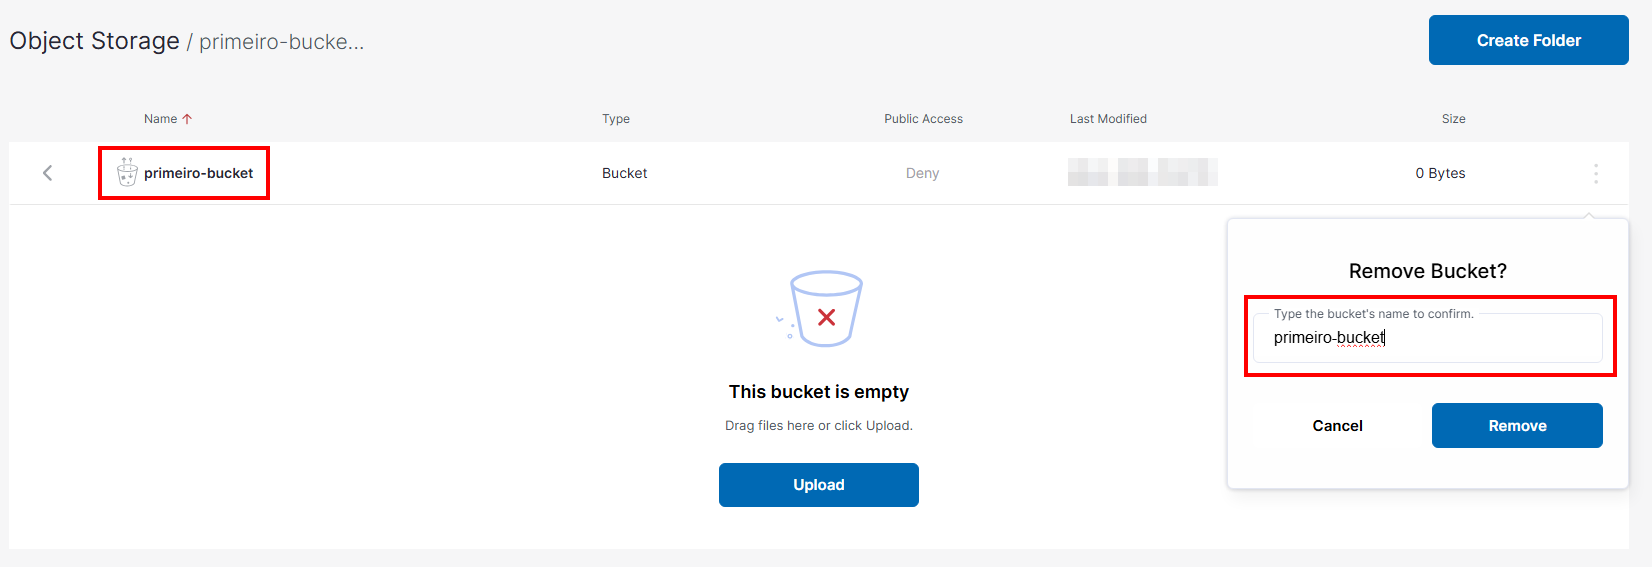
- After typing the exact Bucket name, click Remove again to delete.
- Confirm the operation.
A bucket can only be removed if it contains no objects or folders.
Best Practices
- Separate buckets by environment (e.g.,
app-prod,app-hml) - Use prefixes to organize by application or client
- Avoid using a single bucket for multiple systems without organization
- Use specific access policies for each application
📚 Documentation and Resources
🧠 Support
If you have questions or need help with configuration, contact Saveincloud support through the channels available on the platform.