Initial Load Balancer Configuration on Nuvion
To create a Load Balancer on Nuvion, just go to the left menu of the panel and click on the Load Balancer menu.
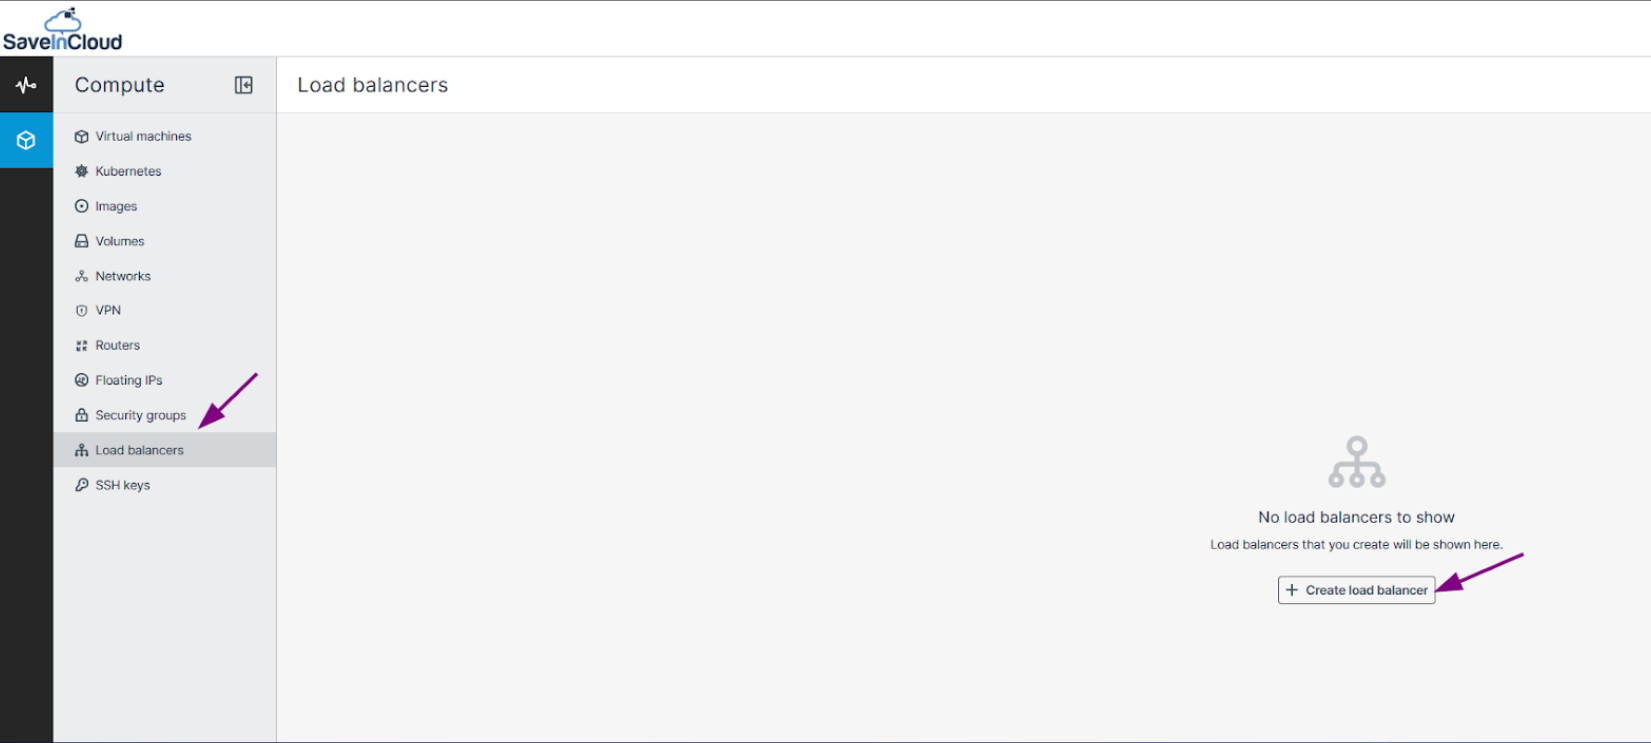
Configuring the Load Balancer
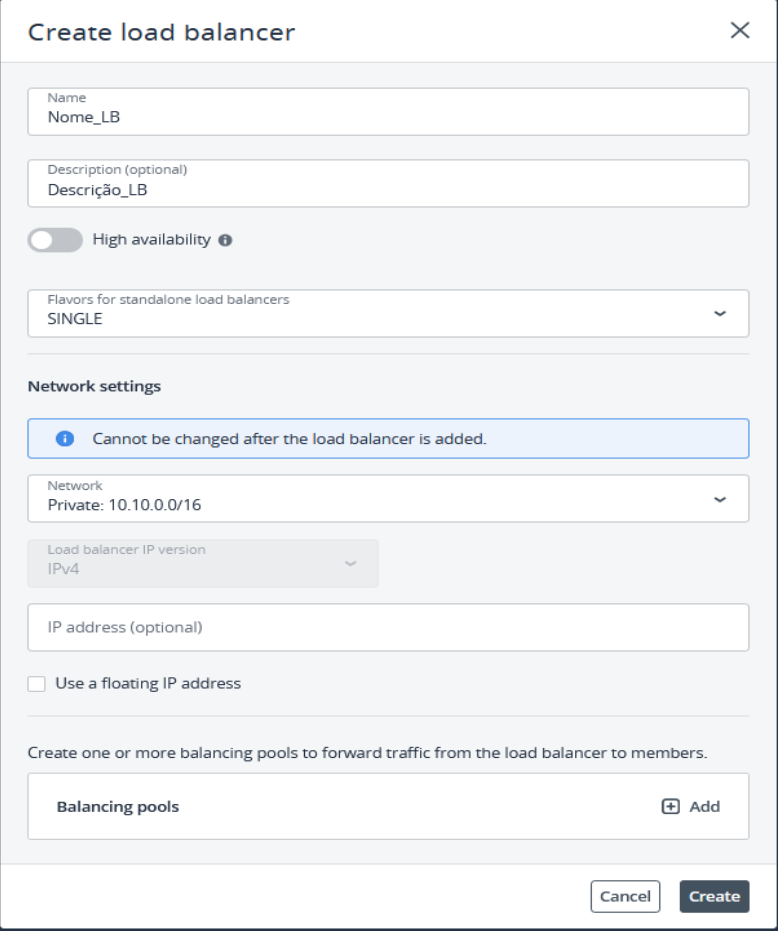
In the wizard that will open, you will need to configure the following options:
- Name - specify the name of your load balancer.
- Description - provide a brief description of the load balancer (optional).
- High Availability (HA) - enable this option to deploy two load balancers in active-passive mode, with the second acting as a standby instance that will take over if the primary load balancer fails.
- Flavor - as defined in HA if active (Active_Standby) if not active (Single).
- Network - choose the network where the load balancer will be deployed.
- IP Version - choose between IPv4 and IPv6.
- IP address - specify the IP address that will be assigned to the load balancer (optional).
- Use a floating IP address - enable the assignment of a floating IP address to the load balancer. If you do not have a floating IP already created, it will be created along with the load balancer.
Balancing pools
Add one or more balancing pools to forward incoming traffic from the load balancer to the pool members.
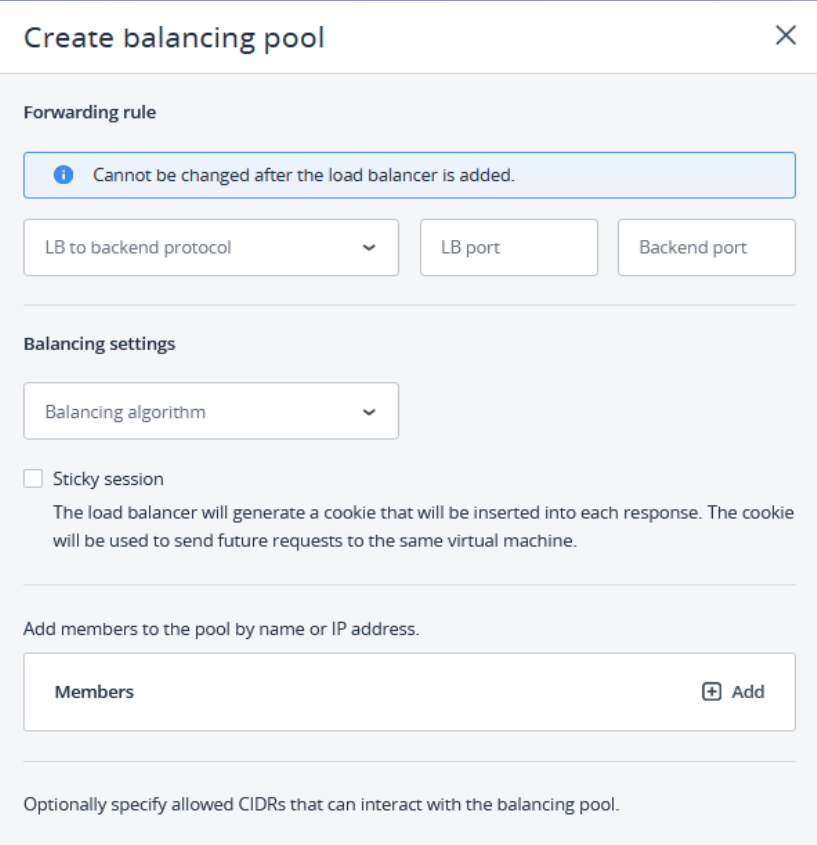
Forwarding rule:
Select the desired rule from the list and specify the ports for incoming and destination connections.
Available rules:
- HTTPS -> HTTPS
- HTTPS -> HTTP
- TCP -> TCP
- UDP -> UDP
Balancing Settings:
Select the balancing algorithm:
- Round Robin - Distributes requests sequentially among servers.
- Least Connections - Sends request to the server with the fewest active connections.
- Source IP - Uses the client IP to maintain session persistence.
Sticky sessions:
If checked, generates a cookie that will be inserted in each response. The cookie will be used to send future requests to the same environment.
Members:
Add members to this pool, can be adjusted after the load balancer creation.
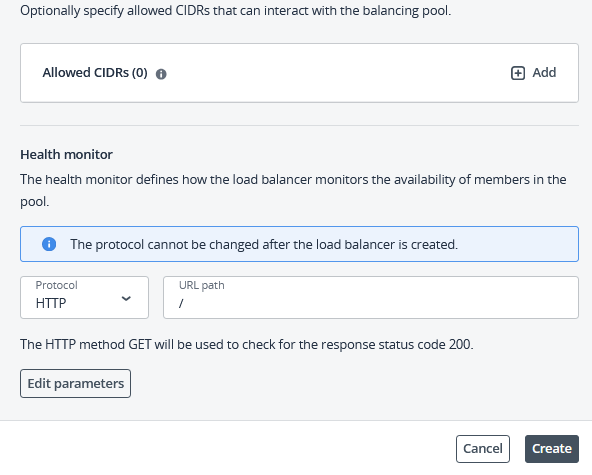
Allowed CIDRs:
Add IP ranges that can communicate with the balancing pool.
Health monitor:
Configures the monitoring protocol.
Available options:
- HTTP - checks availability (response code 200) of the specified URL.
- HTTPS - checks availability (response code 200) of the specified URL.
- TCP - checks TCP availability of the backend port.
- PING - checks availability of the members' IP addresses.
Health monitor parameters:
By default, the health monitor removes a member from a balancing pool if it fails three consecutive health checks at five-second intervals. When a member returns to operation and successfully responds to three consecutive health checks, it is re-added to the pool.
However, you can adjust these values to your needs as shown in the image below:
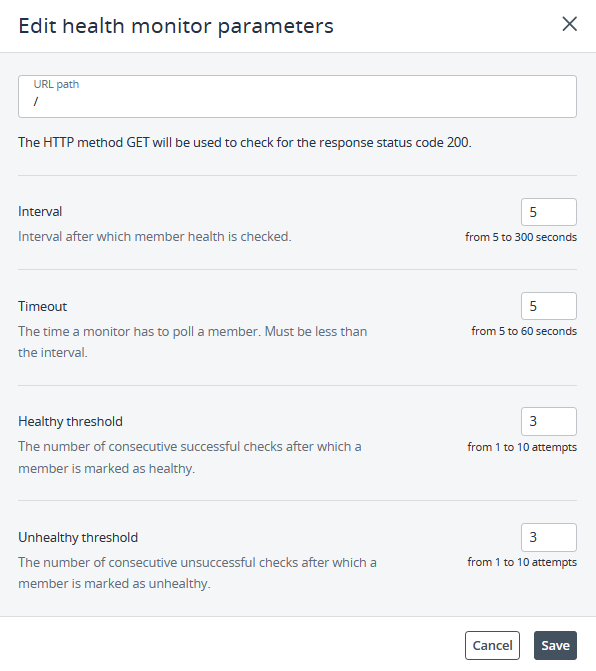
Parameters:
- URL path - specify the URL path to check the member's availability (for HTTP/HTTPS protocols).
- Interval - specify the time interval between health checks (from 5 to 300 seconds).
- Timeout - specify the waiting time for a response from the member (from 5 to 60 seconds, cannot be longer than the defined interval).
- Healthy threshold - specify the number of consecutive successful checks to consider the member healthy (from 1 to 10 attempts).
- Unhealthy threshold - specify the number of consecutive failed checks to consider the member unhealthy (from 1 to 10 attempts).