🕸️ Networking
This page explains how pods talk to each other and how to restrict who can talk to whom.
There are two network layers, and each is configured in a different place:
| Layer | What it controls | Where to configure |
|---|---|---|
| Outside the cluster | Inbound and outbound traffic (floating IPs, security groups, load balancers) | Nuvion Panel, under Compute |
| Inside the cluster | Communication between pods (DNS, Services, Network Policies) | kubectl |
In the cluster, every pod gets its own IP and can talk to any other pod, on any node. By default, nothing is blocked.
🚀 Before you start
- Have cluster access configured (see Cluster Access).
🚀 1. See the cluster network
- 🖥️ Nuvion Panel
- ⌨️ kubectl (CLI)
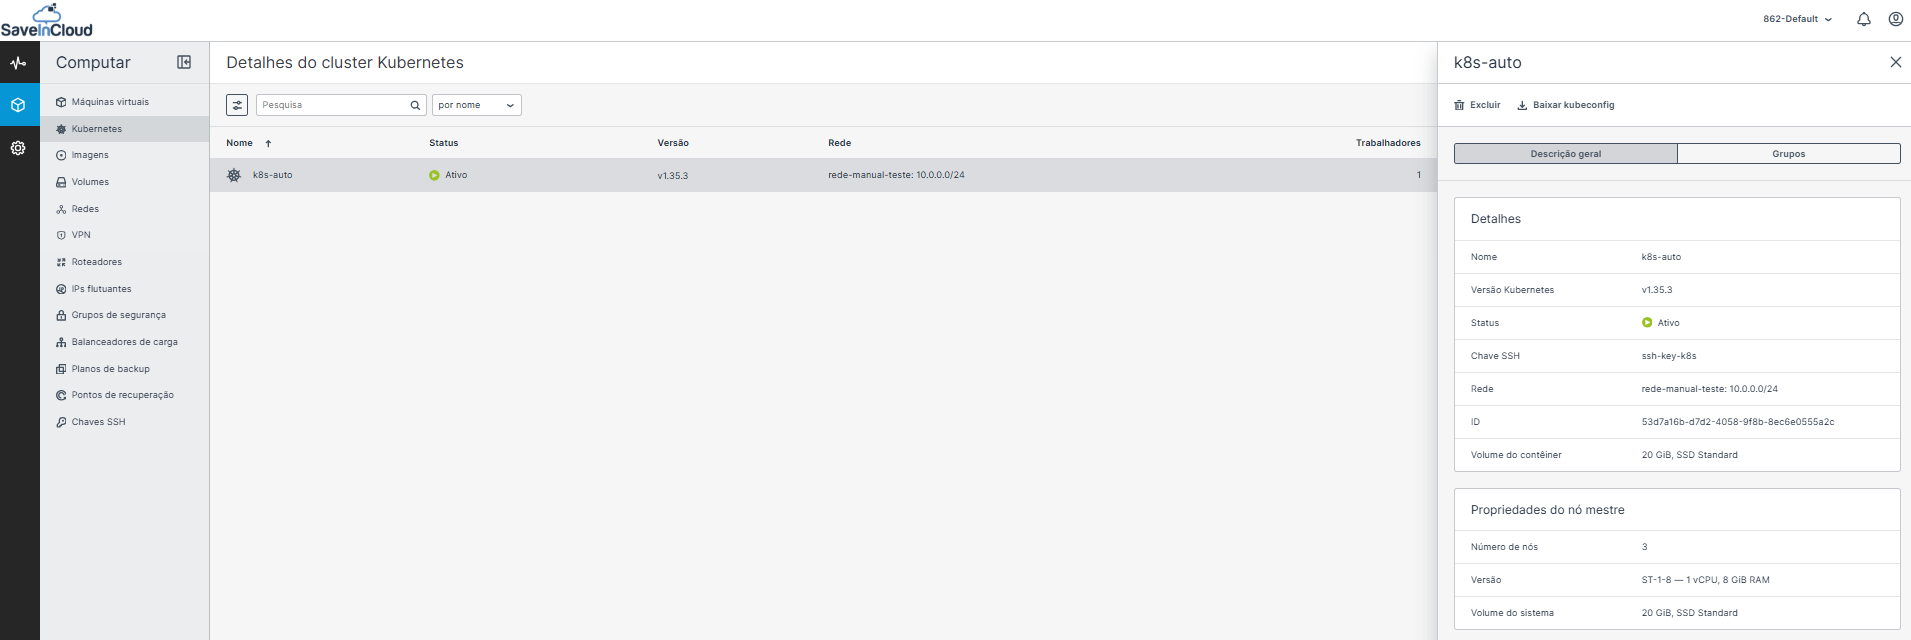
- Go to Compute > Kubernetes and click the cluster name.
- In the Overview tab, see the Network field. It shows the network and the IP range of the nodes (for example,
10.0.0.0/24).
kubectl get nodes -o wide
kubectl get pods -A -o wide
The INTERNAL-IP column shows each node's IP, and the IP column shows each pod's IP.
🚀 2. Create a test pod and Service
kubectl run web --image=nginx --port=80
kubectl expose pod web --name=web --port=80
kubectl get pod web -o wide
Wait for the pod to be Running. Note the IP it received.
🚀 3. Access from another pod by name (DNS)
The cluster has an internal DNS (CoreDNS): every Service gets a name.
kubectl run cliente --rm -it --image=curlimages/curl --restart=Never -- curl -sS http://web
The Welcome to nginx! page appears. The full name of the Service is
web.default.svc.cluster.local, in the format service.namespace.svc.cluster.local.
To talk to a Service in another namespace, use at least web.NAMESPACE.
🚀 4. Block access with a Network Policy
A Network Policy is a firewall rule inside the cluster. We will allow
the web pod to receive connections only from pods with the label acesso=permitido.
Create the file web-politica.yaml:
apiVersion: networking.k8s.io/v1
kind: NetworkPolicy
metadata:
  name: web-somente-autorizados
spec:
  podSelector:
    matchLabels:
      run: web
  policyTypes:
    - Ingress
  ingress:
    - from:
        - podSelector:
            matchLabels:
              acesso: permitido
kubectl apply -f web-politica.yaml
kubectl get networkpolicy
run: web is the label that the kubectl run web command adds to the pod automatically.
🚀 5. Test the policy
Without the label (should be blocked):
kubectl run cliente-bloqueado --rm -it --image=curlimages/curl --restart=Never -- curl -sS -m 5 http://web
Expected response: curl: (28) ... timed out
With the label (should work):
kubectl run cliente-ok --rm -it --labels=acesso=permitido --image=curlimages/curl --restart=Never -- curl -sS -m 5 http://web
Expected response: the Welcome to nginx! page.
🚀 6. Block everything by default (optional)
This policy blocks all inbound traffic to the pods in the namespace, and only lets through what is allowed by other policies:
apiVersion: networking.k8s.io/v1
kind: NetworkPolicy
metadata:
  name: negar-tudo
spec:
  podSelector: {}
  policyTypes:
    - Ingress
Be careful when using it in a namespace that receives traffic from an Ingress. After blocking everything, you need to create a policy allowing the Ingress Controller's source, or the site goes down.
✅ How to know it worked
In step 5, the pod without the label cannot access web, and the pod with the
label can.
❗ Common problems
| Symptom | Cause | Solution |
|---|---|---|
| The pod without the label can access | The cluster network plugin does not enforce Network Policy | Contact support to confirm policy support |
Could not resolve host | Internal DNS problem | Check kubectl get pods -n kube-system and see whether CoreDNS is Running |
Connection refused | The Service points to the wrong port | Check kubectl get svc web and the container port |
| Timeout with no policy created | Service without pods | Run kubectl get endpoints web |
| Access from outside the cluster fails | Port not opened in the security group | See step 5 of the Services page |
🧹 Cleanup
kubectl delete networkpolicy web-somente-autorizados negar-tudo
kubectl delete svc web
kubectl delete pod web
If you did not create the policy from step 6, the command above shows a
not found warning for negar-tudo. You can ignore it.
🧠 Questions?
Talk to our SaveinCloud technical support team!